Volakas White Marble Honed Tile 12″ × 24″
Refined Elegance Inspired by Greek Marble
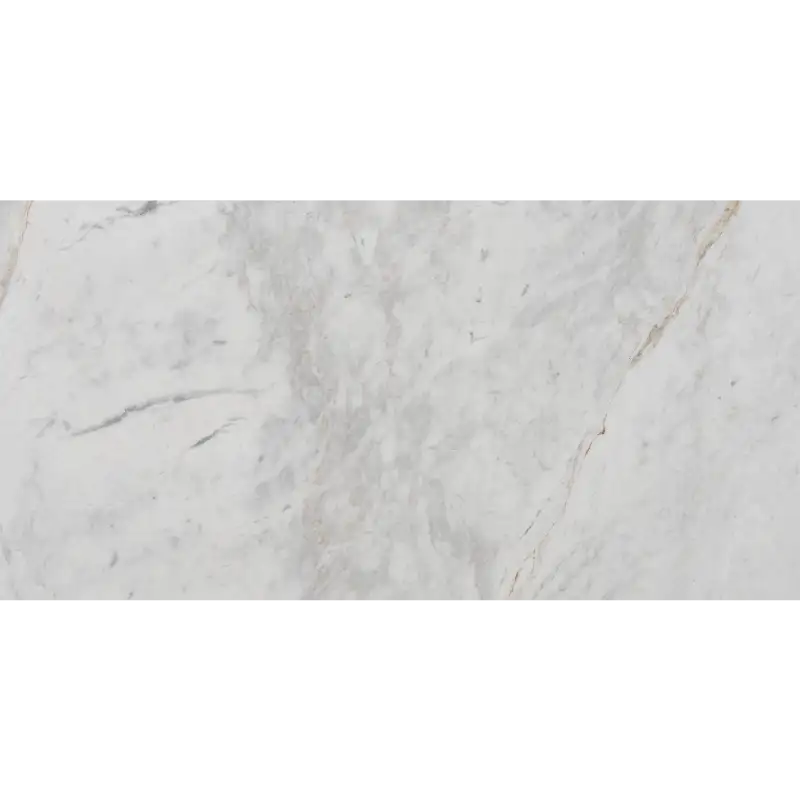
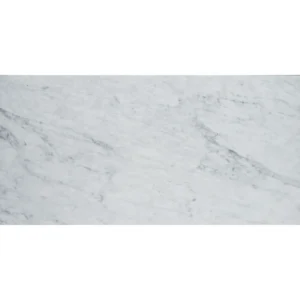
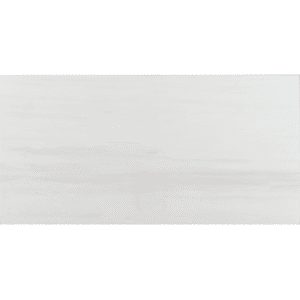
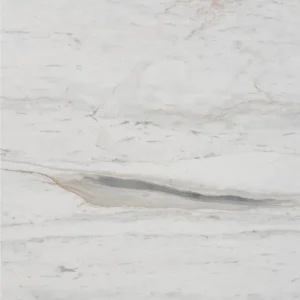
The Volakas White Marble Honed Tile 12″ × 24″ brings a refined and balanced character to interior spaces, inspired by the renowned white marbles of Northern Greece. Its smooth honed (matte) finish softens light while allowing the stone’s natural gray veining to flow gracefully across a clean white background—creating a calm, timeless aesthetic.
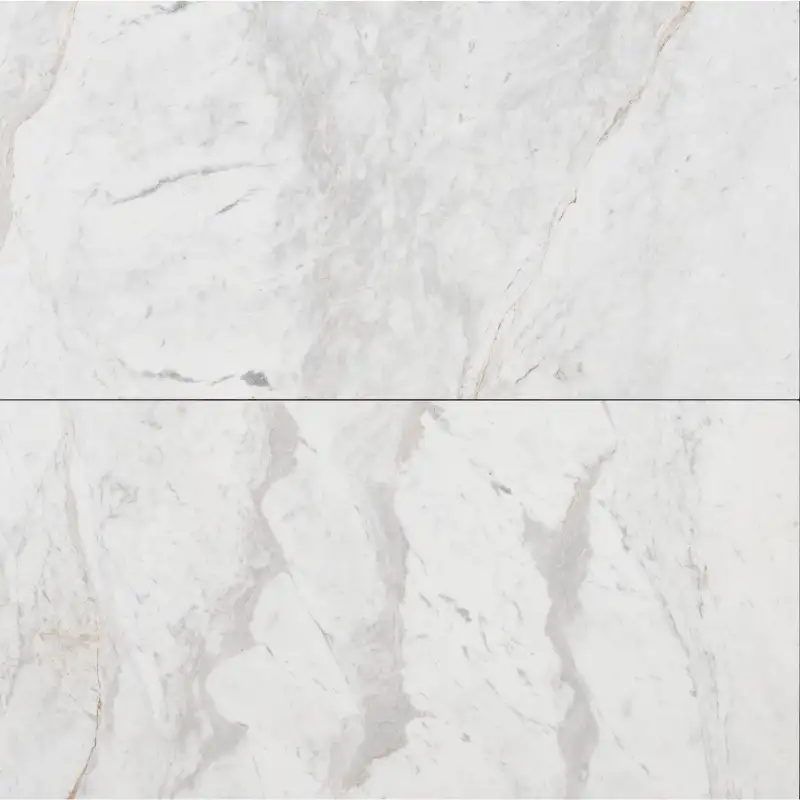
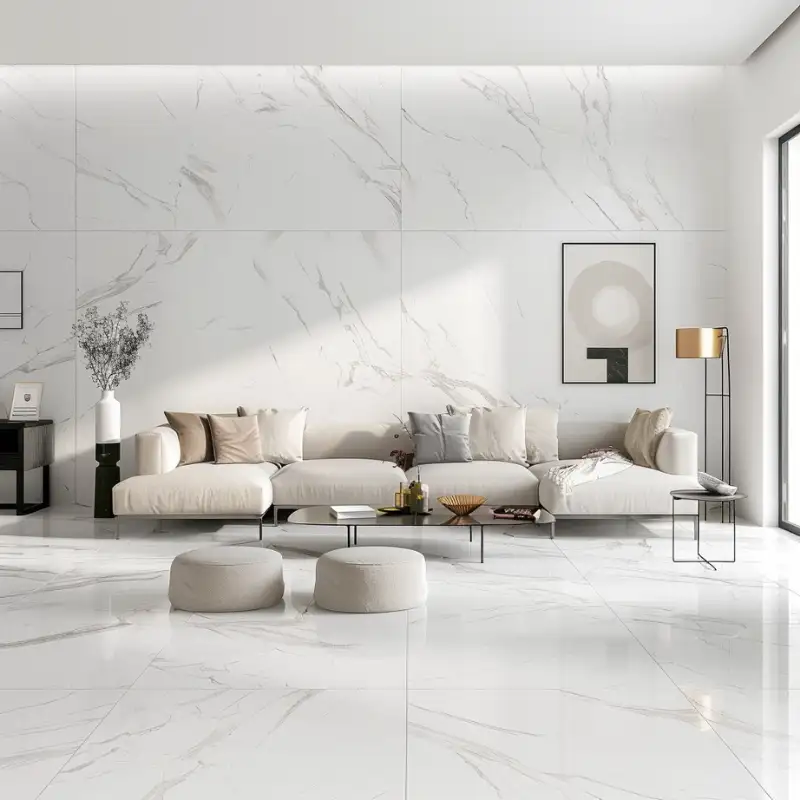
The 12″ × 24″ format offers a contemporary layout with fewer grout lines, delivering a seamless and spacious appearance on floors, walls, and shower surrounds. Known for its balanced veining and subtle contrast, Volakas marble provides a sophisticated alternative to classic white marbles, making it well suited for both modern and timeless design concepts.
Key Features:
- Material: Genuine Volakas marble
- Finish: Honed – smooth, matte, and understated
- Size: 12″ × 24″ (30.5 × 61 cm)
- Thickness: Approx. 0.47″ (1.2 cm)
- Edge: Straight edge for clean, precise installation
- Color: Soft white with elegant gray veining
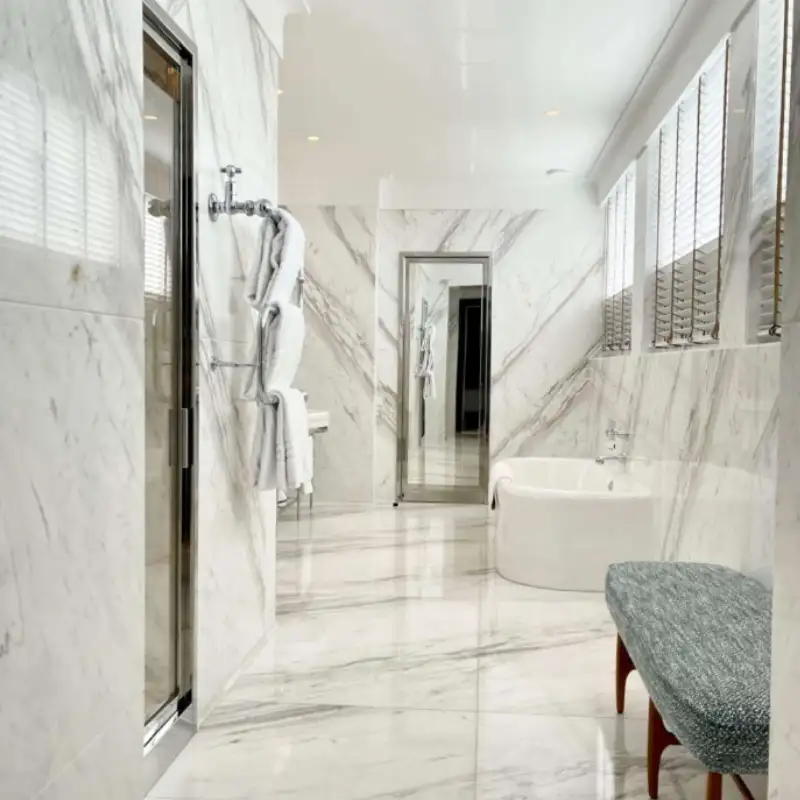
- Applications: Interior floors, walls, bathrooms, kitchens, and shower surrounds
Why Choose Volakas Honed Marble Tile?
Volakas marble is prized for its gentle veining and refined visual balance. The honed finish offers a more natural, slip-friendly surface while maintaining the stone’s depth and character. Durable, versatile, and visually calm, the Volakas Honed 12″ × 24″ tile is an excellent choice for residential and light commercial interiors seeking understated elegance.
Need more choices before you decide? Check the full tile catalog and filter by finish, color, and look.
Installation Guide – Volakas White Marble Honed Tile 12″ × 24″
Material Notes
- Natural Volakas marble with a soft white background and subtle gray veining.
- Honed (matte) finish that provides a smooth, non-glossy surface.
- Large-format 12″ × 24″ tiles with straight edges.
- Suitable for interior floors, walls, bathrooms, kitchens, and shower surrounds.
Step 1: Surface Preparation
- Ensure the substrate is clean, dry, flat, and structurally sound.
- For large-format tile installation, surface variation must not exceed 1/8″ over 10 feet.
- Use a leveling compound or skim coat to correct any uneven areas.
- Install ANSI A118.10-compliant waterproofing in showers and other wet areas.
- Always use white thin-set mortar to avoid shadowing beneath light-colored marble.
Step 2: Dry Layout & Planning
- Dry-lay tiles from multiple boxes to evenly distribute natural veining and tone variation.
- Plan the layout to minimize small cuts and achieve visual balance.
- Establish level reference lines to maintain straight courses and consistent grout joints.
Step 3: Adhesive Application (White Thin-Set)
- Use a white polymer-modified thin-set mortar meeting ANSI A118.4 or A118.15.
- Recommended trowel size: 1/2″ × 1/2″ square-notch for proper coverage.
- Key mortar into the substrate, then comb in straight, uniform lines.
- Back-butter each tile to ensure full mortar contact.
- Only spread mortar over areas that can be tiled within 10–15 minutes.
Step 4: Setting the Tiles
- Set tiles firmly into the mortar using a slight sliding motion.
- Use tile leveling systems or spacers to reduce lippage and maintain a flat surface.
- Check alignment frequently and make adjustments as needed.
- Remove excess thin-set from joints and tile surfaces immediately.
Step 5: Cutting & Detailing
- Cut tiles using a wet saw with a continuous-rim diamond blade suitable for marble.
- Apply painter’s tape along cut lines to minimize chipping.
- Smooth cut edges with a rubbing stone for a clean, finished appearance.
Step 6: Grouting
- Allow thin-set to cure for at least 24 hours before grouting.
- Use unsanded grout for grout joints 1/8″ or smaller.
- Test grout color on a small, inconspicuous area to ensure compatibility.
- Apply grout diagonally and clean carefully using minimal water.
Step 7: Sealing
- After grout has cured for 72 hours, apply a penetrating stone sealer.
- Additional sealing may be required prior to use in wet or high-traffic areas.
- Re-seal periodically to maintain protection and appearance.
Maintenance
- Clean with pH-neutral stone cleaners only.
- Avoid acidic or abrasive cleaners, as marble may etch over time.
- Wipe spills promptly to preserve the natural finish.
Important Note
For best results, Stonemarket USA recommends professional installation and the use of premium-grade setting materials.