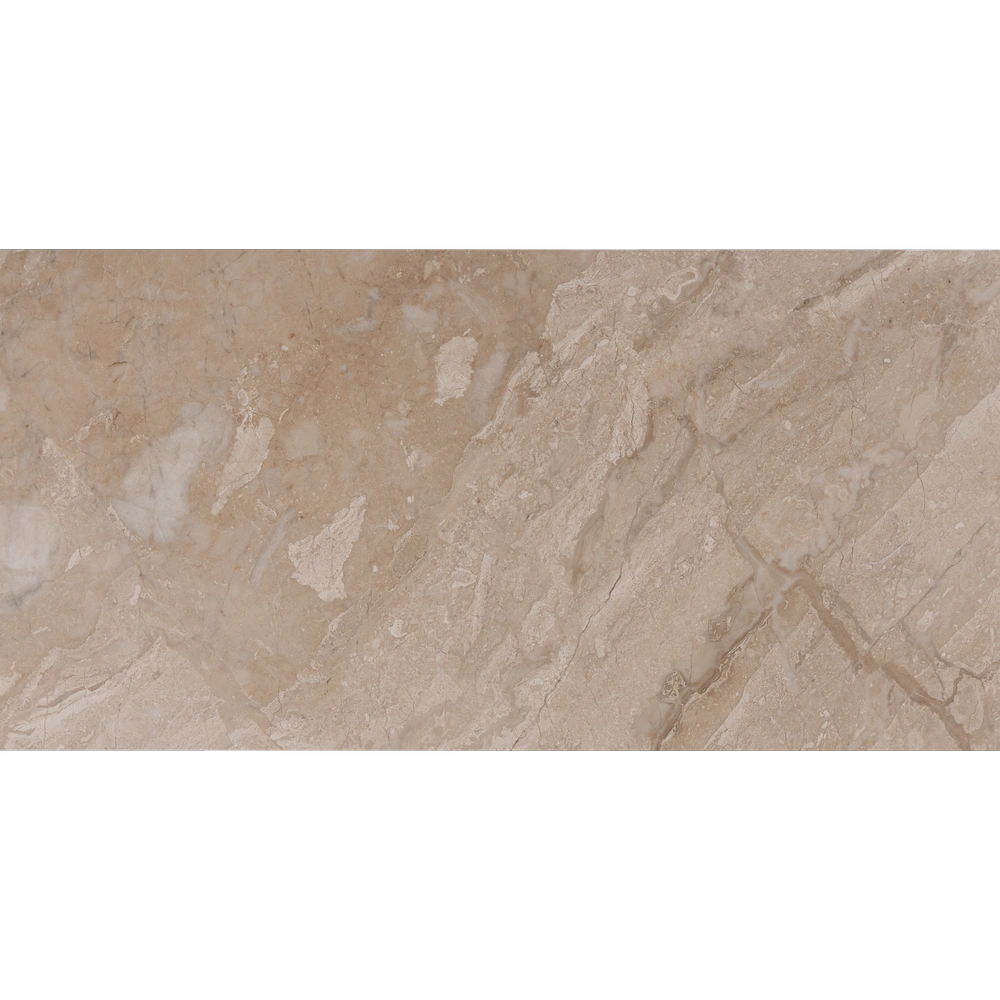
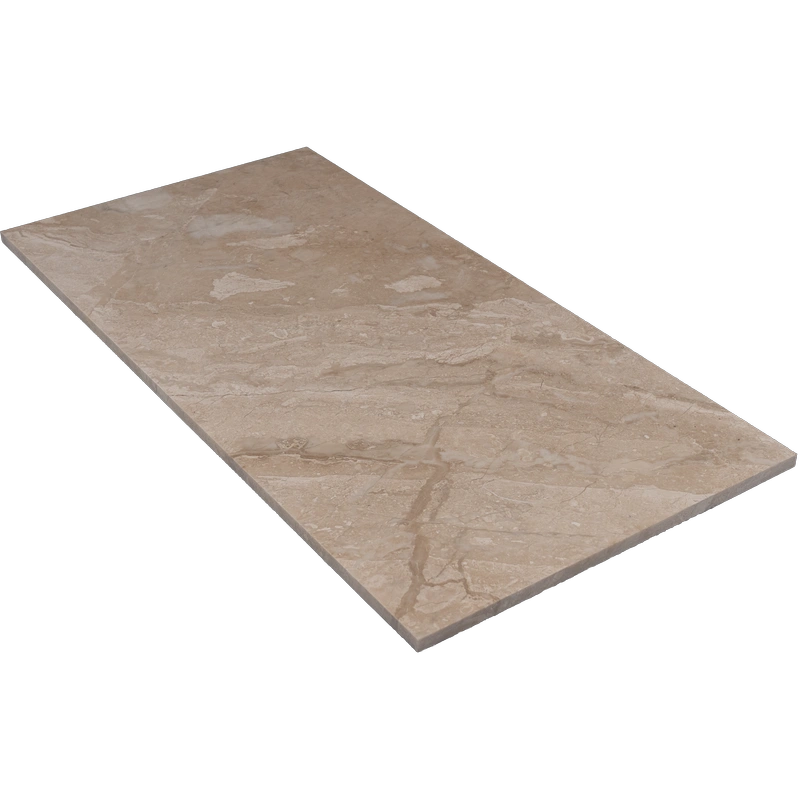
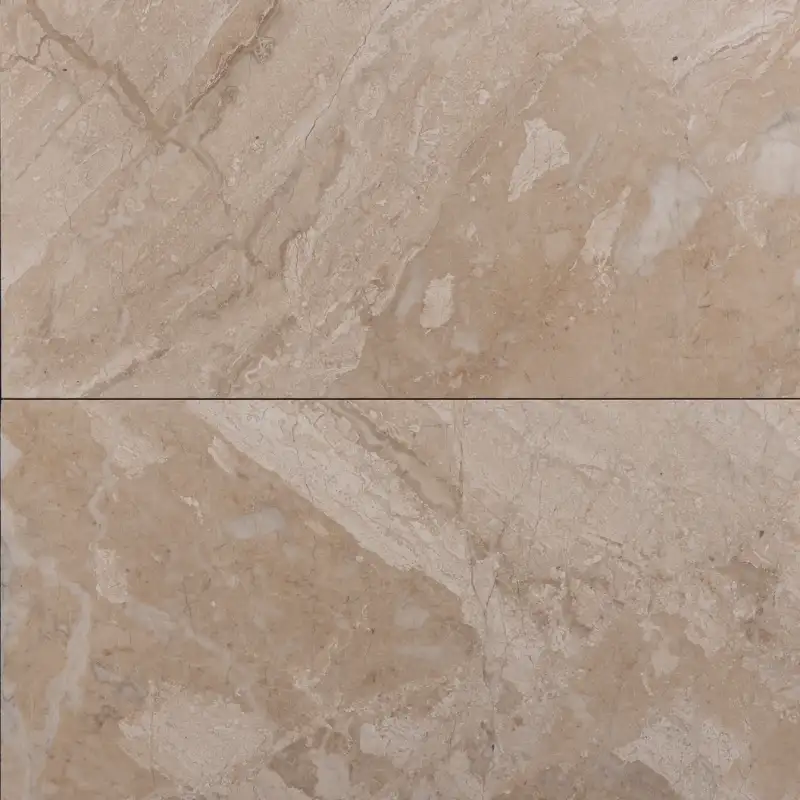
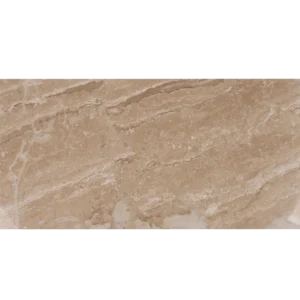
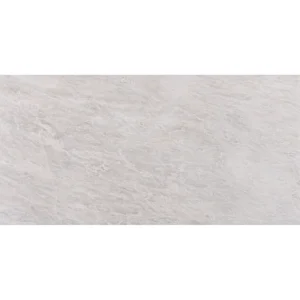
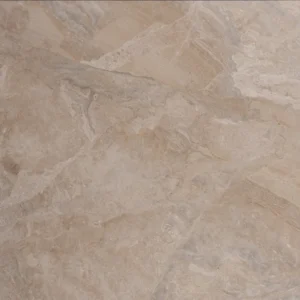
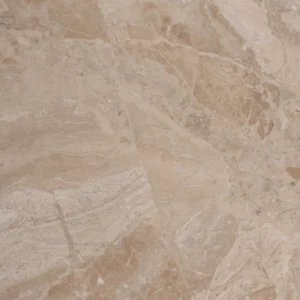
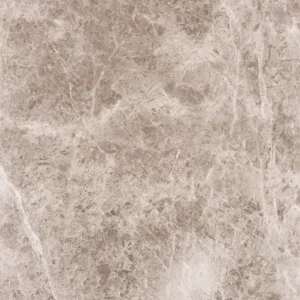
Royal Beige Tile 12″x24″ Polished – Natural Marble, Refined Shine
Understated Luxury with a Polished Glow
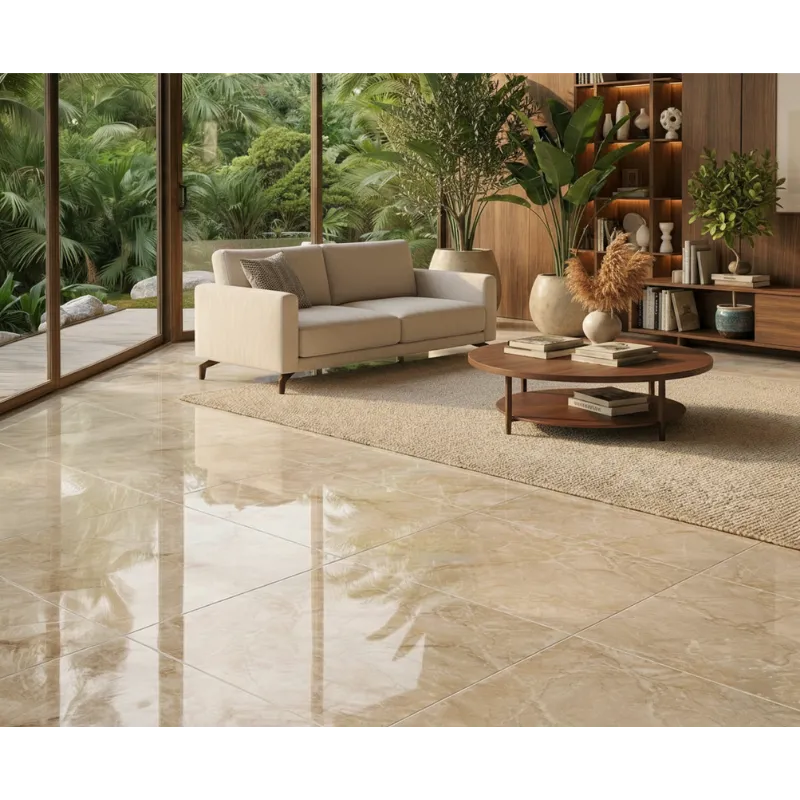
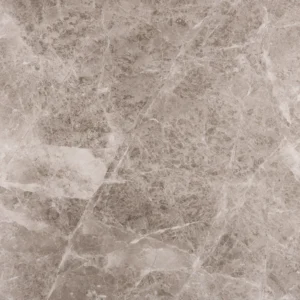
Transform your space with the serene elegance of the Royal Beige Tile 12″x24″ Polished. Made from genuine marble, this tile features soft beige tones and subtle natural variation. Its polished surface enhances brightness and gives walls a clean, high-end appearance. The 12″x24″ format minimizes grout lines, creating a seamless and open feel in any room.
Perfect for spa-inspired bathrooms, light-filled kitchens, or serene accent walls, this tile brings warmth and sophistication to your design. It pairs beautifully with brushed metals, natural wood, or minimalist décor. Moreover, the polished finish is not only stylish but also easy to clean—making it a practical choice for daily living or commercial settings.
Product Features – Royal Beige 12″x24″ Polished Tile
- Material: Natural Royal Beige Marble
- Color: Warm beige with soft veining
- Finish: Polished – glossy, light-reflective surface
- Size: 12″x24″ (30.5 x 61 cm)
- Thickness: 0.43″ (1.1 cm)
- Edges: Straight edge for crisp alignment
- Use: Indoor walls – ideal for bathrooms, kitchens, and feature areas
Why Choose This Tile?
The Royal Beige polished tile offers timeless appeal and a refined finish. Its larger size makes spaces feel broader, while the warm tones add inviting charm. With lasting durability and easy maintenance, it’s an excellent solution for upscale homes, hotels, or showrooms.
Installation Guide – Step by Step
Step 1: Surface Preparation – Start Flawlessly
- Ensure the substrate is clean, level, dry, and structurally sound.
- Remove all dust, oil, paint, or loose debris before beginning installation.
- Apply a waterproofing membrane in areas exposed to water such as showers and kitchen backsplashes.
- Use a self-leveling underlayment where needed—polished tiles require a flat base to avoid lippage and light distortion.
Step 2: Layout Planning – Blend and Align
- Mark layout lines from the center of your installation area.
- Dry-lay several tiles to observe tone and veining consistency. Royal Beige marble has natural color movement.
- Mix tiles from multiple boxes to achieve a balanced aesthetic across the surface.
- Maintain tight joints with **1/16″ to 1/8″ spacing**, ideal for polished straight-edge marble.
Step 3: Adhesive Application – Use White, Non-Staining Mortar
Recommended Thin-Set Mortars:
- Mapei Ultraflex LFT White
- Laticrete 254 Platinum White
- Ardex X77 White
Instructions:
- Use white thin-set to avoid shadowing beneath translucent beige marble.
- Spread mortar with a 1/2″ square-notched trowel for large-format tiles.
- Back-butter each tile to ensure full contact and avoid air pockets.
- Apply adhesive in small sections to prevent premature drying.
Step 4: Cutting & Fitting – Clean, Polished Edges
- Use a wet saw with a continuous-rim diamond blade designed for marble to prevent chipping.
- Measure twice and cut once. Double-check fit before final placement.
- Smooth visible cut edges with a polishing pad or marble file for a clean finish.
Step 5: Setting Tiles – Prevent Lippage
- Use a leveling system specifically made for large-format tiles.
- Place tiles with spacers and align carefully—polished surfaces highlight misalignment and unevenness.
- Lightly tap with a rubber mallet to set tiles evenly.
- Remove excess thin-set immediately from the polished surface to prevent permanent marks or haze.
- Let tiles cure undisturbed for at least 24 hours before grouting.
Step 6: Grouting & Sealing – Seal First, Then Grout
- Pre-seal polished marble before grouting to prevent staining or haze on the surface.
- Use non-sanded grout for joints up to 1/8″. Sanded grout may scratch polished surfaces.
- Apply grout diagonally with a rubber float, ensuring full joint coverage.
- Clean immediately with a damp sponge, then buff after 15–20 minutes to remove grout haze.
- After full curing (typically 72 hours), apply a second coat of a **penetrating sealer** formulated for polished marble.
Maintenance Tips – Protect the Shine
- Use pH-neutral cleaners only. Avoid acidic or abrasive products.
- Wipe up spills immediately—especially wine, citrus, oils, or cosmetics.
- Re-seal annually or as needed, depending on exposure and traffic.
- Use soft rugs and felt pads under furniture to reduce surface wear.
Shipping & Packaging
Each 12″ x 24″ Royal Beige Polished Marble Tile is carefully cushioned and boxed to prevent breakage. Store tiles indoors and inspect for shade and veining prior to installation.
Important Note
Royal Beige is a natural marble, and no two tiles are identical. Variations in tone and veining are expected and part of the stone’s beauty. Professional installation is recommended. Stonemarket USA is not liable for installation-related issues.