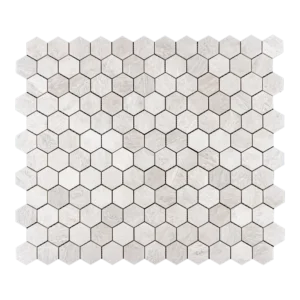
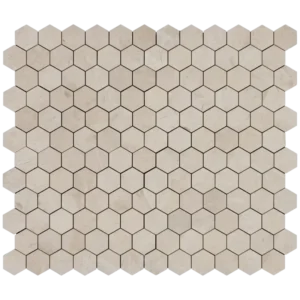
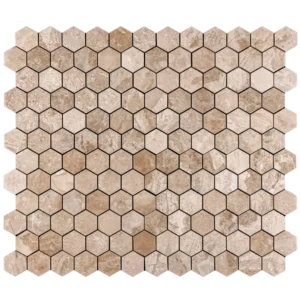
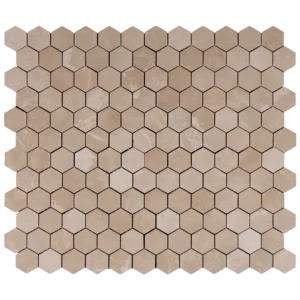
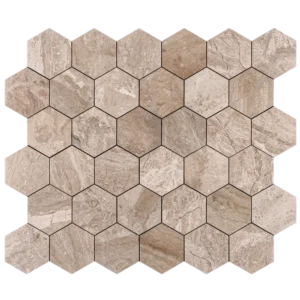
Myra Beige Hexagon 2″ Honed Limestone Mosaic
Soft Beige Hexagon Pattern for Modern Spaces
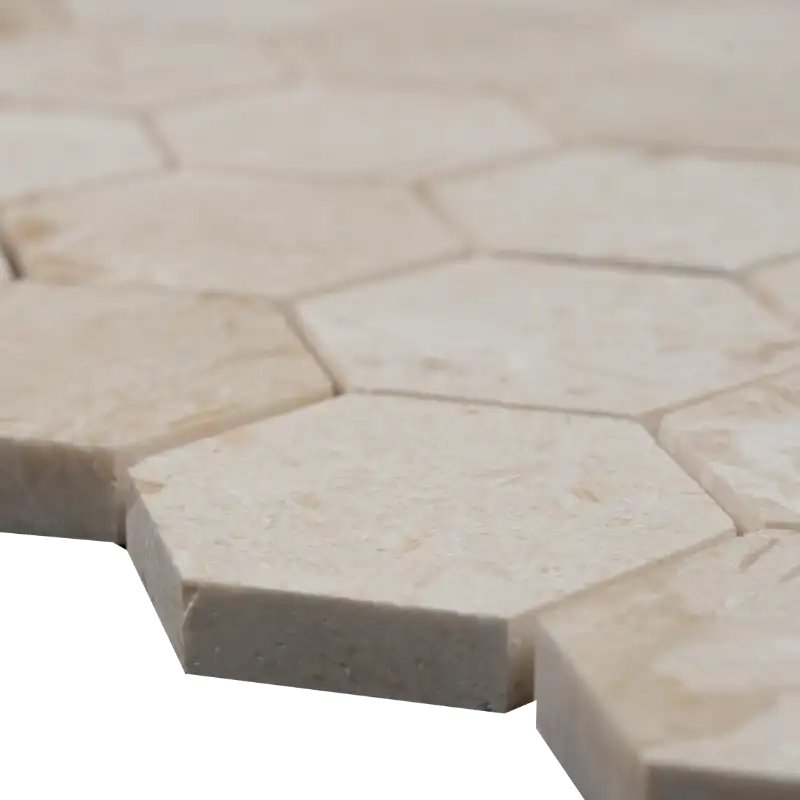
The Myra Beige Hexagon 2″ Honed Limestone Mosaic combines warm beige tones with a stylish hexagon pattern, creating a clean and contemporary look for any interior. Its honed (matte) finish offers a smooth, soft surface that feels refined yet understated, making it a perfect choice for modern and classic designs alike.
Ideal for Bathrooms, Showers, and Backsplashes
This hexagon limestone mosaic is an excellent option for bathroom walls, shower enclosures, niche areas, feature walls, and kitchen backsplashes. The 2″ hexagon shape adds visual interest and texture, while the neutral Myra Beige color pairs beautifully with a wide range of cabinetry, fixtures, and countertop materials.
Premium Natural Limestone Craftsmanship
Each hexagon piece is cut from high-quality Myra Beige limestone and mounted on a mesh-backed sheet for easier handling and installation. The honed finish provides a soft, non-gloss surface that helps reduce glare and delivers a calm, elegant appearance. Suitable for residential and light commercial use, this mosaic is designed to perform well in everyday environments.
Key Features
- Material: Natural Myra Beige Limestone
- Finish: Honed (Matte)
- Pattern: 2″ Hexagon Mosaic
- Tile Size: 2″ hexagon pieces
- Sheet Size: 10.4″ x 12″ (26.5 x 30.5 cm)
- Thickness: 1 cm
- Coverage: Approx. 469.84 sq. ft. total inventory (54 boxes)
Why Choose This Mosaic?
- Modern Hexagon Look: Adds a contemporary geometric style to any space.
- Warm Neutral Color: Soft beige tones complement many interior palettes.
- Durable Limestone: Natural stone construction designed for long-term use.
- Versatile Applications: Ideal for bathrooms, showers, kitchen backsplashes, and accent walls.
Upgrade Your Design with Natural Limestone
Bring subtle luxury and modern texture to your home with the Myra Beige Hexagon 2″ Honed Limestone Mosaic. Its geometric pattern, warm color, and natural stone surface make it a beautiful choice for creating stylish, inviting interiors.
Shop more coordinating looks in our marble mosaic tiles section.
Browse our complete Limestone Mosaic tiles collection to see more natural limestone mosaic designs suitable for kitchens, bathrooms, and shower walls.