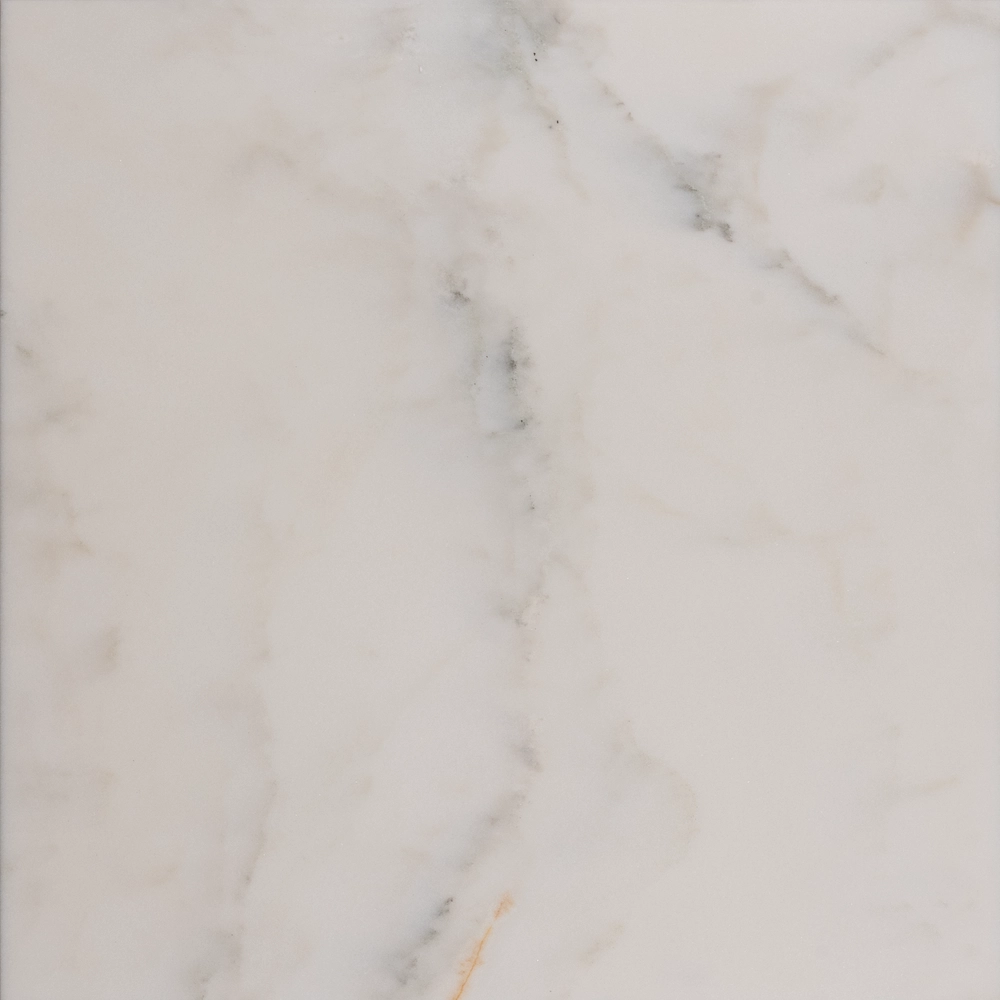
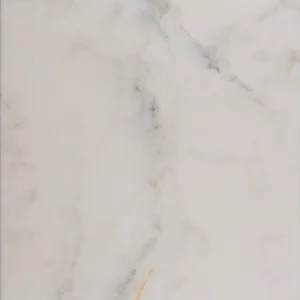
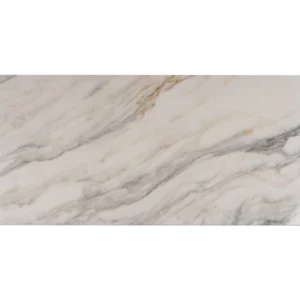
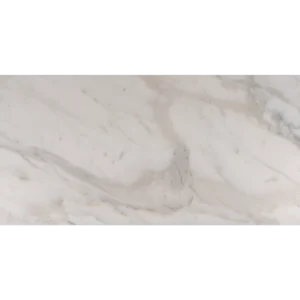
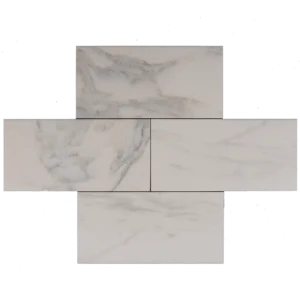
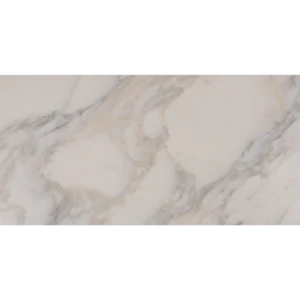
Calacatta Marble Tile 18″x18″ Honed – White Marble with Beveled Edge
Classic Calacatta Beauty, Honed to Perfection
Elevate your interior with the Calacatta Marble Tile 18″x18″ Honed, a tile that blends the opulence of Italian white marble with a smooth honed finish. Its signature white background, adorned with dramatic gray veining, creates a sophisticated canvas for both traditional and modern spaces. The beveled edge introduces subtle depth and dimension, perfect for refined wall or floor applications.
Key Features of Calacatta Marble Tile 18″x18″
- Stone Type: Natural Calacatta Marble
- Finish: Honed – matte, non-reflective surface for understated elegance
- Size: 18″x18″ (45.7×45.7 cm)
- Edge Detail: Beveled for a sculpted, elevated profile
- Color Profile: Clean white base with bold gray veining
- Application: Ideal for interior floors, feature walls, and luxurious bathrooms
Why Choose Calacatta Marble?
This tile offers more than just visual appeal—it enhances your space with natural durability and timeless character. Whether used in large-scale installations or as a feature, its honed surface provides slip resistance while showcasing the marble’s unique veining. Additionally, the beveled edges add a tailored touch that distinguishes this tile in upscale designs.
Not fully decided yet? Compare sizes and finishes on our main Tiles page.
Installation Guide – Step by Step
Step 1: Surface Preparation – Flat & Moisture-Ready
- Clean and level the surface with no more than 1/8″ variation over 10 feet.
- Use a self-leveling compound if necessary to correct uneven areas.
- Apply a waterproof membrane in areas exposed to moisture.
- Ensure the substrate is structurally sound, dry, and free from dust or oils.
Step 2: Layout Planning – Showcase the Stone
- Establish centerlines and use layout markers for balanced placement.
- Dry-lay tiles to evaluate veining direction and tone variation.
- Mix tiles from different boxes for a blended, natural appearance.
- Use 1/16″ to 1/8″ grout joints for proper spacing with beveled edges.
Step 3: Mortar Application – Strong Bond Required
Recommended Mortars:
- Mapei Ultraflex LFT White
- Laticrete 254 Platinum White
- Ardex X77 White
Instructions:
- Apply mortar with a 1/2″ square-notched trowel to achieve full coverage.
- Back-butter each tile to eliminate hollow spots.
- Set tiles while the mortar is fresh to ensure adhesion.
Step 4: Cutting & Fitting – Clean and Accurate
- Use a wet saw with a continuous-rim diamond blade suitable for marble.
- Polish cut edges if exposed to match the honed surface.
- Dry-fit tiles before final placement to confirm alignment and fit.
Step 5: Setting Tiles – Manage Lippage
- Use a tile leveling system to reduce lippage across large-format tiles.
- Set tiles with even pressure and check alignment regularly with a level.
- Remove any thin-set from the surface before it dries.
- Allow to cure for 24 hours before grouting.
Step 6: Grouting & Sealing – Essential Protection
- Pre-seal honed marble with a penetrating marble-safe sealer before grouting.
- Use non-sanded grout to avoid scratching the stone and beveled edges.
- Grout diagonally with a rubber float and clean joints promptly with a damp sponge.
- Buff off haze after 20–30 minutes using a soft microfiber cloth.
- Re-seal after full curing (typically 72 hours) to protect both tile and grout.
Maintenance Tips – Keep It Elegant
- Use only pH-neutral stone-safe cleaners.
- Avoid acidic or abrasive products that may damage the honed finish.
- Clean up spills quickly, especially oils or acids.
- Reseal surfaces every 6–12 months depending on traffic and use.
Shipping & Packaging
Each 18″ x 18″ honed Calacatta tile is cushioned with protective edge spacers and boxed securely to prevent damage. Inspect all tiles before installation to ensure consistency in tone, veining, and finish.
Important Note
Calacatta marble is a natural product that varies in veining and color. Always dry-lay tiles to confirm layout and visual harmony before installation. Stonemarket USA is not responsible for natural stone variation or installation errors.