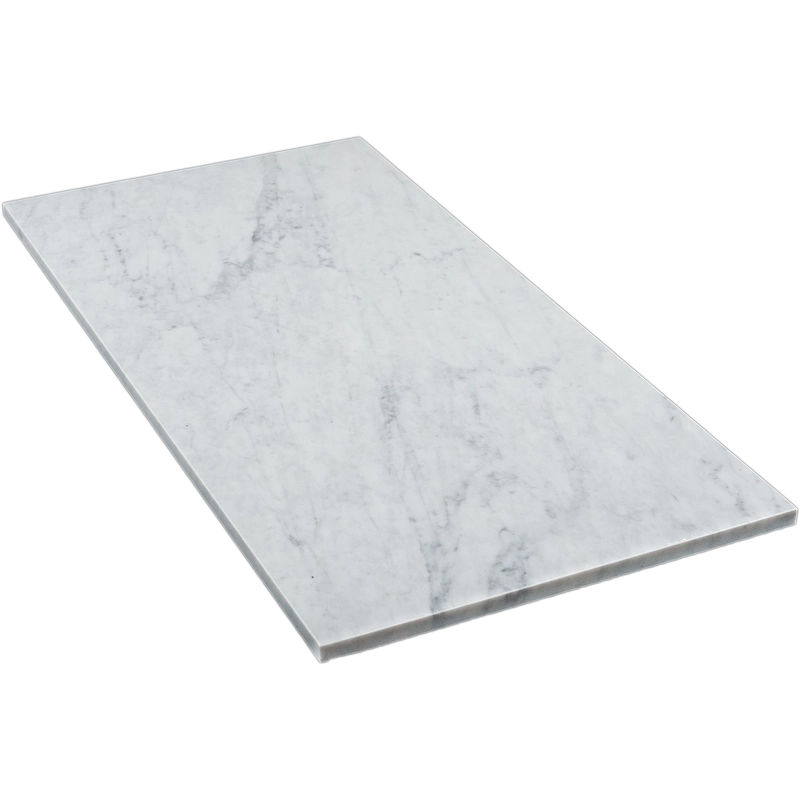
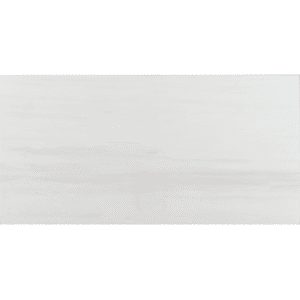
Carrara Marble Tile 18″x36″ Honed – Beveled Edge
Timeless Grandeur in a Subtle Matte Finish
Bring quiet luxury to your interiors with the Carrara Marble Tile 18″x36″ Honed, crafted from fine Italian marble and finished with a soft honed surface and precise beveled edges. This large-format tile balances timeless appeal with modern minimalism, creating expansive visual flow with fewer grout lines and refined architectural definition.
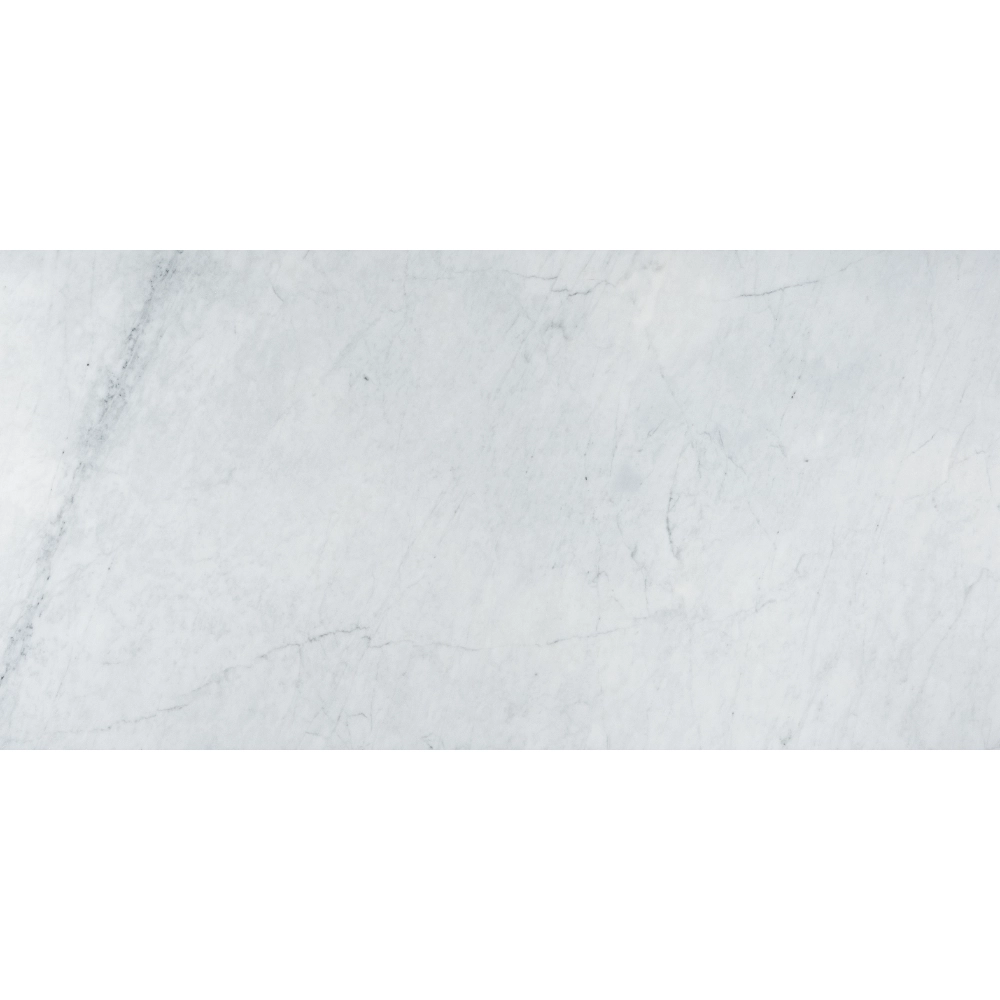
Ideal for walls and floors, its white background is accented with graceful gray veining, offering visual texture that complements both contemporary and traditional settings. The honed finish enhances its natural beauty while minimizing glare, making it a practical choice for soft, light-filled spaces. Whether you’re upgrading a bathroom, designing a serene entryway, or accenting a feature wall, this tile delivers both performance and style.
Key Features
- Material: Premium Carrara Marble
- Finish: Honed – smooth and matte for a soft, modern look
- Size: 18″ x 36″ (45.7 x 91.4 cm)
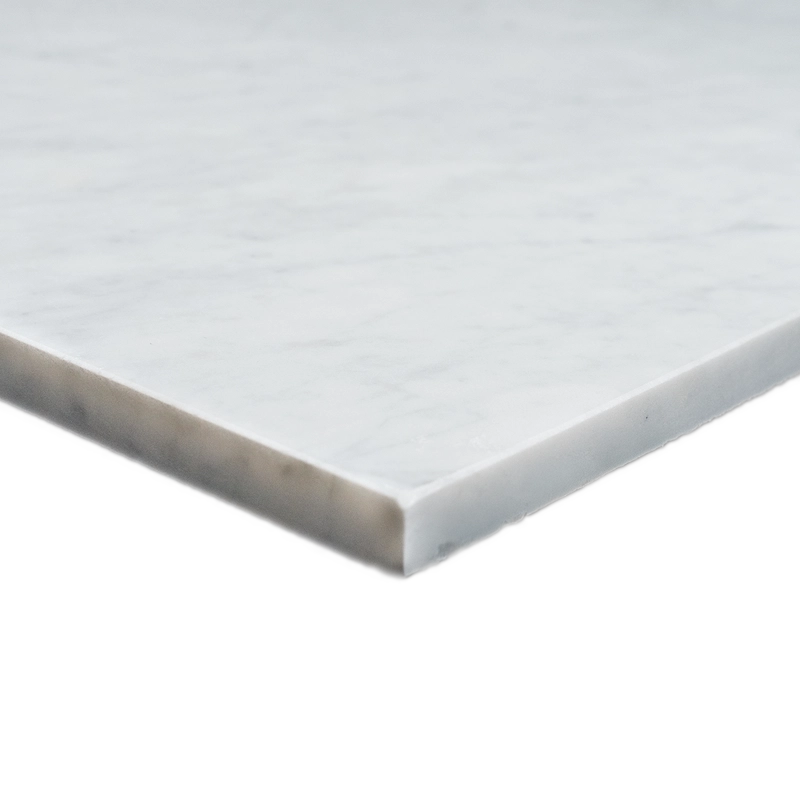
- Edge: Beveled – adds depth and visual refinement
- Color: White marble with elegant gray veining
- Application: Interior floors and walls – bathrooms, living spaces, and accent panels
Why Choose This Carrara Honed Beveled Tile?
This tile offers more than just surface beauty. Its large size reduces joint lines, creating a seamless canvas that visually enlarges any room. The honed finish and beveled edges add a sculptural quality, lending quiet elegance to interiors without overpowering other design elements. It’s a versatile choice for those who value sophistication with subtle detail.
Installation Guide – Step by Step
Step 1: Surface Preparation – Flat, Clean, and Level
- Ensure substrate is level, dry, and structurally sound; variation should not exceed 1/8″ over 10 feet.
- Remove all dust, oils, and loose debris; clean with a vacuum and damp cloth.
- Use a self-leveling underlayment if necessary, especially for large-format tile areas.
- Apply a waterproofing membrane in wet areas such as showers or backsplashes.
Step 2: Layout Planning – Blend & Balance
- Mark reference lines and use a grid to maintain symmetry and reduce awkward cuts.
- Dry-lay tiles to preview Carrara veining and tone; pull from multiple boxes for natural variation.
- Plan your layout to align beveled edges consistently and create an intentional flow.
- Recommended grout joint: 1/16″ to 1/8″.
Step 3: Mortar Application – Large Format Thin-Set
Recommended Mortars:
- Mapei Ultraflex LFT White
- Laticrete 4-XLT White
- Ardex X5 or X77 White
Instructions:
- Apply white thin-set mortar using a 1/2″ square-notched trowel.
- Back-butter each tile to ensure full contact and avoid voids.
- Install tiles while thin-set is fresh; do not allow it to skin over.
Step 4: Cutting & Fitting – Minimize Chipping
- Use a wet saw with a continuous-rim diamond blade designed for natural stone.
- Polish exposed cut edges with a stone file or polishing pad.
- Always dry-fit cut pieces before setting to confirm alignment and fit.
Step 5: Setting Tiles – Ensure Flat Transitions
- Use a leveling system to control lippage between large-format tiles.
- Place tiles into mortar with firm, even pressure or a rubber mallet.
- Clean excess mortar from the surface and grout joints before it dries.
- Allow to cure for 24 hours before grouting.
Step 6: Grouting & Sealing – Protect the Stone
- Pre-seal honed marble tiles with a penetrating sealer to prevent staining.
- Use non-sanded or fine-sanded grout to avoid scratching beveled edges.
- Apply grout diagonally with a rubber float and wipe clean immediately.
- Buff away any haze after 20–30 minutes with a soft cloth.
- Re-seal the tiles and grout after curing (typically 72 hours).
Maintenance Tips – Preserve the Natural Look
- Clean with pH-neutral stone cleaners only—avoid acidic or abrasive products.
- Wipe spills immediately to avoid absorption or discoloration.
- Re-seal honed marble every 6–12 months depending on traffic and exposure.
- Use felt pads under furniture and rugs in high-traffic areas.
Shipping & Packaging
Each Carrara Marble 18″ x 36″ Honed Tile is packaged with foam padding and edge protection. Inspect all tiles before installation to ensure consistency in color, veining, and bevel detail.
Important Note
Carrara is a natural stone and will vary in tone and veining. Dry-lay tiles before installation to achieve a balanced visual effect. Stonemarket USA is not liable for installation errors or natural variation.