Acorn Mahogany Natural Porcelain Tile 9×36
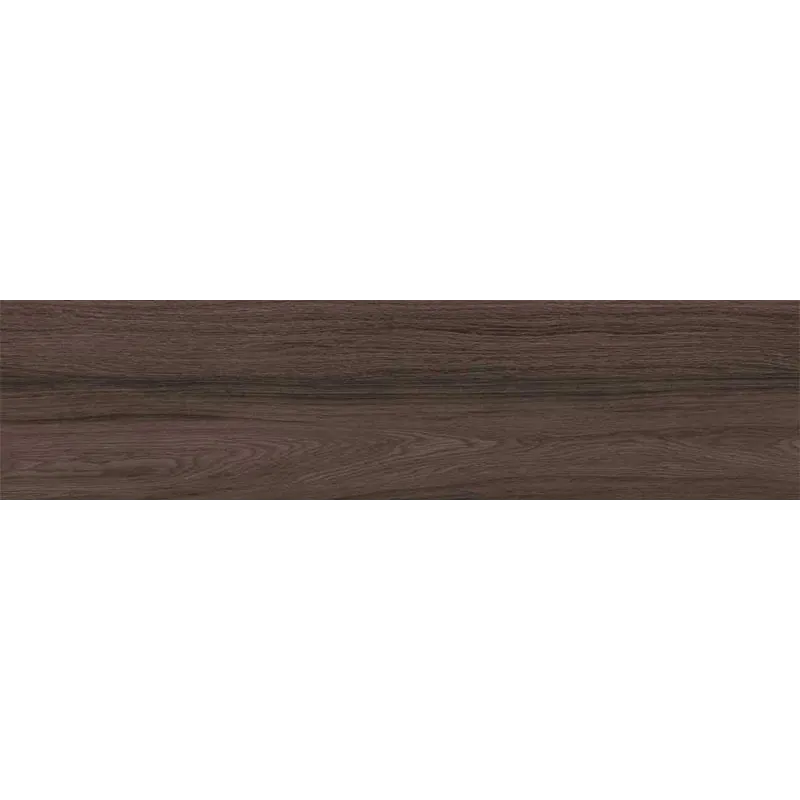
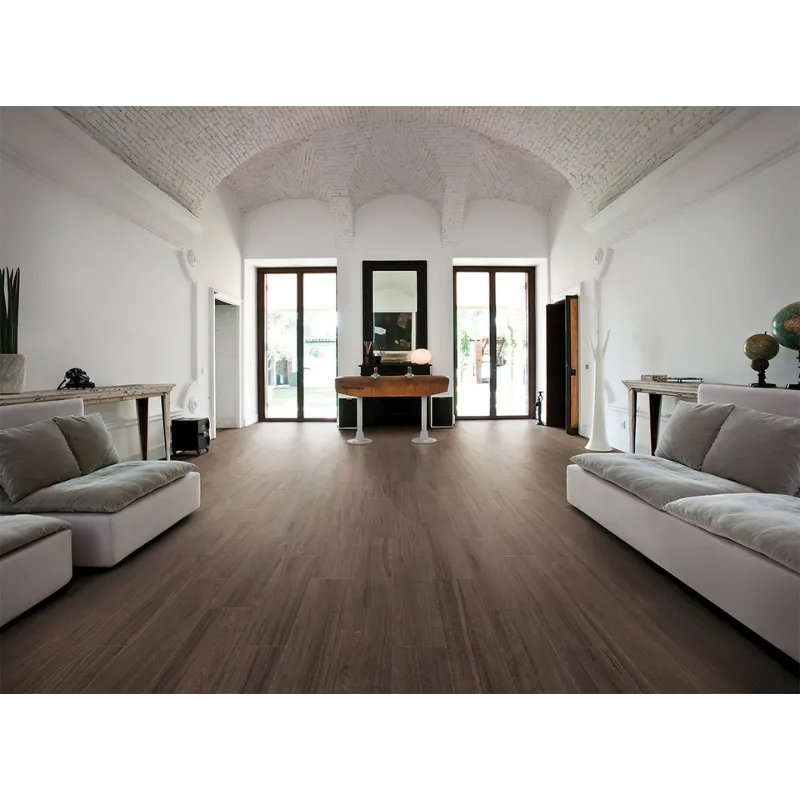
The Acorn Mahogany 9×36 Porcelain Tile brings the rich, sophisticated character of dark wood into a durable porcelain surface. Designed with deep mahogany brown tones and detailed wood-grain movement, this elongated plank tile creates the warmth and visual depth of natural hardwood with the practical advantages of porcelain.
The 9×36 wood-look plank format emphasizes the natural linear grain of the design, making it an excellent choice for creating continuous, wood-inspired surfaces. With 30 screens, the collection provides visual variation from tile to tile, helping create a more natural and less repetitive appearance across larger installations.
A natural finish complements the wood-inspired texture with a refined matte appearance, while the rectified edges provide precise dimensions for clean, contemporary installations and tighter grout joints.
Ideal Applications
Acorn Mahogany porcelain tile is a versatile option for residential and commercial spaces, including:
- Living rooms and family rooms
- Kitchens and dining areas
- Bathrooms
- Entryways and hallways
- Bedrooms
- Feature walls
- Commercial interiors
The deep brown mahogany coloring works especially well in contemporary, transitional, and classic interiors where the warmth of wood is desired with the durability and easy maintenance of porcelain tile.
Wood-Look Variation
The Acorn collection is designed to reproduce the natural variation found in real wood. Differences in grain pattern and tonal movement between individual tiles contribute to a more authentic wood-look installation. Dry laying several pieces before installation is recommended to achieve a balanced distribution of patterns.
Product Specifications
Material: Porcelain
Collection: Acorn
Color: Mahogany
Finish: Natural
Edge: Rectified
Tile Size: 9″x36″
Thickness: 9 mm
DCOF: >0.42
Screens: 30
Coverage per Box: 13.08 sq ft
Vendor SKU: 7095-R
Installation Guide – Step by Step
Step 1: Surface Preparation – Flat, Clean and Dry Substrate
- Clean the installation surface thoroughly and remove dust, grease, debris, paint, or any material that may interfere with proper mortar adhesion.
- Ensure the substrate is structurally sound, flat, level, and completely dry before installation.
- Because 9×36 porcelain planks require a flat installation surface, correct any significant irregularities with an appropriate patching or self-leveling compound.
- Apply an appropriate waterproofing membrane when installing in wet areas such as bathrooms or showers.
Step 2: Layout Planning – Create a Natural Wood-Look Pattern
- Use chalk lines to establish a balanced layout and determine the direction of the 9×36 planks before applying mortar.
- Dry-lay several tiles to evaluate the wood-grain patterns and tonal variation throughout the installation.
- Blend tiles from multiple boxes to distribute the different patterns and create a more natural wood-look appearance.
- Avoid excessive overlap when using a staggered layout. For long plank-format porcelain tile, a maximum offset of approximately 33% is commonly recommended unless otherwise specified by the manufacturer.
- Use appropriate tile spacers to maintain consistent grout joints throughout the installation.
Step 3: Mortar Application – Use a Porcelain-Compatible LFT Mortar
Recommended Mortars:
- Mapei Ultraflex LFT
- Laticrete 4-XLT
- Ardex X77
Instructions:
- Use a suitable large-format tile mortar specifically approved for porcelain tile.
- Select the appropriate notched trowel based on substrate conditions and mortar manufacturer recommendations.
- Comb mortar in one direction to help achieve proper coverage and reduce trapped air beneath the tile.
- Back-butter the tiles when necessary to achieve adequate mortar coverage and strong adhesion.
- Periodically lift a tile during installation to verify proper mortar transfer and coverage.
- Apply mortar only to an area that can be tiled within the mortar manufacturer’s recommended open time.
Step 4: Cutting & Fitting – Use Porcelain-Compatible Tools
- Use a professional wet saw with a diamond blade suitable for porcelain tile for clean and accurate cuts.
- Measure carefully and dry-fit cut pieces before setting them into mortar.
- For exposed cut edges, use an appropriate diamond polishing pad or finishing tool when necessary.
- Use extra care when making narrow or detailed cuts in the elongated 9×36 plank format.
Step 5: Tile Setting – Maintain a Flat and Consistent Installation
- Place each tile firmly into the mortar and move it slightly perpendicular to the mortar ridges to improve contact and coverage.
- Use a tile leveling system when appropriate to help minimize lippage between the long plank-format tiles.
- Frequently check alignment, grout joint consistency, and surface flatness during installation.
- Remove excess mortar from the tile surface and grout joints before it hardens.
- Allow the installation to cure according to the mortar manufacturer’s instructions before grouting or allowing traffic on the surface.
Step 6: Grouting – Complete the Installation
- Select a grout suitable for porcelain tile and the chosen grout-joint width.
- Choose a grout color that complements the deep mahogany brown tones of the tile and the desired wood-look appearance.
- Apply grout diagonally across the joints using a rubber grout float.
- Remove excess grout and clean the tile surface with a damp sponge according to the grout manufacturer’s instructions.
- Allow grout to cure completely before normal use or routine cleaning.
Maintenance Tips – Easy-Care Porcelain
- Sweep or vacuum regularly to remove dust, sand, and abrasive debris.
- Clean with a pH-neutral cleaner suitable for porcelain tile.
- Wipe spills promptly and avoid allowing residue to build up on the surface.
- Avoid harsh abrasive cleaners or tools that may affect the tile or grout appearance.
- Use protective pads beneath furniture and appropriate mats in high-traffic entry areas.
- Porcelain tile itself generally does not require periodic sealing; however, grout may require sealing depending on the grout product used.
Shipping & Packaging
Acorn Mahogany 9×36 Porcelain Tile is packaged 6 pieces per box, providing approximately 13.08 sq. ft. of coverage per box. Each box weighs approximately 50.27 lbs. Store boxes in a clean, dry environment and protect them from impact or improper handling. Always inspect tiles for damage, color variation, and pattern distribution before installation.
Important Note
Acorn Mahogany is a wood-look porcelain tile designed with variation in grain pattern and tonal movement to help reproduce the appearance of natural wood. The collection features 30 screens, so visual differences between individual tiles are an intentional part of the design. For best results, open and blend tiles from multiple boxes before installation and review the overall layout before permanently setting the material. Installation should follow applicable industry standards and manufacturer recommendations. StoneMarket USA is not responsible for improper installation, substrate conditions, or installation-related errors.