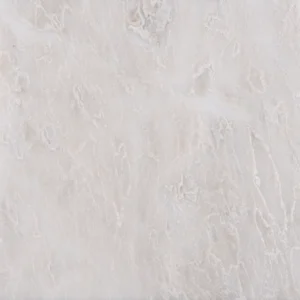
12″ x 12″ Bianco Dolomite Polished Beveled Marble Tile
Classic Elegance Meets Crisp Modernity
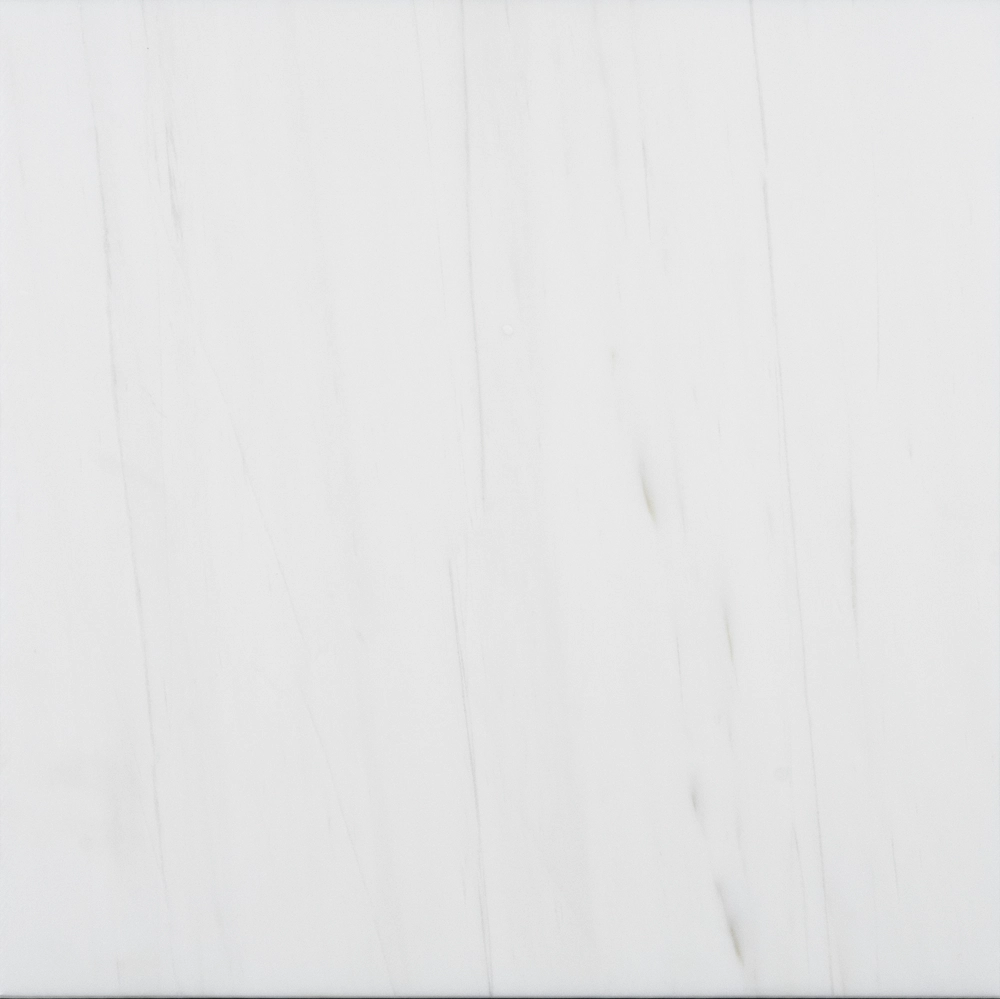
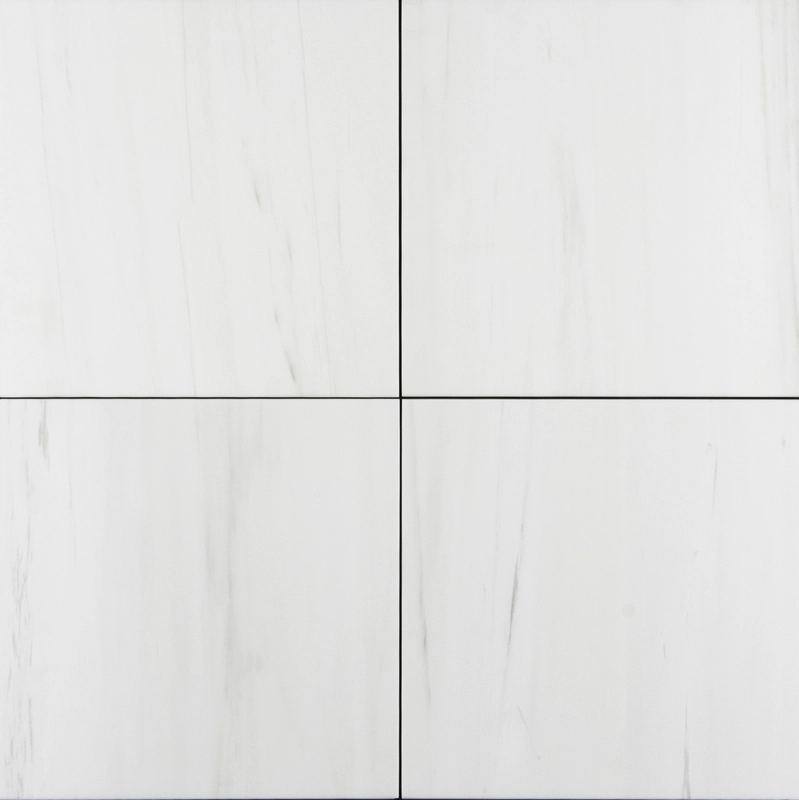
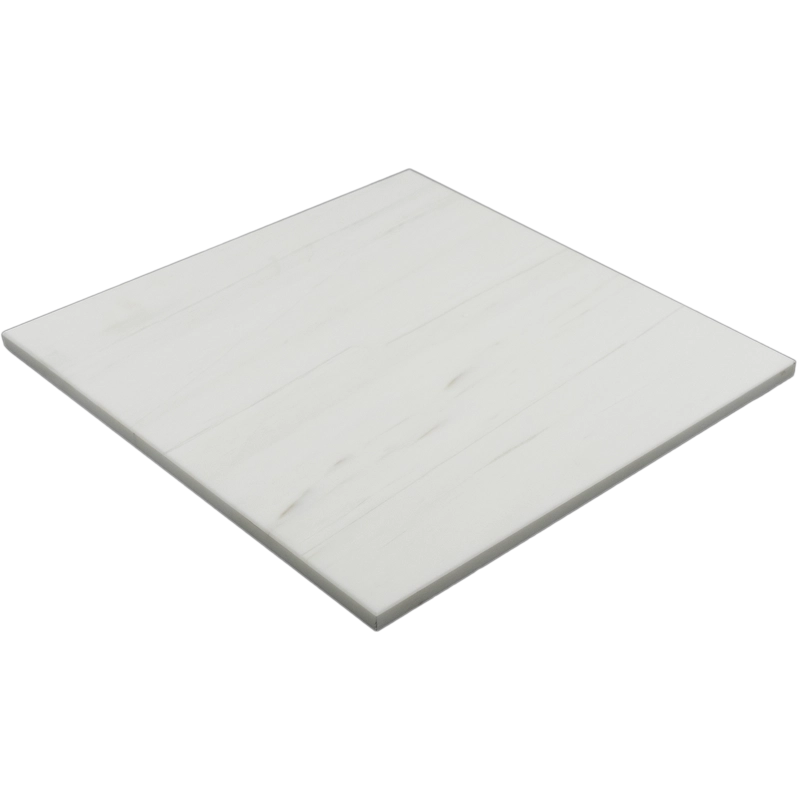
The Bianco Dolomite Polished Beveled Marble Tile offers a timeless combination of white marble beauty and contemporary design. With its smooth polished finish and subtle beveled edges, this 12″ x 12″ tile delivers a refined, upscale look that elevates any space. The gentle white tones and fine veining of dolomite marble bring natural brightness and a sense of calm to interiors.
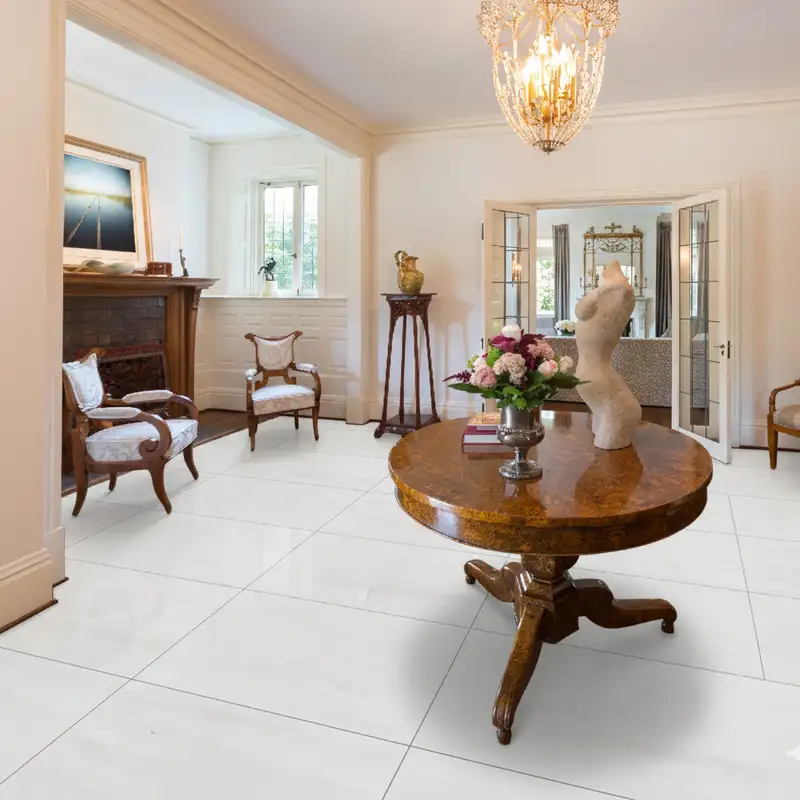
Whether you’re renovating a bathroom wall, creating a sophisticated kitchen backsplash, or designing an accent wall, this tile offers both versatility and style. Its square shape and polished surface help open up smaller spaces, while the beveled edges add definition and a touch of depth. Designed for indoor wall applications, it blends perfectly with both modern and traditional settings.
Product Features
- Material: Bianco Dolomite Marble
- Color: Clean white with soft veining
- Finish: Polished – bright, smooth surface
- Edge: Beveled for added dimension
- Size: 12″ x 12″ (30.5 x 30.5 cm)
- Thickness: 0.4″ (1 cm)
- Use: Indoor wall applications including bathrooms, backsplashes, and accent walls
Why Choose This Tile?
This tile is an ideal choice for those seeking elegant design with practical benefits. It’s easy to maintain, long-lasting, and resistant to moisture. Moreover, the natural veining and crisp white palette make it a perfect fit for bright, luxurious interiors.
Installation Guide – Step by Step
Step 1: Surface Preparation – Solid & Smooth
- Ensure the substrate is flat, dry, clean, and free of oil, dust, or debris.
- Use a long level to check for dips or high spots—correct with a self-leveling compound as needed.
- Apply a waterproofing membrane in wet zones like showers or kitchen backsplashes.
Step 2: Layout Planning – Visual Flow Matters
- Mark center lines to maintain symmetry across the installation area.
- Dry-lay tiles to preview veining and color variation; blend tiles from different boxes.
- Plan layout to avoid small cuts along edges; adjust starting point if necessary.
- Use **1/16″–1/8″ spacers** to allow for uniform grout joints while preserving the definition of beveled edges.
Step 3: Adhesive Application – Use White Thin-Set
Recommended Mortars:
- Mapei Ultraflex LFT White
- Laticrete 254 Platinum White
- Ardex X5 or X77 White
Instructions:
- Apply mortar with a 1/4″ or 3/8″ square-notched trowel depending on surface flatness.
- Back-butter tiles to ensure full contact and reduce air pockets.
- Work in manageable sections to prevent adhesive skin-over.
Step 4: Cutting & Fitting – Clean and Precise
- Use a wet saw with a diamond blade suitable for marble to prevent chipping the polished surface and beveled edge.
- Dry-fit cut tiles before setting; polish visible cut edges with a stone file if needed.
Step 5: Tile Setting – Align with Precision
- Set tiles carefully and press into mortar bed, tapping lightly with a rubber mallet.
- Check alignment continuously—beveled edges make spacing errors more visible.
- Remove any excess thin-set from joints and surface before it dries—especially important on polished tiles to avoid residue and etching.
- Allow at least 24 hours of curing before grouting.
Step 6: Grouting & Sealing – Protect the Finish
- Pre-seal the polished surface with a penetrating sealer to prevent grout haze or staining.
- Use non-sanded grout for joints ≤ 1/8″ to avoid surface scratching.
- Grout diagonally using a rubber float, then wipe with a damp sponge before haze forms.
- After curing (72 hours), apply a second coat of sealer approved for polished marble surfaces.
Maintenance Tips – Keep It Gleaming
- Use only pH-neutral stone cleaners. Avoid acidic, bleach-based, or abrasive products.
- Clean spills immediately—especially wine, citrus, or oil-based materials.
- Re-seal every 6–12 months, depending on exposure and foot traffic.
- Use felt pads under furniture and place rugs or mats in entry areas to minimize wear.
Shipping & Packaging
Each 12″ x 12″ Bianco Dolomite Polished Beveled Marble Tile is cushioned and securely packaged. Inspect all tiles before installation and store in a clean, dry indoor environment.
Important Note
Bianco Dolomite is a natural stone product. Variations in veining, tone, and polish are part of its uniqueness. Always plan the layout in advance. Stonemarket USA is not responsible for installation errors or improper handling.