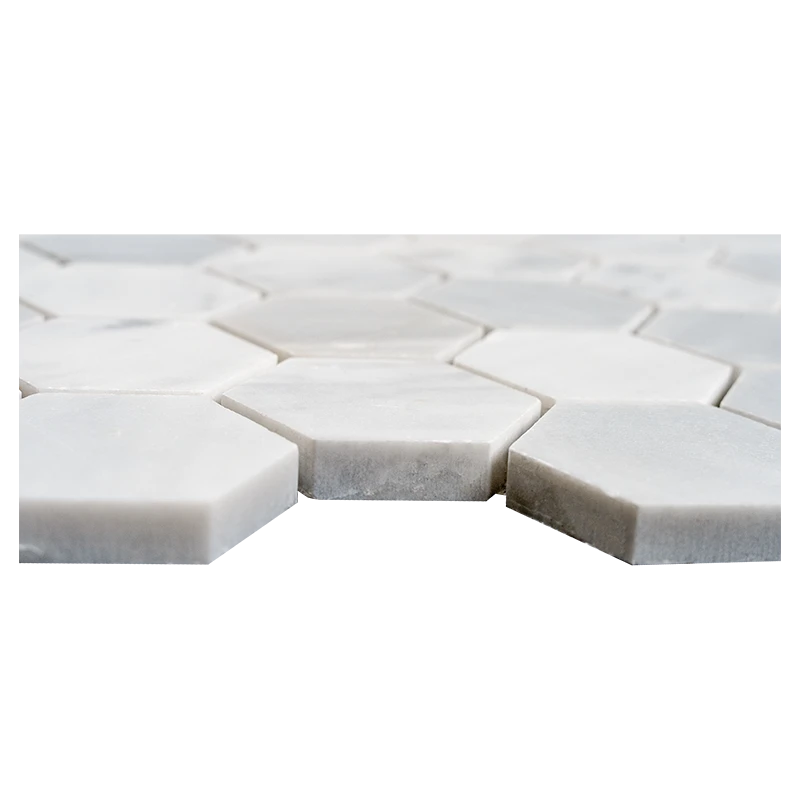
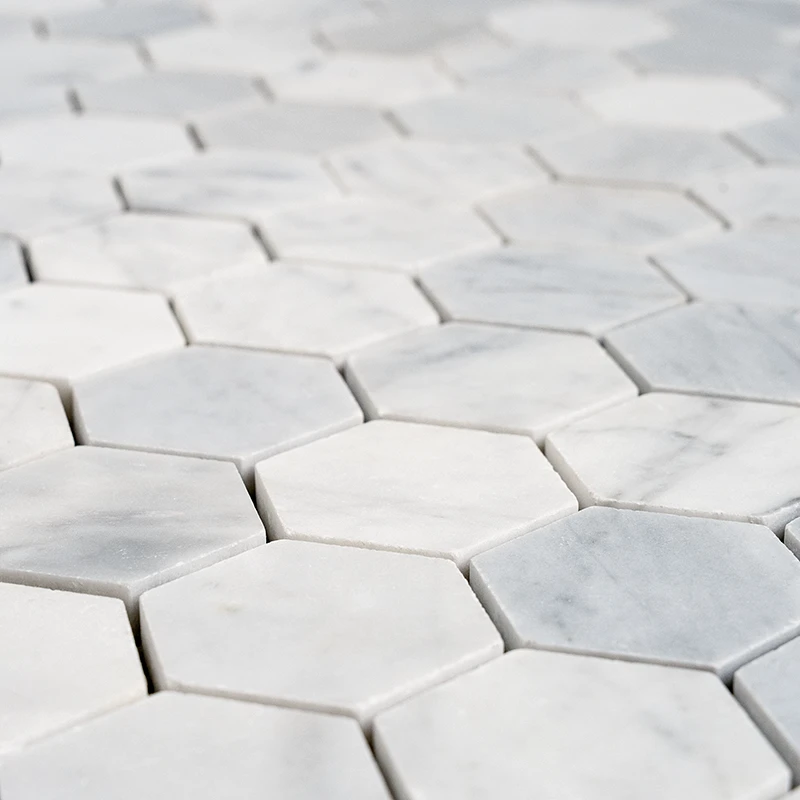
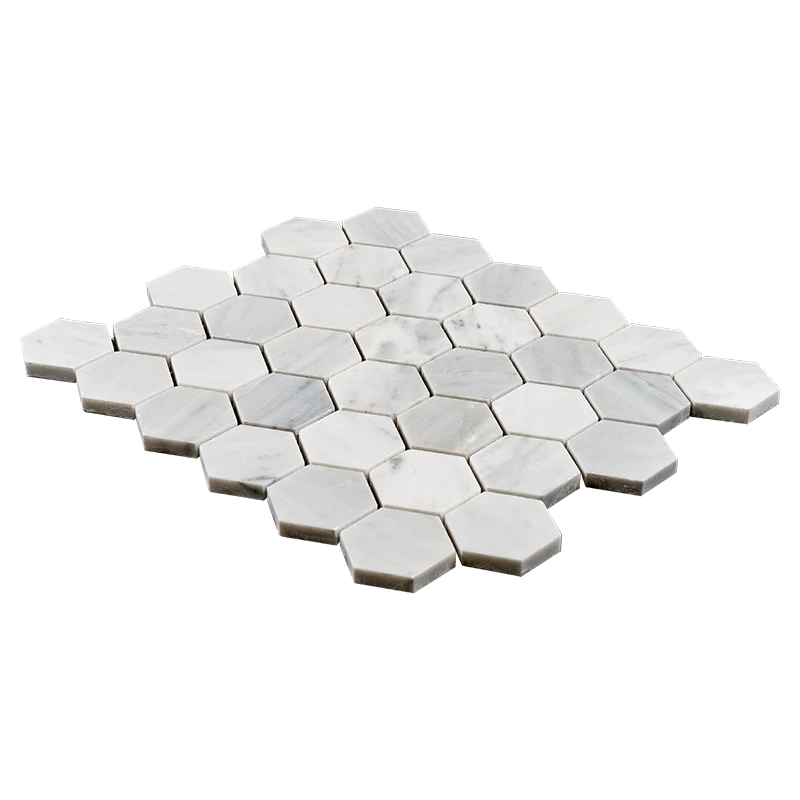
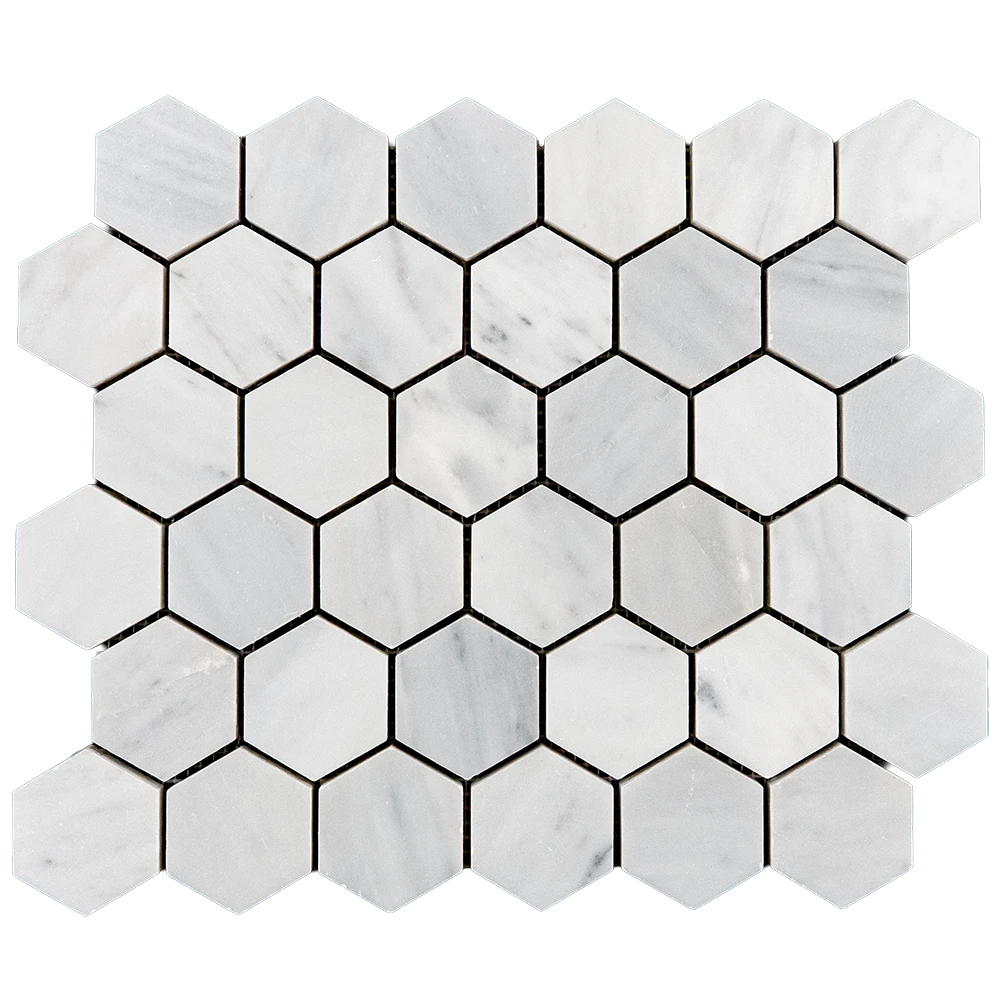

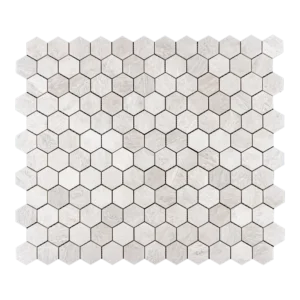
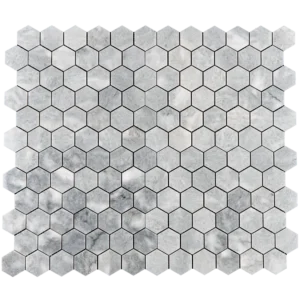
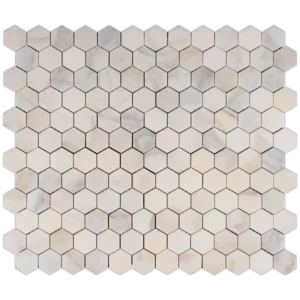
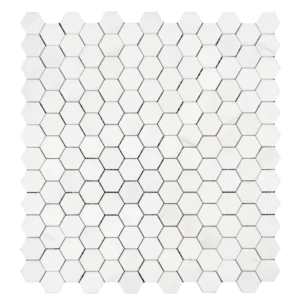
2″ Carrara White Hexagon Mosaic Tile – Honed Finish
Honed Carrara Marble in a Classic Honeycomb Pattern
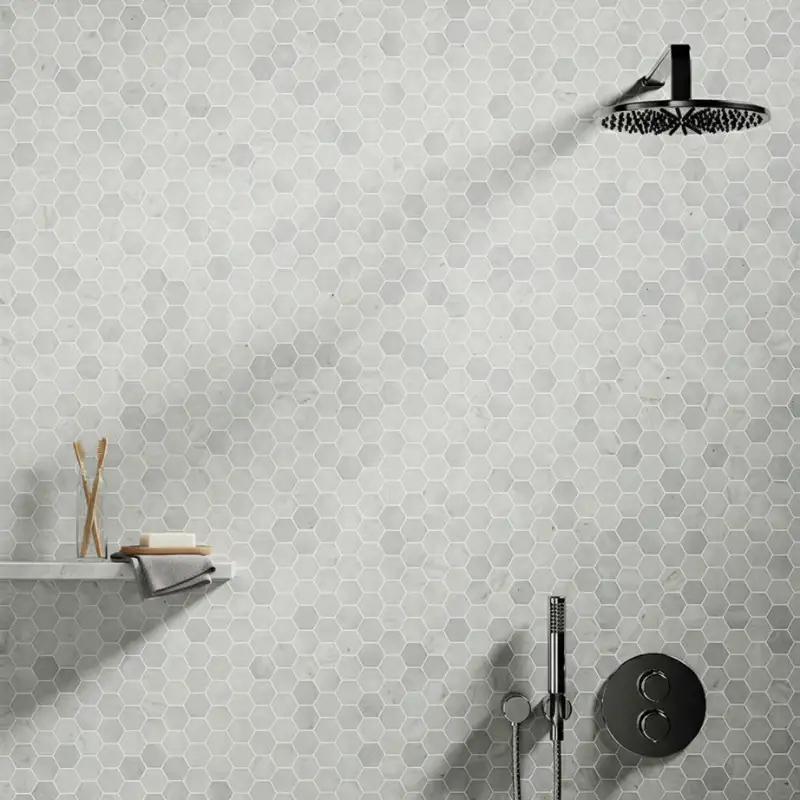
Enhance your interiors with the 2″ Carrara White Honeycomb Mosaic Tile. Crafted from authentic Carrara marble, this mosaic features a timeless honeycomb design that brings geometric elegance to your walls. The honed finish creates a smooth, matte surface, highlighting the natural beauty of Carrara’s subtle veining and white tones. Perfect for kitchens, bathrooms, and accent walls, this tile delivers refined sophistication and lasting appeal.
The mesh-mounted backing ensures easy installation and consistent alignment, making it a top choice for both residential and light commercial applications. Its versatile design pairs beautifully with a wide range of color palettes and materials, from modern minimalism to classic styles.
Product Highlights – Carrara White Honeycomb Mosaic Features
- Material: Premium Carrara White Marble
- Color: Crisp white with subtle, icy veining
- Shape: Honeycomb – 2″ hexagon pieces
- Finish: Honed – smooth, matte surface that softens light reflections
- Sheet Size: 10.4″ x 12″ (26.5 x 30.5 cm)
- Thickness: Approx. 0.4″ (1 cm)
- Chip Size: 2″ individual hexagons
- Installation: Mesh-mounted for easy and clean application
- Use: Ideal for walls, backsplashes, shower surrounds, and decorative panels
- SKU: CAR-HB-002
Why Choose Carrara White Honeycomb Mosaic Tile?
This classic tile offers a blend of timeless charm and contemporary versatility. The 2″ honeycomb pattern creates a dynamic flow that adds visual interest without overwhelming the space. Its honed finish reduces glare while enhancing the natural veining of the marble, making it perfect for serene bathrooms, sophisticated kitchens, and upscale accent areas.
Recommended Applications
- Bathroom walls and shower enclosures
- Kitchen backsplashes and feature walls
- Vanity walls and decorative panels
- Commercial lobbies and hospitality projects
Maintenance Tips
- Clean with a pH-neutral, stone-safe cleaner to preserve the honed finish.
- Avoid acidic or abrasive products that can damage the marble surface.
- Apply a penetrating sealer to protect against moisture and stains.
- Reapply sealer as needed depending on usage and exposure.
Packaging & Delivery
- Sold per box – 5 mesh-mounted sheets included
- Total coverage: Approx. 4.35 sq.ft. per box
- Net Weight: Approx. 25.1 lbs per box
- Carefully packaged to ensure safe, nationwide delivery
Shop the full assortment of natural-stone mosaics in mosaic tiles.