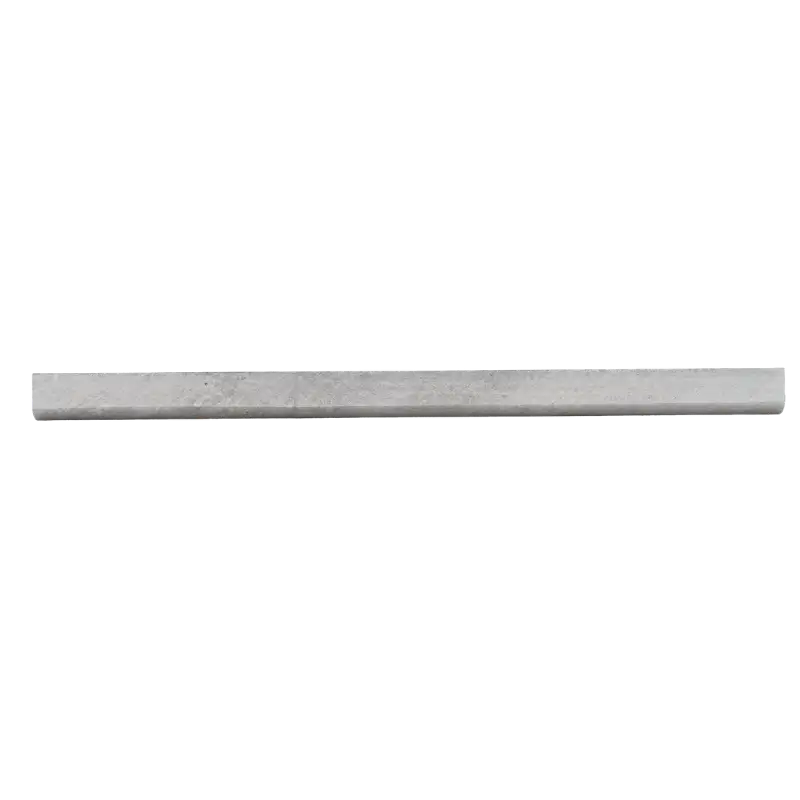
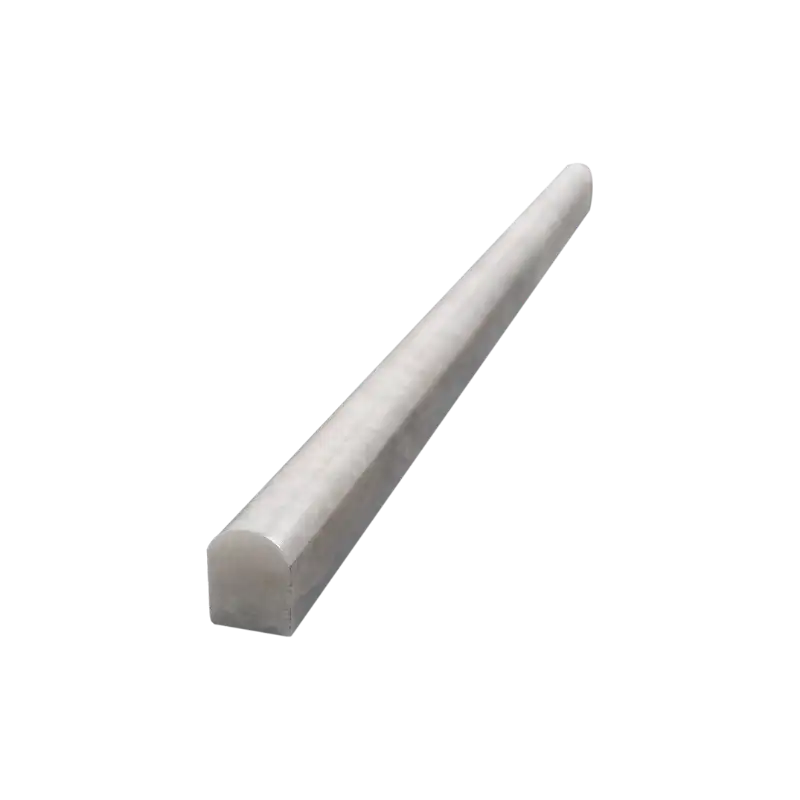
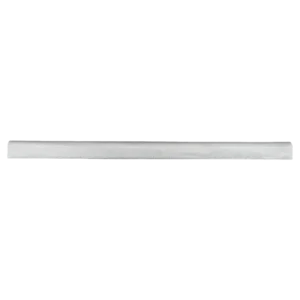
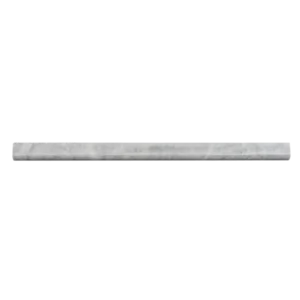
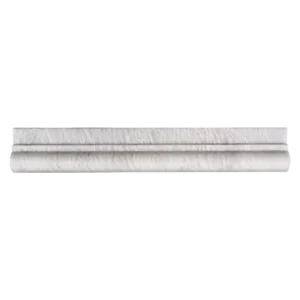
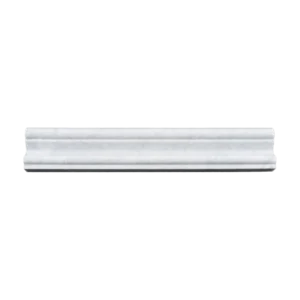
Iceberg Marble Polished Pencil Liner – Clean Marble Accent for Seamless Transitions
The Iceberg Marble Polished Pencil Liner is a refined marble molding designed to bring a crisp, elegant finish to tile installations.
Crafted from natural Iceberg marble, this pencil liner features a polished surface that enhances the stone’s bright white base and subtle gray veining,
creating a smooth, light-reflective accent.
Ideal for wall applications, this trim works beautifully as a finishing edge for backsplashes, shower walls, niches, and decorative borders.
Its rounded pencil profile creates smooth transitions between surfaces, while the clean white tones pair effortlessly with marble tiles,
mosaics, and contemporary stone designs in both modern and classic interiors.
Product Highlights
- Material: Natural Iceberg marble
- Finish: Polished for a smooth, glossy appearance
- Color: Bright white with subtle gray veining
- Profile: Rounded pencil liner molding
- Recommended Uses: Backsplashes, shower walls, niches, decorative borders, and wall transitions
Design Advantage
The Iceberg Marble Polished Pencil Liner introduces a clean, architectural detail that elevates tile layouts without overpowering the design.
Its gently rounded form softens edges, while the polished finish reflects light to enhance brightness and visual clarity.
Timeless and versatile, this marble trim is an excellent choice for residential and light commercial spaces seeking a refined,
cohesive look with a modern touch.
Installation Guide – Iceberg Marble Polished Pencil Liner Trim
Step 1: Surface Preparation – Establish a Clean, Stable Base
- Ensure the installation surface is solid, dry, and free from dust, grease, or debris.
- Complete the installation of surrounding wall tiles or mosaics before placing the pencil liner trim.
- Use a level and pencil to mark straight reference lines for precise alignment.
Step 2: Dry Fit – Layout and Planning
- Dry-lay the pencil liner trims to confirm spacing, alignment, and overall visual flow.
- Carefully review corners, edges, and termination points before cutting.
- Cut pieces using a wet saw with a fine diamond blade designed for natural stone.
Step 3: Setting the Liner – Adhesive Application
Recommended Thin-Set Mortars (White):
- Mapei Ultraflex LFT
- Laticrete 254 Platinum
Application Method:
- Apply a thin, even layer of mortar to the back of each pencil liner trim using a margin trowel.
- Back-butter for full coverage and gently press into place along the reference guideline.
- For vertical applications, use painter’s tape or spacers to hold pieces securely during curing.
Step 4: Grouting – Clean Finish for Polished Marble
- Allow the adhesive to cure for a minimum of 24 hours before grouting.
- Use non-sanded grout to prevent scratching the polished marble surface.
- Remove excess grout promptly with a clean, damp sponge.
- After initial set, gently buff the surface with a microfiber cloth to restore shine.
Step 5: Sealing – Long-Term Protection
- Once grout has fully cured (typically 48–72 hours), apply a penetrating sealer suitable for polished marble.
- Reapply sealer periodically based on moisture exposure and routine maintenance.
Care & Maintenance
- Clean regularly using pH-neutral cleaners specifically formulated for natural stone.
- Avoid acidic or abrasive products such as vinegar, bleach, or harsh chemicals.
- Wipe spills promptly to preserve the polished finish and natural veining.
Important Notice
Iceberg marble is a natural stone and may exhibit variations in color, veining, and texture. Always inspect and dry-fit materials prior to installation.
StoneMarket USA is not responsible for installation errors or natural stone variation once the product has been installed.