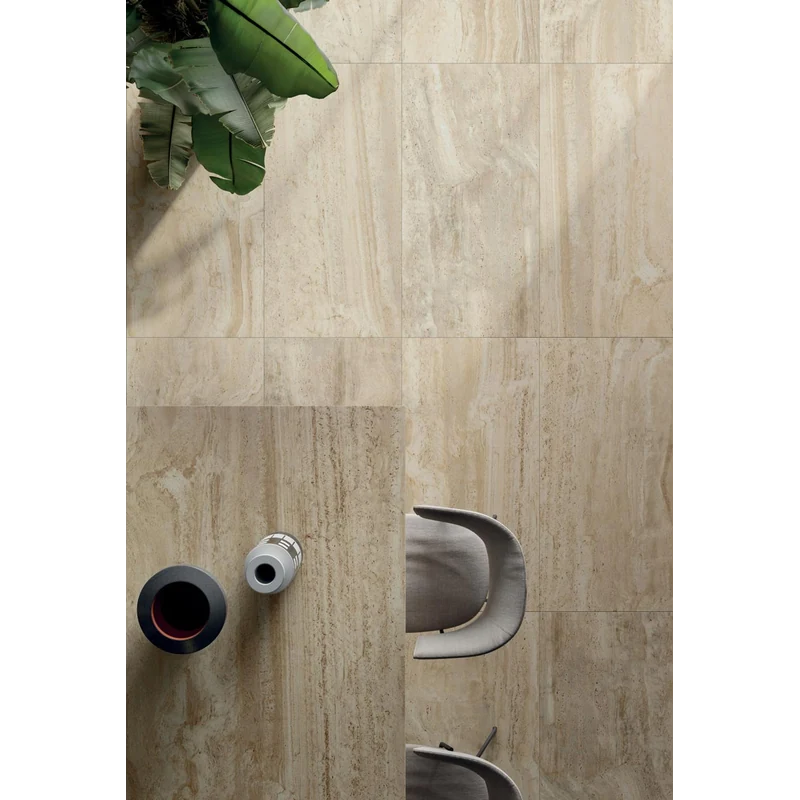
Installation Guide – Navona Honey Vein Cut 4×12 Brick Porcelain Tile – Natural
Important Advisory
Inspect all material before installation and verify that the tile is suitable for the intended location. Follow current Happy Floors instructions, setting-material manufacturer requirements, applicable local codes, and recognized tile-industry standards. Wet and exterior installations require project-appropriate waterproofing, drainage, movement accommodation, and substrate preparation.
Step 1: Layout & Planning
- Confirm the installation area, pattern, reference lines, transitions, and perimeter cuts before setting tile.
- Dry-lay material to review the Honey Vein Cut appearance, natural finish, and directional relationship between tiles.
- Blend tiles from multiple cartons during layout to distribute natural visual variation across the installation.
- The 4×12 format can support horizontal, vertical, stacked, offset, and other suitable patterns. Confirm any offset limitations with the manufacturer before installation, especially where surface variation may affect alignment or lippage control areas are critical to design outcome resolution expectations specifications requirement tolerances project’s standards chosen arrangement considerations relevant conditions apply as needed for completion of work properly managed during setup processes overall in field execution professionally handled accordingly throughout placement sequence direction alignment checks maintaining intended balanced appearance and acceptable plane transitions across finished tiled surface areas involved in scope delivery final acceptance quality review phases conducted under established industry guidance appropriate to installation circumstances present at site conditions encountered before and during work progression consistently monitored for satisfactory results achieved in accordance with approved plans and product documentation requirements available from manufacturer source materials provided for installer reference use throughout project implementation activities undertaken responsibly by qualified trade personnel familiar with rectified porcelain tile systems and related substrate preparation methods necessary for successful installation performance over time under anticipated service conditions applicable to intended setting location environment exposure levels and occupancy usage demands expected following completion and curing of all installation materials according to their respective instructions and limitations stated by each system component manufacturer involved in the assembly as selected for compatibility with tile, substrate, environmental exposure, and intended use conditions determined by project professionals responsible for specification and execution oversight at the location where material will be installed and maintained after turnover to owner or end user for normal service life operation and routine care practices recommended for porcelain surfaces and associated grout joints or flexible sealant locations provided within completed tiled assembly as required by design and field conditions present throughout installation footprint including perimeters, transitions, penetrations, and changes of plane where rigid grout should not replace required movement accommodation provisions specified by applicable standards and project documents prepared for work involved; select the final layout only after evaluating the actual tile and installation area.
Step 2: Tile Installation
- Confirm that the substrate is clean, dry, flat, stable, structurally sound, and free of contaminants that could interfere with adhesion. Correct cracks, deflection, unevenness, or unsuitable surfaces before installation.
- Install required waterproofing or moisture-management components before setting tile in wet or moisture-prone areas. Exterior assemblies must also provide suitable drainage and account for environmental exposure.
- Use a high-quality mortar approved for porcelain tile, the substrate, tile size, application, and exposure conditions. Mix and apply it according to the mortar manufacturer’s instructions.
- Select the trowel and setting method based on substrate conditions and manufacturer guidance. Press tiles firmly into the mortar and periodically lift a tile to verify adequate transfer and coverage for the application.
- Maintain consistent alignment and joint spacing. Regularly check the surface plane while setting the rectified tile, and clean mortar from the face and joints before it hardens or exceeds workable removal conditions specified by setting-material manufacturer guidance for safe cleanup and finished appearance quality preservation throughout installation progress on site activities undertaken by qualified installer teams following professional methods suited to porcelain tile work scope requirements and environmental factors present during setting period as documented in product instructions applicable to project selected materials and assembly components used in completed system design intended for long-term service under anticipated conditions of occupancy or exposure relevant to the installation location involved within building interior or exterior areas as applicable based on approved product suitability confirmation received before work begins and maintained across all phases from substrate preparation through final cure and turnover while protecting tile surfaces from damage, contamination, traffic, moisture, temperature extremes, and other conditions that could adversely affect bond formation or finished assembly performance; follow applicable instructions rather than relying on generalized timing assumptions or unsupported project-specific values not established by the manufacturers responsible for each installation-system component selected for use on project under actual jobsite conditions verified before installation proceeds further beyond test areas or initial placement sections where adjustments may be necessary to meet standards and design intent satisfactorily without compromising material integrity, bond quality, joint consistency, movement accommodation, or long-term maintainability of tiled surface assembly completed for owner acceptance following inspection and correction of any identified deficiencies before opening area to service as scheduled within project plan requirements and cure limitations prescribed by product manufacturers involved in installation process and care guidelines supplied for ongoing use thereafter throughout expected service life under normal conditions and proper maintenance practices observed consistently by occupants or facility staff responsible for cleaning and upkeep of finished surfaces as recommended for porcelain tile and selected grout or sealant products installed alongside it within assembly overall to ensure compatible care approach is followed without abrasive, acidic, or otherwise unsuitable agents that may damage components or alter intended appearance over time unnecessarily; allow mortar to cure as directed before grouting or exposing the installation to traffic or moisture.
Step 3: Cutting
- Use a wet saw or professional cutting equipment fitted with a blade suitable for porcelain tile.
- Measure and dry-fit cuts before setting them, particularly at perimeters, penetrations, corners, and transitions.
- Handle rectified factory edges and cut edges carefully to reduce chipping. Place cut edges where they can be properly finished or concealed when practical.
- Wear suitable personal protective equipment and use dust-control practices that comply with tool instructions and applicable safety requirements.
Step 4: Joint Filling
- Choose a grout compatible with porcelain tile, the selected joint width, exposure conditions, and intended application.
- Apply and clean grout according to the manufacturer’s directions, taking care not to leave haze on the natural-finish surface.
- Provide movement joints at perimeters, changes of plane, transitions, and other required locations. Use an appropriate flexible sealant rather than rigid grout where specified.
- Protect the completed installation and allow mortar, grout, and sealant to cure fully according to their respective manufacturers’ instructions.
Step 5: Cleaning & Maintenance
- Clean routinely with a pH-neutral cleaner suitable for porcelain tile and the installed grout.
- Remove spills and residue promptly, particularly in kitchens, bathrooms, and exterior settings.
- Avoid abrasive tools, harsh chemicals, or cleaning products not approved for porcelain tile and the selected grout system.
- Maintain grout, sealant, movement joints, drainage components, and adjacent waterproofing details as required for the installation environment.
Disclaimer
These instructions are general guidance and do not replace Happy Floors documentation, project specifications, local building codes, or tile-industry standards. Product suitability, substrate preparation, setting materials, waterproofing, drainage, movement joints, and installation methods must be confirmed for the specific project by qualified professionals. Inspect and approve all material before installation.