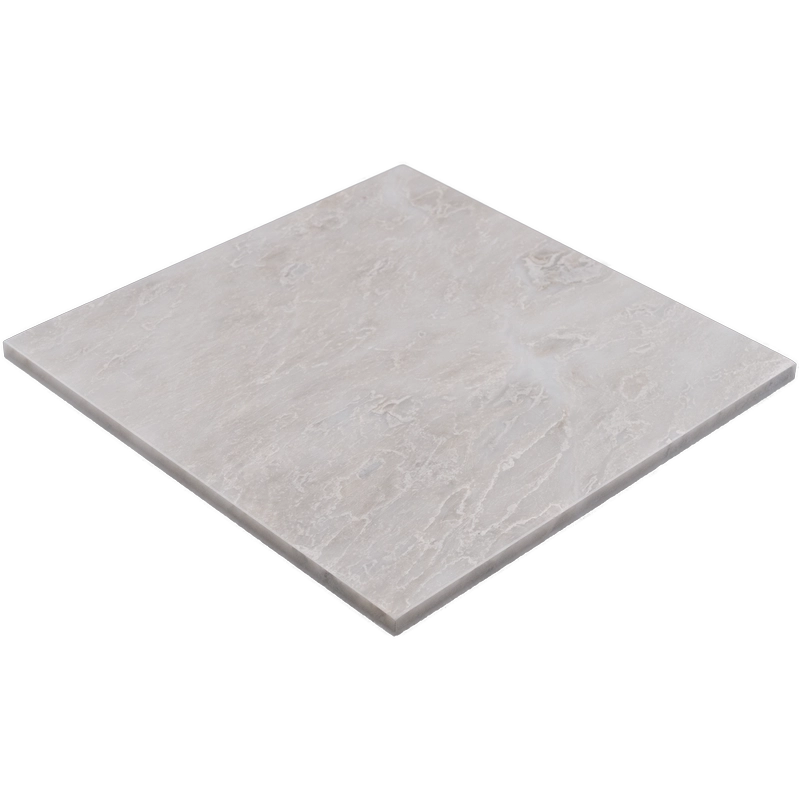
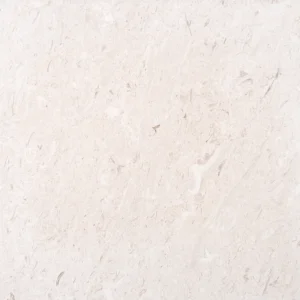
Iceberg Marble Tile 12″x12″ Polished – White Marble with Beveled Edge
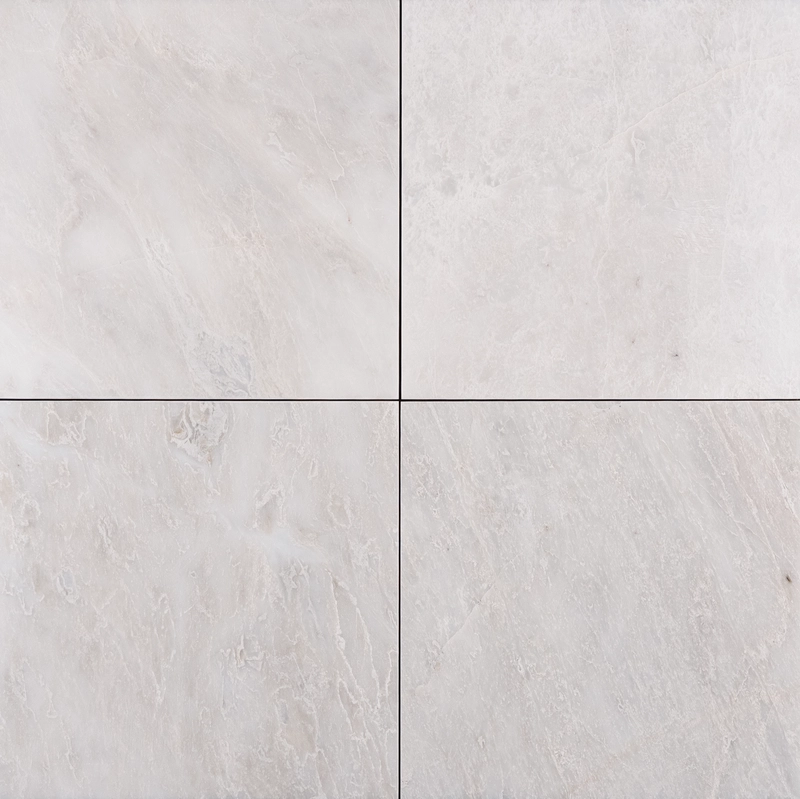
Glossy Elegance in a Perfect Square
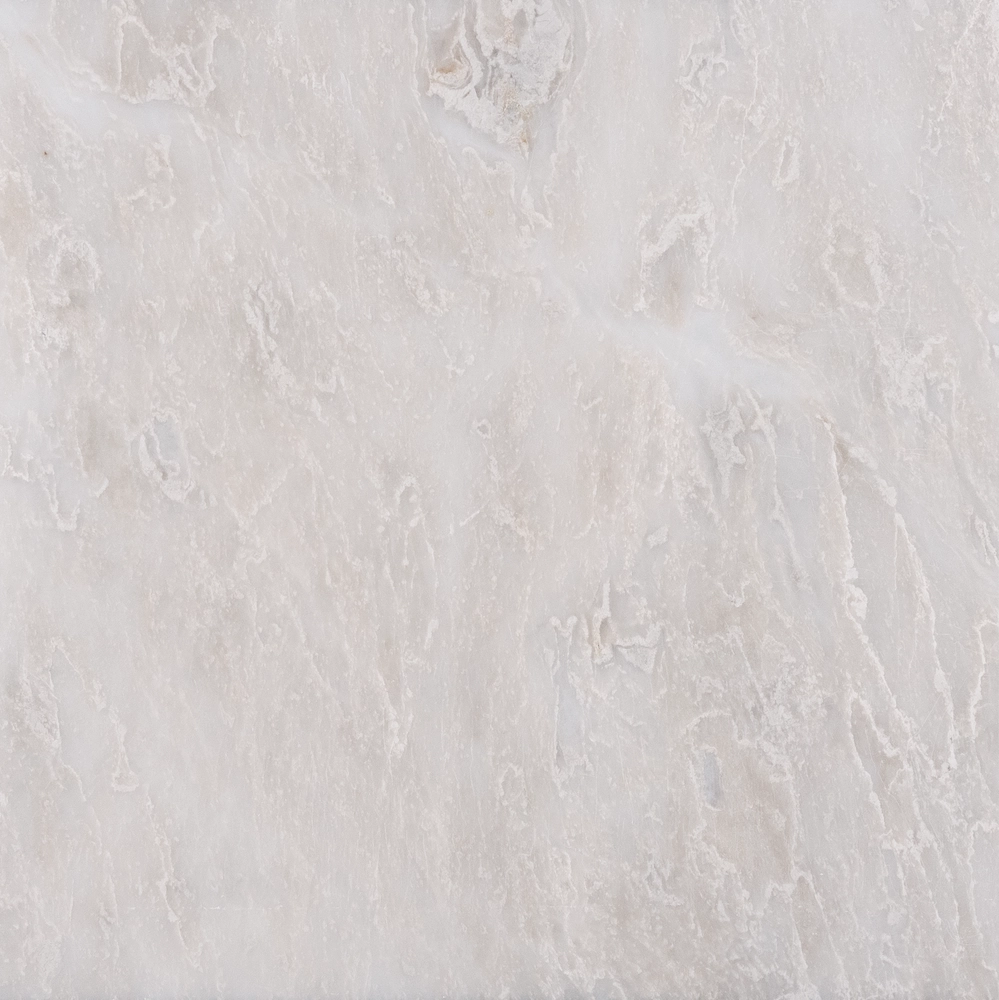
Elevate your design with the Iceberg Marble Polished Tile, a refined choice for sophisticated interiors. This tile showcases a crisp white base with delicate icy veining, creating a clean and luminous surface. Additionally, its polished finish reflects light beautifully, making any space feel brighter and more spacious.
Crafted from high-quality natural marble, this tile features beveled edges that add depth and definition. Moreover, the standard 12″x12″ format allows for both classic and modern layouts, whether you’re designing a minimalist bathroom or a luxurious kitchen backsplash. Thanks to its durability and low maintenance needs, it’s also ideal for accent walls and boutique commercial spaces.
Product Features – Iceberg Marble 12″x12″ Polished Tile
- Material: Natural Iceberg Marble
- Finish: Polished – enhances reflectivity and depth
- Color: Bright white with icy veining
- Size: 12″x12″ (30.5 x 30.5 cm)
- Thickness: 0.47″ (1.2 cm)
- Edge Detail: Beveled edge for visual refinement
- Best Use: Indoor walls and low-traffic residential floors
Why Choose the Iceberg Marble 12″x12″ Polished Tile?
Because of its elegant finish and versatile size, this tile works beautifully in a wide range of design schemes. It blends effortlessly into contemporary, coastal, or transitional spaces. In addition, each tile is unique, showcasing natural veining that adds authentic character and depth. Whether you’re renovating a small powder room or creating a high-end shower surround, this tile brings both form and function.
Installation & Care Tips
- Use a premium white thin-set adhesive for best results
- Seal before grouting to protect the polished finish
- Apply non-sanded grout to avoid surface scratches
- Clean regularly with a pH-neutral stone cleaner
Installation Guide – Step by Step
Step 1: Surface Preparation – Solid & Level Foundation
- Clean the substrate thoroughly to remove all dust, oil, and old adhesives.
- Use a long level to check for dips or high spots. Correct with a self-leveling compound if necessary.
- For wet areas, apply a waterproofing membrane to prevent moisture infiltration.
Step 2: Layout Planning – Balanced and Blended
- Mark center layout lines for a symmetrical starting point.
- Dry-lay tiles to preview and blend veining and color variation. Iceberg marble features cool tones and icy movement that benefit from pre-layout planning.
- Use **1/16″ to 1/8″ grout joints**. Beveled edges will accentuate grout lines, so maintain consistency.
Step 3: Mortar Application – Use White Thin-Set
Recommended Adhesives:
- Laticrete 254 Platinum White
- Mapei Ultraflex LFT White
- Ardex X77 or X5 White
Instructions:
- Apply thin-set using a 1/4″ or 3/8″ square-notched trowel.
- Back-butter tiles to ensure full coverage and secure bonding.
- Work in small sections to keep adhesive fresh and workable.
Step 4: Cutting & Fitting – Chip-Free Finish
- Use a wet saw with a continuous-rim diamond blade designed for marble to avoid chipping polished edges.
- Test-fit cut tiles and polish exposed cuts using a marble file or diamond pad for a seamless appearance.
Step 5: Tile Setting – Level and Flush
- Set tiles into the adhesive and tap gently with a rubber mallet for level placement.
- Use a leveling system to maintain an even surface and reduce lippage.
- Bevel edges should be carefully aligned—irregular spacing will be visible once grouted.
- Clean off any mortar residue immediately to protect the polished surface from haze or dulling.
- Allow at least 24 hours to cure before grouting.
Step 6: Grouting & Sealing – Preserve the Shine
- Pre-seal with a penetrating marble sealer before grouting to avoid staining and haze on the polished finish.
- Use non-sanded grout to prevent scratching. Apply grout diagonally to fill joints between beveled edges.
- Wipe away grout residue immediately with a damp sponge and buff dry with a soft cloth after 15–20 minutes.
- After grout cures (typically 72 hours), apply a second coat of sealer to lock in protection.
Maintenance Tips – Long-Lasting Radiance
- Use pH-neutral, non-abrasive stone cleaners only. Avoid acidic products that can etch polished marble.
- Wipe spills promptly—especially oil, wine, and citrus-based liquids.
- Re-seal every 6–12 months depending on foot traffic and exposure.
- Use rugs or pads under furniture to prevent scratches.
Shipping & Packaging
Each 12″ x 12″ Iceberg Polished Marble Tile with beveled edge is securely packaged and protected with foam inserts. Inspect all tiles prior to installation and store in a climate-controlled space.
Important Note
Natural Iceberg marble is unique in tone and veining. Always dry-lay to determine ideal placement and blend. Stonemarket USA is not responsible for installation errors, improper substrate preparation, or natural variation in the stone.