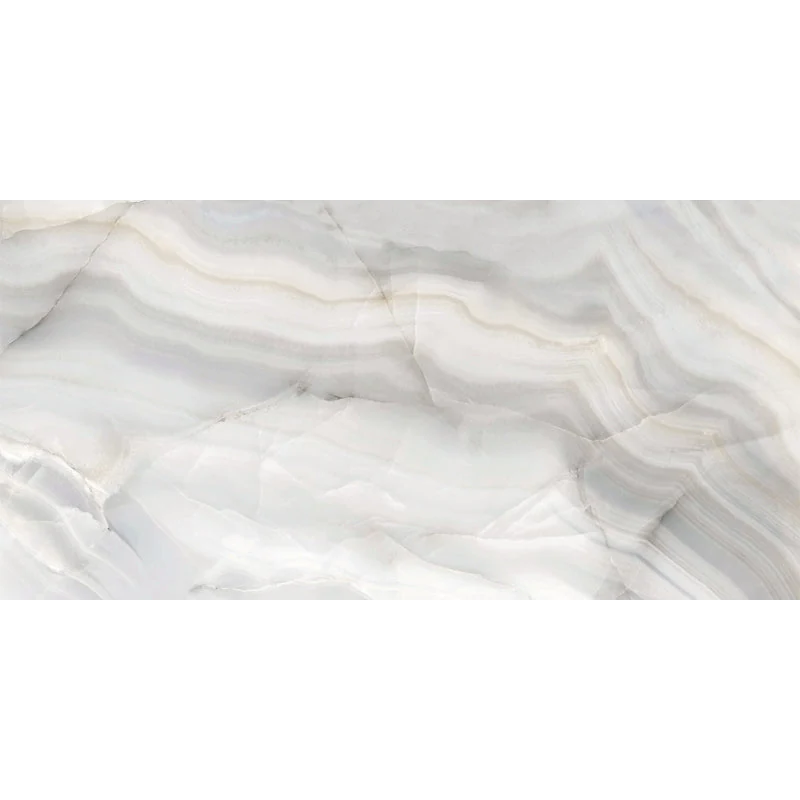
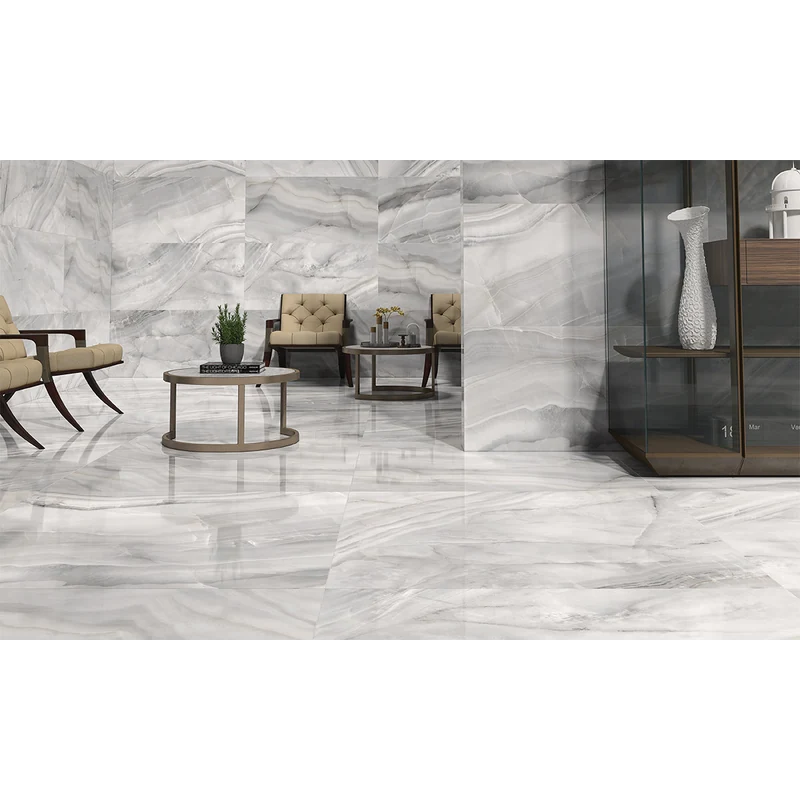
Athena Plata Rodas Perla 12×24 Porcelain Tile Polished Rectified
Refined and contemporary, Happy Floors’ Athena Plata Rodas Perla 12×24 porcelain tile brings a cool gray palette in a polished finish. The elongated format helps minimize grout lines for a smooth, modern surface, while rectified edges support tight, consistent joints across walls or floors.
Engineered in durable porcelain with a 9.5mm (3/8") thickness and a PEI 3 wear rating, this tile balances style and everyday practicality for residential spaces. Frost resistance expands design options to exterior facades in freeze–thaw climates. Use it as a clean, standalone field tile or pair it with coordinating pieces to complete a cohesive design.
The polished surface delivers a luminous look that complements both warm and cool materials, making Athena Plata a versatile choice for kitchens, baths, living areas, and feature walls.
Features
- Porcelain body for durability and easy care
- Collection/Color: Athena – Plata (gray tone)
- Finish: Polished
- Edge: Rectified for precise, uniform grout joints
- Size: 12×24 tile
- Thickness: 9.5mm (3/8 inch)
- PEI 3 wear rating suitable for residential floors and walls
- Frost resistant for freeze–thaw exterior wall applications
Recommended Applications
- Residential interior floors (dry areas)
- Residential interior walls
- Commercial interior walls
- Backsplashes
- Shower walls
- Fireplace surrounds
- Exterior walls/facades (freeze–thaw)
Installation Guide – Athena Plata Rodas Perla 12×24 Porcelain Tile Polished Rectified
Important Advisory
Always follow the tile manufacturer’s instructions, local building codes, and recognized industry standards (ANSI A108/A118 and TCNA guidelines). Verify substrate suitability, movement accommodation, and waterproofing/drainage where required.
Step 1: Layout & Planning
- Confirm the substrate is clean, dry, structurally sound, and flat within tolerances appropriate for 12×24 tile.
- Dry-lay to plan the layout, balance cuts, and align pattern/vein direction if present.
- Blend tiles from multiple boxes to distribute any shade variation.
- Use spacers consistent with rectified tile and include movement joints per TCNA EJ171.
Step 2: Tile Installation
- Use a polymer‑modified thin‑set mortar approved for porcelain and for the tile size.
- Key mortar into the substrate, then comb with an appropriate notched trowel; back‑butter tiles as needed for coverage.
- Set tiles with a slight sliding motion to collapse ridges and achieve proper bond; target coverage per industry requirements based on area and exposure.
- Use a leveling system when helpful to minimize lippage on larger-format installations.
- Allow mortar to cure per manufacturer guidance before grouting or light traffic.
Step 3: Cutting
- Cut with a wet saw using a premium diamond blade designed for porcelain.
- Support the tile fully and mark cuts carefully to reduce chipping.
- Ease sharp cut edges where they will be exposed.
Step 4: Joint Filling
- Select a grout suitable for porcelain and the chosen joint width; follow manufacturer mixing and curing instructions.
- Pack joints fully, clean diagonally, and remove residue promptly.
- Use appropriate sealants at movement joints and changes of plane; do not grout these areas.
- Protect the installation from traffic until grout has cured.
Step 5: Cleaning & Maintenance
- Clean routinely with a pH‑neutral cleaner suitable for porcelain tile; avoid acids and harsh abrasives.
- Use entry mats and furniture pads to reduce abrasive wear.
- Maintain grout per manufacturer recommendations; seal cementitious grout if advised.
Disclaimer
Installation should be performed by qualified professionals. Confirm actual materials, lot-to-lot variations, and application suitability before installation. Stone Market USA is not responsible for issues arising from improper installation, handling, or site conditions.