Dolomite & Bardiglio Siena Marble Mosaic Tile – 11.7″ x 11.7″ Polished Finish
Dynamic Elegance with a Modern Touch
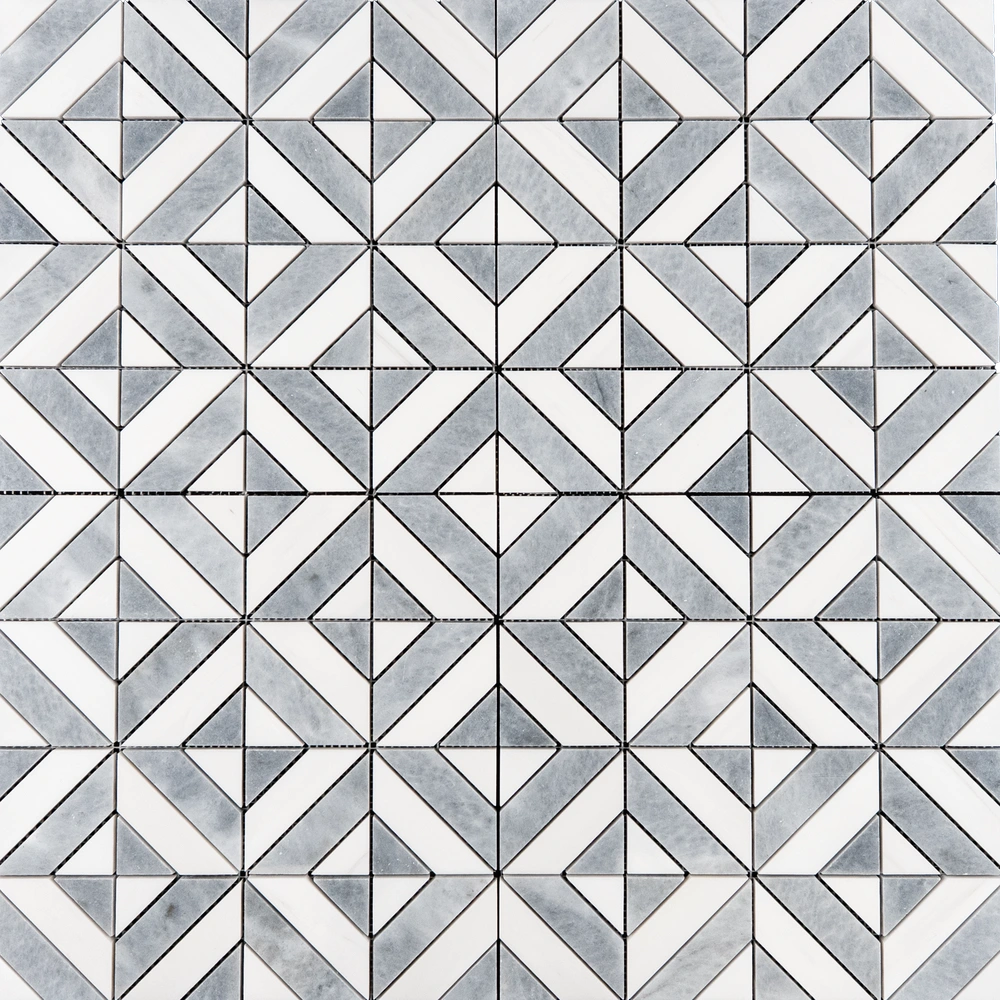
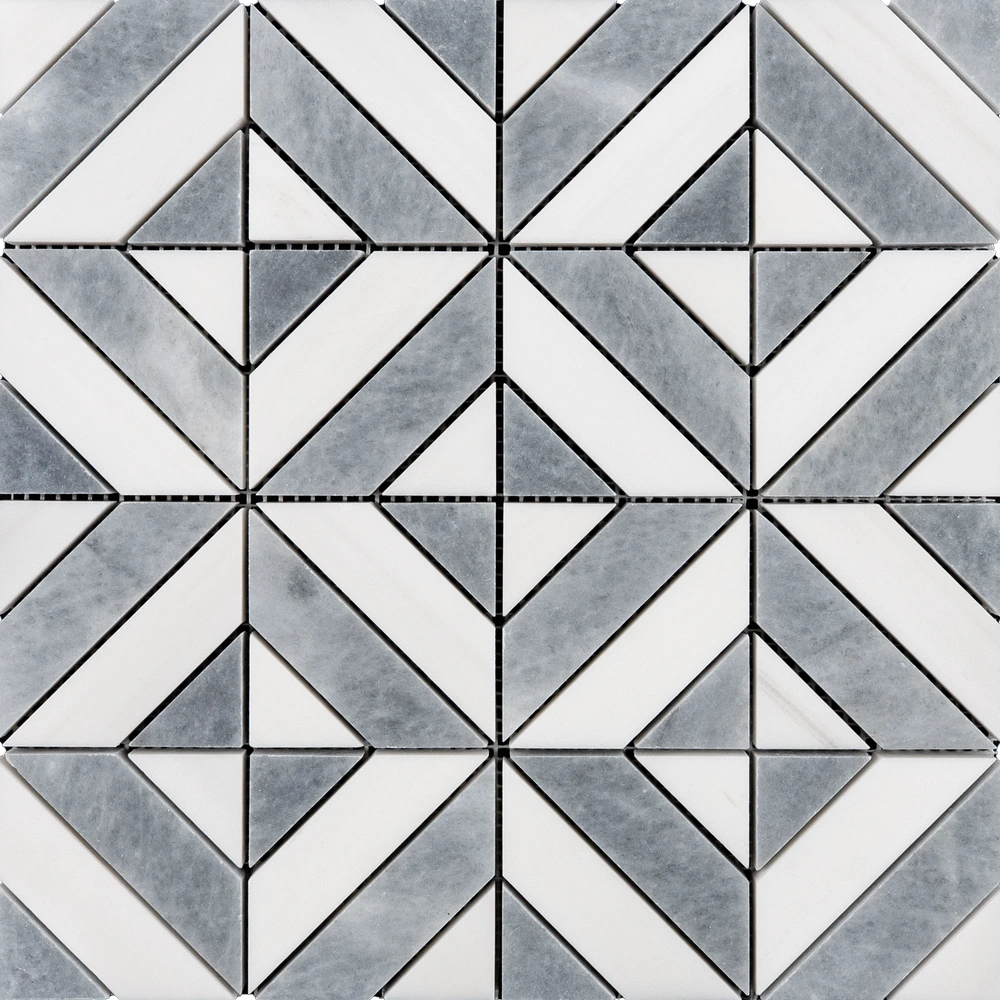
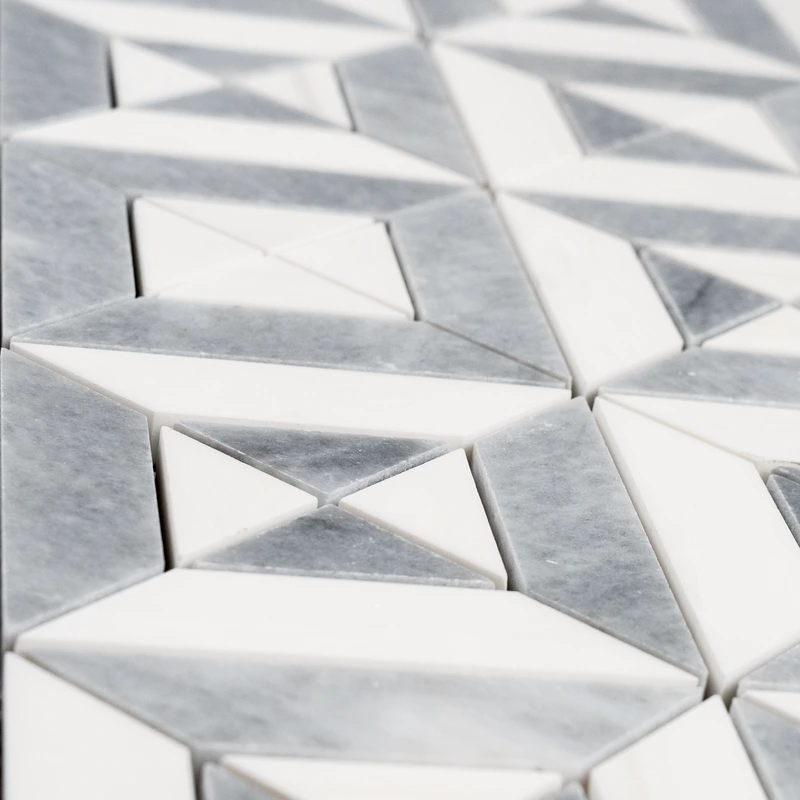
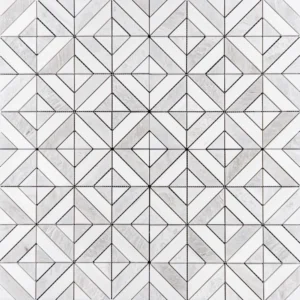
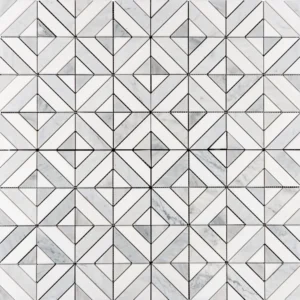
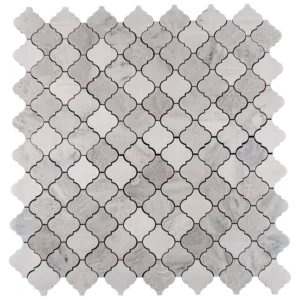
Bring your walls to life with the Dolomite & Bardiglio Siena Marble Mosaic Tile. This 11.7″ x 11.7″ sheet features a blend of crisp white Dolomite and smoky gray Bardiglio marble, arranged in an eye-catching Siena pattern. The polished finish highlights the natural veining, creating a surface that reflects light and adds brightness to any room.
Thanks to its versatile mix of white and gray tones, this mosaic tile pairs beautifully with both classic and modern designs. Its dynamic pattern adds movement and visual interest, making it a standout choice for backsplashes, shower walls, and accent areas. Moreover, the durable marble construction ensures long-lasting beauty even in high-moisture spaces.
Furthermore, the mesh backing allows for quick, easy installation and consistent alignment. Whether you’re refreshing a bathroom or updating a kitchen, this tile brings a sophisticated blend of color and texture to your project.
Product Highlights – Dolomite & Bardiglio Siena Features
- Material: Natural Dolomite and Bardiglio Marble
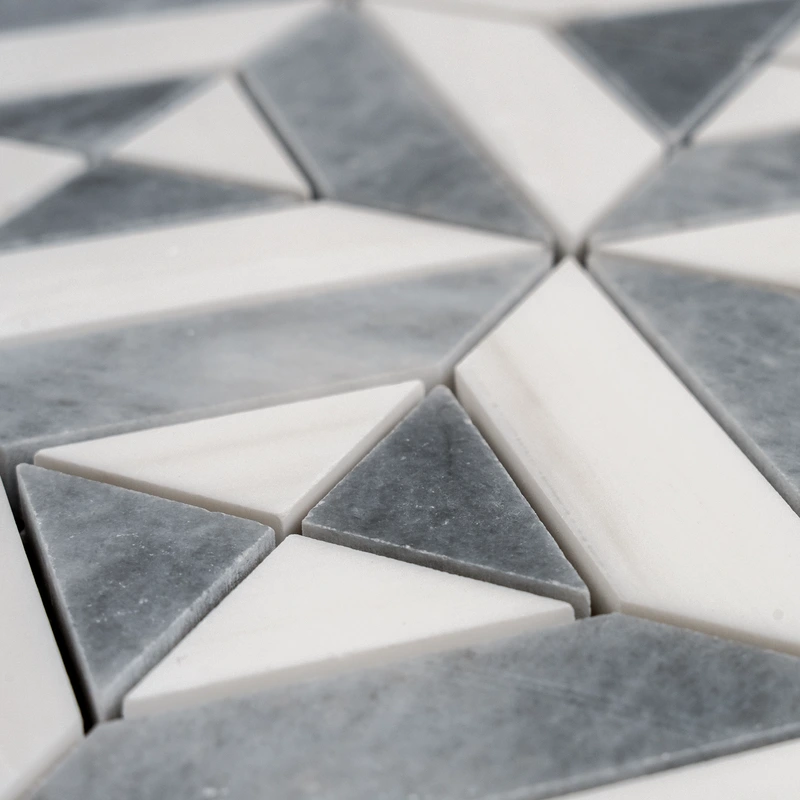
- Color: White and gray mix with subtle veining
- Finish: Polished – smooth and glossy
- Pattern: Siena design – contemporary and refined
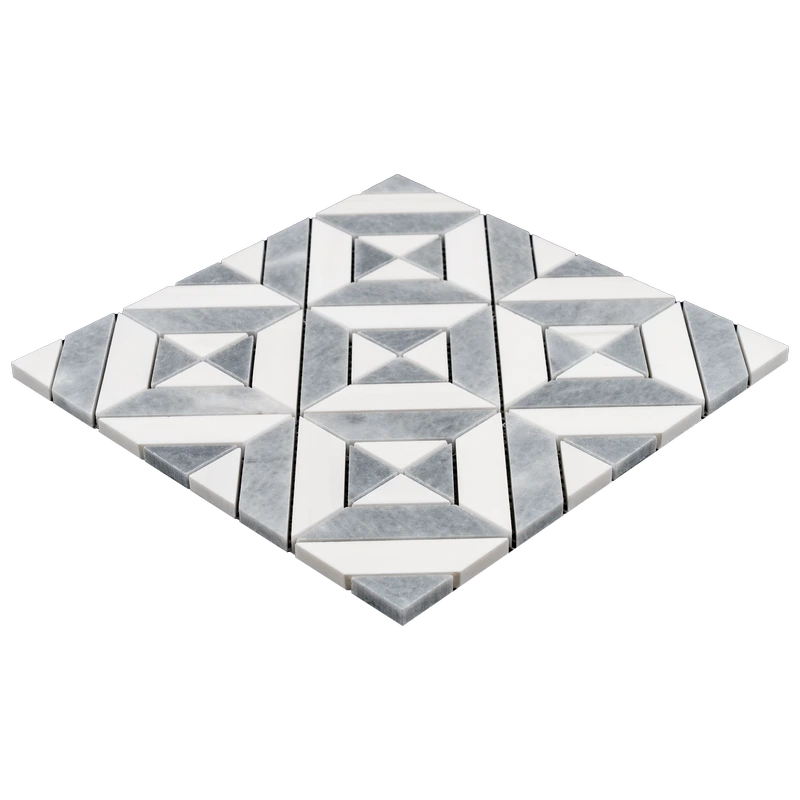
- Sheet Size: 11.7″ x 11.7″ (29.7 x 29.7 cm)
- Thickness: 0.4″ (1 cm)
- Installation: Mesh-mounted for easy application and alignment
- Use: Indoor walls – bathrooms, kitchens, backsplashes, and accent walls
Why Choose This Siena Mosaic Tile?
This mosaic tile offers a refined blend of Dolomite and Bardiglio marble, perfect for adding luxury and depth to any space. Its polished finish highlights the stone’s natural beauty, while the Siena pattern brings a touch of modern sophistication. Additionally, its sturdy construction ensures it’s ideal for both residential and light commercial applications.
Installation & Maintenance Tips
- Use white thin-set adhesive for secure installation.
- Seal the tile after installation to protect against moisture and stains.
- Apply non-sanded grout to avoid scratching the polished surface.
- Clean regularly with a pH-neutral stone cleaner to maintain its shine.
Packaging & Coverage
- Sold per box – includes 5 mesh-mounted sheets
- Coverage: approximately 4.75 sq. ft. per box
- Weight: approximately 25.00 lbs per box
- Securely packaged to prevent damage during shipping
Installation Guide – Step by Step
Step 1: Surface Preparation – The Key to Longevity
- Start with a surface that’s not just clean but free from any dust, oil, or residue—this ensures a strong, lasting bond.
- Make sure the substrate is level, solid, and completely crack-free—Dolomite & Bardiglio Siena marble deserves nothing less.
- In moisture-prone areas like showers, apply a high-quality waterproofing membrane to preserve your stone’s integrity.
- Remove any trims or outlet covers that could interrupt the seamless flow of your Petit Beurre pattern.
- If needed, apply a leveling compound to create a smooth canvas for your mosaic masterpiece.
Step 2: Layout Planning – Let the Stone Shine
- Find the center point of your installation area—this ensures your design radiates balance and symmetry.
- Dry-lay several sheets to get a feel for the unique interplay of Dolomite’s crisp white backdrop and Bardiglio Siena’s elegant gray veining—no two sheets are alike, making each installation one-of-a-kind.
- Adjust your layout to avoid small, awkward cuts that could compromise the overall design flow.
- Use 1.5–3 mm spacers between sheets to achieve consistent, professional grout lines that complement the polished finish.
Step 3: Adhesive Application – Trust in Proven Performance
Recommended Thin-Set Brands (Perfect for Natural Stone):
- Mapei – for its consistent quality and reliability.
- Laticrete – trusted by pros for natural stone installations.
- Ardex – a go-to choice for a strong, secure bond.
Instructions:
- Always choose a white, non-staining thin-set mortar to keep your polished marble pristine—this helps prevent any unwanted color changes beneath the surface.
- Mix small batches that can be applied within 30 minutes—this ensures a consistent, workable adhesive.
- Using a 1/4″ notched trowel, spread thin-set evenly—start with the flat side, then comb at a 45° angle to guarantee uniform coverage.
- Back-butter each sheet to enhance the bond and reduce any risk of lippage—especially important for maintaining the smooth, polished finish.
- Work in sections so the thin-set doesn’t dry before you set the sheets—patience is key to a flawless installation.
Step 4: Cutting & Fitting – Precision Meets Craftsmanship
- Use a wet saw with a fine diamond blade designed for marble—this keeps the edges clean and sharp, preserving the stone’s natural beauty.
- Mark cuts with precision using a pencil—this ensures accuracy and a perfect fit every time.
- Carefully smooth any cut edges with a stone file or rubbing block—this small step preserves the polished finish and showcases your attention to detail.
- Dry-fit sheets to confirm the pattern’s integrity and flow—every sheet tells a story of nature’s artistry, so let it shine.
Step 5: Setting Tiles – The Art of the Mosaic
- Begin from the center and work outward—this ensures symmetry and balance that elevates the entire space.
- Press mesh-backed sheets gently but firmly into the thin-set, letting the natural marble’s character take center stage.
- Use spacers to maintain consistent grout lines, keeping the overall design clean and elegant.
- Gently tap with a rubber mallet to level the tiles and avoid lippage—your finished surface deserves the perfect polish.
- Wipe away excess thin-set immediately with a damp sponge—this prevents any haze or residue on the polished finish.
- Allow at least 24 hours of curing time before grouting—greatness takes time.
Step 6: Grouting & Sealing – Preserve the Beauty
- Choose non-sanded grout to protect the polished marble from scratches—it’s the final touch that makes all the difference.
- Apply grout diagonally with a rubber float to fill all joints—this method ensures every corner is secure and complete.
- Wipe off excess grout immediately with a damp sponge—don’t let any haze hide your stone’s brilliance.
- After 15–20 minutes, buff any remaining haze with a soft, dry cloth—let that polished shine radiate.
- Allow the grout to cure for 72 hours—patience ensures longevity.
- Finish with a penetrating sealer designed for marble—this step preserves your investment by protecting against stains and moisture while letting the stone’s natural veining remain the star of the show.
Maintenance Tips – Keep It Radiant
- Use only pH-neutral cleaners specifically formulated for natural stone—harsh chemicals can dull the stone’s natural glow.
- Avoid acidic or abrasive substances that could etch the polished finish—treat your marble with the respect it deserves.
- Reseal the surface periodically, based on usage and exposure—this simple step keeps the tile’s brilliance alive year after year.
- Place felt pads under furniture to prevent scratches—small measures add up to lasting beauty.
Shipping & Packaging – Crafted with Care
Each mosaic sheet is individually wrapped and carefully packaged to reduce the risk of breakage. The mesh backing ensures easy installation and seamless alignment of the intricate Petit Beurre pattern—an essential detail for preserving the tile’s refined aesthetic.
Important Note – Let Nature Be Your Guide
Each Dolomite & Bardiglio Siena marble sheet carries its own natural veining and subtle color variations—this uniqueness is what makes natural stone so special. We highly recommend professional installation and the use of premium adhesives and sealers for best results. Stonemarket USA is not responsible for improper installation—every masterpiece deserves a master craftsman.