Loading... (Warehouse Local Time)
Mon–Fri: 9:00 AM – 6:00 PM |

Calacatta Marble Mosaic Tile – Diamond Honed White

The Calacatta Diamond Honed Marble Mosaic Tile showcases bold green-gold veining in a diamond pattern, adding timeless elegance to walls, backsplashes, and showers.

$22.49 / Piece

Item Code: MM148-24075 Category

720 Pieces in stock

Est. Coverage: 0.87 sq. ft. per piece | 8.70 sq. ft. per box | 470 sq. ft. per crate | Request Info
Note on Samples:
Sample pieces are small cut sizes, approximately 3" x 3" to 8" x 8", and intended for color and finish reference only.
If you need a full-size sample, please contact us.

Request Custom Pricing for Large Orders

Planning a large project? Orders over 500 sq. ft., full crates, or commercial applications may qualify for exclusive volume pricing. Reach out today and let us provide a custom quote tailored to your needs.

Request Volume Quote
  • Volume pricing available for qualified bulk orders.
  • We offer custom sizes, finishes, and crate-based shipments.

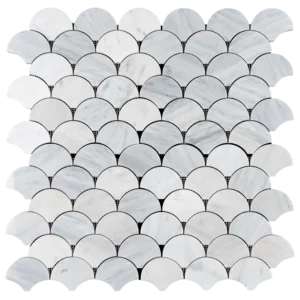
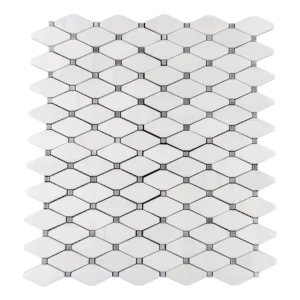
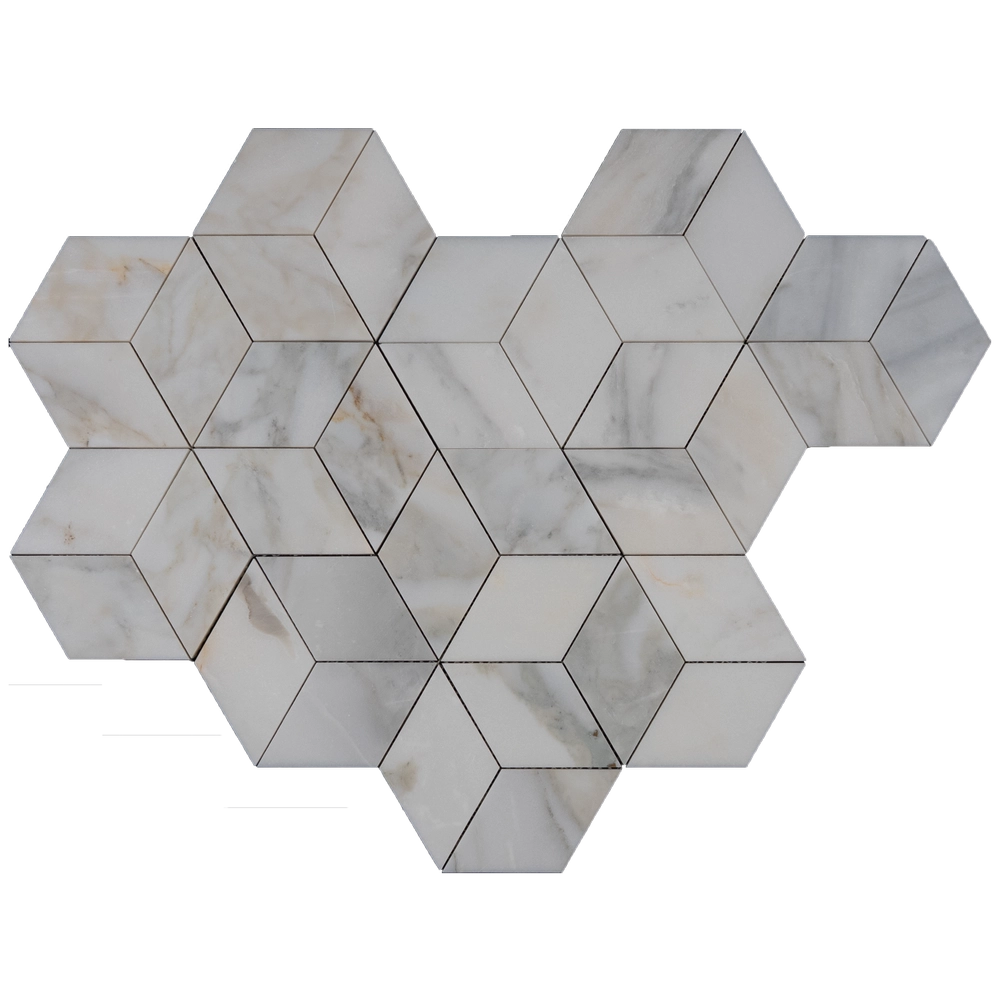
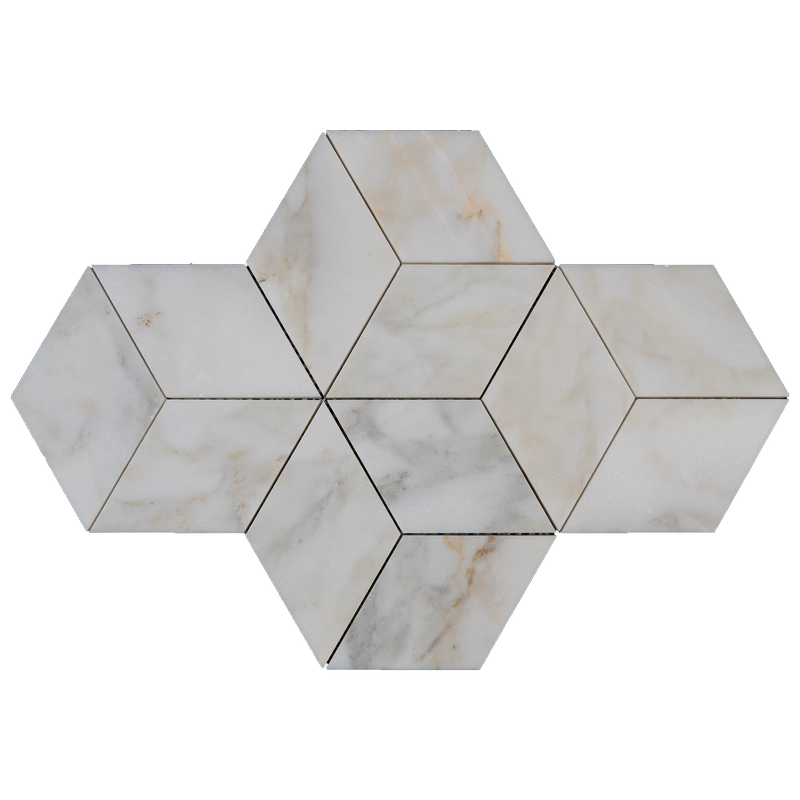
Calacatta Diamond Honed Marble Mosaic Tile – Classic Geometry, Modern Elegance

The Calacatta Diamond Honed Marble Mosaic Tile combines the timeless beauty of Calacatta marble with a distinctive diamond pattern. Its crisp white background and bold gray veining create a refined look that works beautifully in both modern and classic interiors.

The honed finish delivers a soft, matte texture that reduces glare and enhances the natural veining of the stone. As a result, it provides an elegant yet practical option for areas that require both style and durability. Moreover, the diamond layout introduces dynamic geometry, giving walls, backsplashes, and shower surrounds a sophisticated sense of movement.

Key Features

  • Material: Premium natural Calacatta marble
  • Finish: Honed – smooth, matte surface
  • Pattern: Diamond mosaic design
  • Color: White marble with bold gray veining
  • Sheet Size: Approx. 10.4″ x 12″
  • Applications: Suitable for walls, backsplashes, shower enclosures, and decorative features

Why Choose Calacatta Diamond Honed Mosaic?

This mosaic blends the elegance of Calacatta marble with the bold geometry of diamond patterns. Furthermore, the honed finish makes it ideal for creating soft, refined surfaces that complement a wide range of design aesthetics. In addition, its durable marble structure ensures longevity, making it a premium choice for both residential and commercial spaces.

Weight4.81 lbs
Dimensions12 × 10.4 × 0.40 in
Chip Size (Inches)

Collection

Calacatta Collection

Color

Design

Diamond, Waterjet Decos

Finish

Material

Size (inches)

Thickness

Usage Area

Backsplash, Commercial Interior Walls, Outdoor Walls, Residential Interior Floors, Residential Interior Walls, Shower Floors, Shower Walls

Installation Guide – Calacatta Diamond Honed Marble Mosaic Tile

Material Notes

  • Natural Calacatta white marble with soft veining and a honed (matte) finish.
  • Diamond-shaped chips factory-spaced and typically mesh-mounted on ~12"×12" sheets (some lots may be paper-faced).
  • Suitable for walls, backsplashes, shower surrounds, and light-traffic residential floors. Numerous grout joints increase traction vs. large tiles.

Step 1: Surface Preparation

  • Substrate must be clean, dry, sound, and flat (≤ 1/8" variation in 10′). Skim/patch as needed—mosaics telegraph unevenness.
  • Approved substrates: cement backer board, fully cured concrete, or mortar bed meeting ANSI standards.
  • Wet areas: install an ANSI A118.10 waterproofing membrane. Shower floors require a 1/4" per foot slope to the drain.
  • Because Calacatta is light, always use white setting materials to avoid shadowing/picture framing.

Step 2: Dry Layout & Pattern Orientation

  • Blend sheets from multiple boxes to distribute natural shade/vein variation.
  • Snap level/plumb reference lines. Decide the diamond orientation (points vertical or at 45° “harlequin”) and keep it consistent.
  • Hide the sheet grid: trim mesh edges so sheets interlock and stagger seams. Align diamond points and connectors across sheets.
  • Plan balanced perimeter cuts; avoid slivers. Consider framing fields with a border or metal/stone profile for clean terminations.

Step 3: Adhesive (White Thin-Set) Application

Adhesive:

  • White, polymer-modified thin-set for natural stone (ANSI A118.4/A118.15). Avoid premixed mastics, especially in wet zones.

Trowel & Technique:

  • Use a 3/16" V-notch or 1/4"×3/16" V-notch on flat substrates.
  • Key in with the flat side, comb in one direction, then lightly flatten ridges to prevent telegraphing and squeeze-through at diamond tips.
  • Work in areas you can cover within 10–15 minutes to avoid skinning; maintain a uniform bed for a flat plane.

Step 4: Setting the Sheets

  • Place sheets to your layout lines; press/iron with a rubber grout float or beating block for full contact without stressing the points.
  • Use wedge spacers to maintain factory joint spacing—do not butt-joint.
  • Where mesh irregularities cause lippage, back-butter individual diamonds and reset immediately.
  • Clean squeeze-through thin-set from joints and faces right away with a barely damp sponge/microfiber.
  • If paper-faced: set paper out, beat in, lightly wet paper after initial grab (~10–20 min), remove, and true up joints before cure.

Step 5: Cutting & Detailing

  • Cut with a wet saw using a continuous-rim diamond blade for marble; painter’s tape over cut lines helps reduce chip-out.
  • Support delicate diamond points near cuts; dress exposed cuts with a rubbing stone.
  • Finish edges with stone trims, metal profiles, or a framed border row for a clean termination.

Step 6: Grouting (Honed Marble)

  • Allow thin-set to cure (typically 24 hours).
  • For joints ≤ 1/8", use unsanded grout. For ~1/8"–3/16", a fine-aggregate, marble-safe grout may be used—test first to confirm no abrasion.
  • On white marble, consider a marble-safe grout release or pre-seal to limit pigment uptake; choose a light neutral grout for a soft look.
  • Pack diagonally with a rubber float, taking care around sharp tips; clean with minimal water to avoid washout or shading.

Step 7: Sealing

  • After grout cures (~72 hours), apply a penetrating, breathable sealer approved for marble and grout. Choose natural-look to preserve the honed finish.
  • Re-seal periodically based on exposure (e.g., every 1–2 years in wet/high-use areas).

Maintenance

  • Clean with pH-neutral, non-abrasive stone cleaners only; avoid acids, vinegar, bleach, and abrasive pads (marble can etch).
  • In showers, squeegee/wipe dry after use to reduce mineral deposits; use marble-safe scale removers if needed.

Movement Joints

  • Honor structural/expansion joints and provide soft joints per TCNA EJ171 at perimeters, changes of plane, and large expanses.
  • Use 100% silicone (stone-safe) at inside corners and where the mosaic meets dissimilar materials.

Important Notes & Disclaimer

  • Calacatta varies in tone and veining—dry-lay and blend sheets before setting. Expect slight chip size/thickness tolerances.
  • Protect delicate diamond points during handling and beating-in; avoid heavy point pressure.
  • Stonemarket USA is not responsible for substrate issues or improper installation. Professional installation is recommended.
Category
Category
Material
Material
Color
Color
Size
Size
Finish
Finish
Design
Design
Thickness
Thickness
Application
Usage Area
Request a Quote
Tell us briefly about your project, sq ft, and timing.