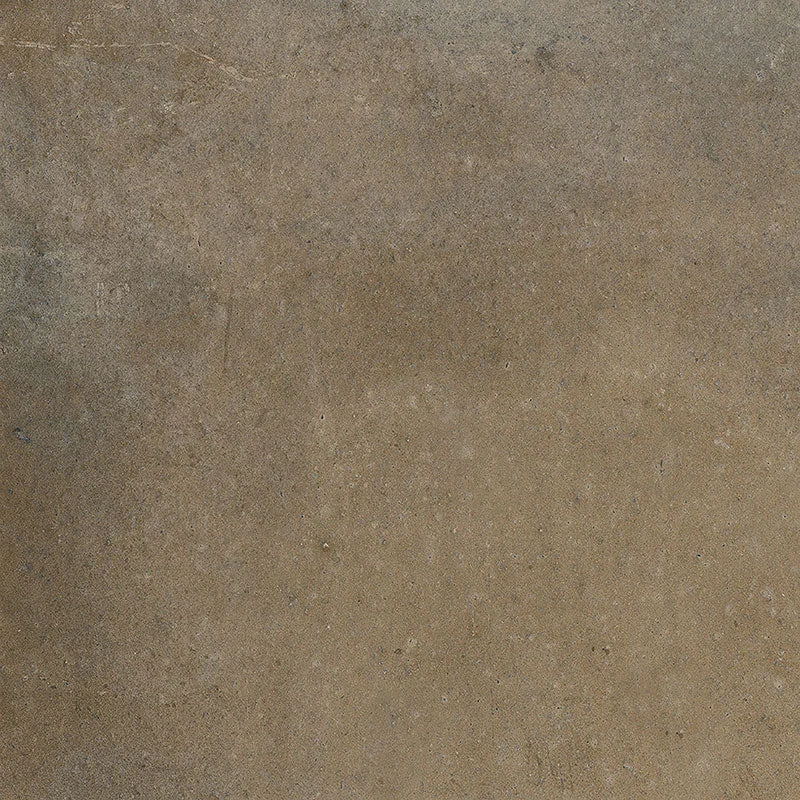
Tierra Brown Castanho 12×12 Natural Porcelain Tile
Tierra Brown (Castanho) 12×12 Porcelain Tile brings warm, earthy brown tones and subtle stone-like movement to interior spaces. Its balanced variation creates a grounded, natural look that complements both contemporary and traditional design palettes.
Crafted in durable porcelain with a natural matte finish and classic pressed edges, this tile offers reliable performance and easy upkeep for everyday living. The versatile 12×12 format works equally well on floors and walls, and lays out cleanly in straight or diagonal patterns.
As with any stone-look porcelain, expect normal shade and pattern variation. Review several pieces before installation and blend tiles from multiple boxes to achieve a cohesive, well-balanced result.
Features
- Collection: Tierra by Happy Floors
- Color: Brown (Castanho)
- Material: Porcelain
- Finish: Natural (matte)
- Size: 12×12 (nominal)
- Thickness: 5/16 in (8mm)
- Edge: Pressed
- PEI Rating: 3 (appropriate for moderate residential foot traffic)
- DCOF: 0.42
- Frost resistant porcelain body
- Low maintenance; sealing typically not required for porcelain
- Classic square format suitable for straight or diagonal layouts
Recommended Applications
- Residential interior floors
- Residential interior walls
- Kitchen floors and backsplashes
- Bathroom floors and walls
- Shower walls
- Entryways and hallways (interior)
- Living areas and dining rooms
Installation Guide – Tierra Brown Castanho 12×12 Natural Porcelain Tile
Important Advisory
Always follow the tile manufacturer’s instructions and comply with ANSI A108/A118/A136, TCNA guidelines, and local building codes. Verify substrate suitability, movement joint placement, and waterproofing requirements for wet areas before installation. Inspect all material for shade, size, and quality prior to setting; blend from multiple boxes for the most natural appearance.
Step 1: Layout & Planning
- Confirm substrate is clean, dry, flat, and structurally sound for porcelain tile.
- Establish control lines to center and balance the layout; dry-lay tiles to review shade and pattern variation.
- Plan cuts to avoid narrow slivers at perimeters and to align with focal points, doorways, and transitions.
- Blend tiles from multiple boxes during installation for even distribution of tone and veining.
Step 2: Tile Installation
- Use a high-quality polymer-modified thin-set mortar suitable for porcelain and the specific substrate.
- Select trowel size per substrate condition, tile size, and mortar manufacturer guidance; comb mortar in one direction for proper coverage and air release.
- Back-butter tiles as needed to promote full contact; periodically lift a tile to verify adequate transfer.
- Set tiles with consistent joints; use a leveling system where appropriate to help minimize lippage.
- Provide movement accommodation joints per TCNA EJ171 and project conditions; do not bridge over existing control joints with tile or mortar.
Allow mortar to cure per manufacturer instructions before grouting or allowing traffic.
Step 3: Cutting
- Use a wet saw with a premium diamond blade rated for porcelain to achieve clean cuts.
- Measure and dry-fit cut pieces before setting; ease sharp edges as needed after cutting.
- Use appropriate diamond hole saws or core bits for penetrations and fittings.
Step 4: Joint Filling
- Choose a grout compatible with porcelain and the selected joint width; follow the grout manufacturer’s recommendations for sanded or unsanded use.
- Pack joints fully with a rubber float and clean diagonally across the joints; change rinse water frequently.
- After initial set, perform final cleaning per grout instructions. Seal grout only if the grout manufacturer requires it.
Step 5: Cleaning & Maintenance
- Sweep or vacuum grit regularly to reduce abrasion.
- Clean with a pH-neutral tile cleaner and soft mop or cloth; rinse thoroughly and dry as needed.
- Avoid harsh acids, oil-based soaps, or abrasive pads that could affect the finish or grout.
- Use protective glides under furniture and walk-off mats at entries to limit tracked-in debris.
Disclaimer
Installation conditions vary. The installer is responsible for verifying jobsite conditions, product suitability, and proper installation methods. Follow all manufacturer instructions and industry standards. Stone Market USA is not responsible for installation practices or damages resulting from improper use.