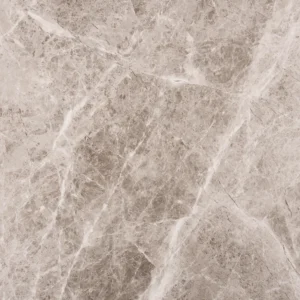
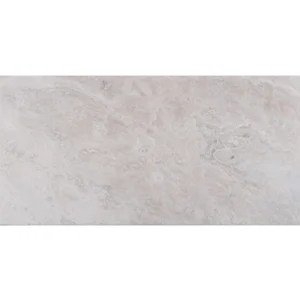
Acorn Nero 9×36 Natural Rectified Porcelain Tile
Acorn Nero in a 9×36 plank format delivers a sleek, modern look with a deep, dark tone that adds drama and sophistication to interiors. The elongated profile helps create continuous lines and a streamlined visual flow across feature walls and other vertical surfaces.
A natural matte finish softens reflections while rectified edges support crisp, tight grout joints for a clean, contemporary installation. Crafted from durable porcelain with frost resistance and a DCOF >0.42, Acorn Nero balances refined style with low‑maintenance performance for design-forward spaces.
Blend tiles from multiple boxes during layout to distribute tonal movement and achieve a balanced appearance across larger installations.
Features
- Collection: Acorn
- Color: Nero
- Material: Porcelain
- Size: 9×36
- Finish: Natural (matte)
- Edge Type: Rectified
- DCOF: >0.42
- PEI: 0 (typically for wall use)
- Frost resistant for cold climates
- Elongated plank profile for streamlined visuals
- Approximate coverage: 13.08 sq ft per box
Recommended Applications
- Residential interior walls and accent walls
- Kitchen backsplashes
- Shower walls and bathroom walls
- Fireplace surrounds (follow local code and heat-clearance requirements)
- Light-duty commercial interior walls
- Select protected exterior walls/facades where suitable and compliant with local codes
Installation Guide – Acorn Nero 9×36 Natural Rectified Porcelain Tile
Important Advisory
Confirm product suitability for your project before installation. Follow manufacturer instructions, TCNA/ANSI standards, and local building codes. Verify substrate flatness, movement joints, and environmental conditions. PEI 0 indicates wall applications; consult the manufacturer before considering any floor use.
Step 1: Layout & Planning
- Verify substrate is sound, flat, clean, and dry; correct irregularities before setting tile.
- Plan the orientation of the 9×36 planks to align with the room’s sightlines and desired visual flow.
- Dry-lay and blend tiles from multiple boxes to distribute tonal movement evenly.
- Use chalk lines to establish straight, balanced reference lines and minimize small cuts at perimeters where possible. The long edge should be straight and well-aligned across courses. For staggered layouts, many plank installations use a maximum 33% offset unless otherwise specified by the manufacturer.
Step 2: Tile Installation
- Use a porcelain-approved large-and-heavy-tile (LHT/LFT) mortar and the trowel size recommended by the mortar manufacturer for full coverage.
- Comb mortar in one direction and slide tiles perpendicular to the ridges to improve transfer; back-butter as needed to meet coverage requirements.
- Set tiles with consistent joints; rectified edges allow narrower joints when supported by standards and site conditions.
- Use a suitable leveling system, especially with long planks, to help control lippage.
- Remove excess mortar from joints and tile surfaces before it cures, and allow the installation to set per mortar manufacturer instructions before grouting.
Step 3: Cutting
- Use a professional wet saw with a porcelain-rated diamond blade for clean, accurate cuts.
- Measure carefully and dry-fit cuts prior to setting.
- Ease exposed cuts as needed with appropriate finishing tools.
Step 4: Joint Filling
- Select a grout compatible with porcelain and the chosen joint width.
- Choose a grout color that complements the dark Nero tone and the desired design effect.
- Apply grout diagonally across joints with a rubber float and clean per grout manufacturer instructions.
- Honor movement joints per TCNA guidelines and project conditions.
Step 5: Cleaning & Maintenance
- Sweep or vacuum surfaces regularly to remove dust and abrasives.
- Clean with a pH-neutral cleaner approved for porcelain; rinse thoroughly and dry with a soft cloth.
- Avoid harsh abrasives, oil-based soaps, or acidic cleaners that may affect grout or finishes.
- Wipe spills promptly and use protective pads or bumpers where needed.
- Porcelain tile generally does not require sealing; follow grout manufacturer guidance regarding grout sealer.
Disclaimer
Guidance provided is general and does not replace manufacturer instructions or professional judgment. Always follow TCNA/ANSI standards, local codes, and product data sheets. Stone Market USA is not responsible for installation practices or site conditions.