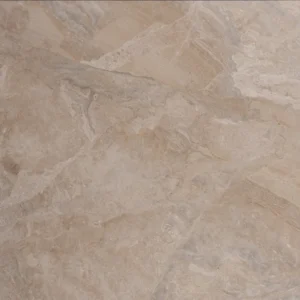
Phase White Deco 12×24 Porcelain Tile Natural Rectified
The Phase White Deco 12×24 porcelain tile brings a bright, decorative white look to contemporary interiors. Its natural finish offers a soft, low-sheen surface, while the rectified edges support clean, consistent grout joints for a tailored installation.
Made from durable porcelain, this 3/8-inch tile offers a practical surface for walls and floors in residential and commercial interiors. Its frost-free construction also supports exterior design applications where the installation system and site conditions are appropriate.
Use Phase White Deco as a refined foundation for bathrooms, kitchens, living areas, and architectural feature walls. The 12×24 format provides flexible layout options, and the decorative character coordinates easily with complementary field tile, mosaics, and trim pieces.
Features
- Porcelain construction for durable, everyday performance
- White Deco color with a natural finish
- Rectified edges for precise, consistent grout joints
- 12×24 tile format
- 3/8-inch thickness
- PEI 5 wear rating
- Frost-free construction for suitable exterior applications
- Approximately 1.94 sq. ft. of coverage per piece
- 13.56 sq. ft. per box with 7 pieces per box
Recommended Applications
- Residential interior floors
- Residential interior walls
- Commercial interior floors
- Commercial interior walls
- Backsplashes
- Shower walls
- Exterior walls where frost-free tile installation is appropriate
Installation Guide – Phase White Deco 12×24 Porcelain Tile Natural Rectified
Important Advisory
Always follow the Happy Floors installation instructions, applicable local building codes, and recognized tile industry standards, including ANSI and TCNA guidance. Confirm that the substrate, setting materials, waterproofing, drainage, movement accommodation, and selected application are appropriate for the project.
Step 1: Layout & Planning
- Verify that the substrate is clean, dry, structurally sound, and suitably flat for the selected tile layout.
- Dry-lay or plan the installation to balance the layout and reduce narrow perimeter cuts.
- Review tiles from multiple boxes during layout to distribute normal shade and pattern variation evenly.
- Plan grout joints, transitions, and movement joints in accordance with the tile layout, site conditions, and applicable industry guidance.
Step 2: Tile Installation
- Use a setting material approved by its manufacturer for porcelain tile and the specific substrate and application.
- Apply mortar to the prepared substrate with an appropriate technique, and periodically check coverage to confirm proper support beneath the tile.
- Set tiles with consistent alignment and joint spacing, adjusting them before the mortar begins to set.
- Coordinate waterproofing and drainage requirements for wet areas and exterior installations before setting tile.
- Allow the mortar to cure according to the setting-material manufacturer’s instructions before grouting or subjecting the installation to use.
Step 3: Cutting
- Measure and mark cuts carefully before cutting.
- Use a wet saw or other appropriate diamond cutting equipment designed for porcelain tile.
- Support the tile during cutting to help reduce chipping, and ease exposed cut edges where appropriate.
- Wear suitable eye, hearing, and respiratory protection when cutting tile.
Step 4: Joint Filling
- Select a grout compatible with porcelain tile, the joint width, and the project conditions.
- Follow the grout manufacturer’s instructions for mixing, application, cleaning, and curing.
- Fill joints completely, clean grout residue carefully, and remove haze using products recommended for the installed materials.
- Use an appropriate flexible sealant at movement joints, changes of plane, and other locations where industry guidance calls for sealant rather than grout.
Step 5: Cleaning & Maintenance
- Remove installation residue using cleaning products recommended for porcelain tile and the grout system.
- Maintain the surface with a suitable pH-neutral cleaner and clean water.
- Avoid harsh abrasives, unapproved acids, and cleaning products that may damage grout or adjacent materials.
- Follow the grout and setting-material manufacturers’ maintenance recommendations, including any guidance regarding sealing cementitious grout.
Disclaimer
Installation should be performed by qualified tile professionals. Confirm product condition, shade variation, actual dimensions, substrate suitability, and application requirements before installation. Stone Market USA is not responsible for problems caused by improper installation, handling, site conditions, or failure to follow manufacturer and industry guidance.