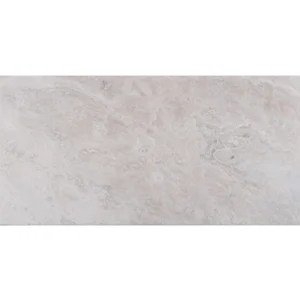
Installation Guide – Navona Bone Cross Cut 4×12 Brick Rectified Porcelain Tile
Important Advisory
Review the material before installation to confirm color, shade, finish, sizing, and quantity. Follow Happy Floors’ product instructions, mortar and grout manufacturer requirements, applicable local building codes, and recognized tile industry standards. Verify that the selected tile assembly is appropriate for the specific location, substrate, moisture exposure, traffic level, and exterior conditions.
Step 1: Layout & Planning
- Confirm the planned layout, starting points, transitions, borders, and cuts before setting tile.
- Dry-lay material from multiple boxes and blend pieces throughout the installation to create a balanced appearance.
- Use reference lines to maintain alignment across the 4×12 brick format. Plan the installation pattern and joint arrangement before applying mortar.
- Account for movement joints, perimeter gaps, and changes of plane as required by the project conditions and applicable industry standards. Do not bridge structural or control joints with tile or grout.
Step 2: Tile Installation
- Install only over a clean, dry, flat, stable, and properly prepared substrate suitable for porcelain tile.
- Correct cracks, deflection, uneven areas, contaminants, or other substrate conditions that could affect the tile installation before beginning.
- Select a quality mortar compatible with porcelain tile, the substrate, and the intended application. Follow the mortar manufacturer’s mixing, application, open-time, and curing instructions.
- Apply mortar consistently and press each tile firmly into place to achieve the coverage required for the installation environment. Periodically lift tiles to verify mortar transfer and coverage.
- Use spacers or an approved layout system as appropriate to maintain consistent joints and alignment. Check the surface frequently for lippage and pattern drift.
Step 3: Cutting
- Measure and dry-fit cut pieces before final placement.
- Use a professional wet saw or tile cutter with equipment suitable for porcelain tile and the desired cut.
- Protect finished surfaces during cutting and handle cut pieces carefully to reduce chipping.
- Use appropriate tools for outlets, plumbing penetrations, corners, and other detailed cuts. Follow safety practices for tile-cutting equipment.
Step 4: Joint Filling
- Allow the mortar to cure according to the mortar manufacturer’s instructions before grouting.
- Choose a grout compatible with porcelain tile, the selected joint width, and the installation conditions.
- Apply grout according to the grout manufacturer’s directions, removing excess material from the tile surface and joints before it hardens.
- Use movement and perimeter joints where required rather than filling those locations with rigid grout.
Step 5: Cleaning & Maintenance
- Remove mortar and grout residue using cleaning methods approved for the Natural porcelain surface and follow product directions.
- Clean regularly with a pH-neutral or otherwise manufacturer-approved tile cleaner and a non-abrasive tool.
- Avoid harsh chemicals, abrasive pads, and cleaning methods that could damage the finish or grout.
- Maintain grout and sealant joints according to the grout and sealant manufacturers’ recommendations. Sealing requirements, if any, should be determined for the selected grout and installation system rather than assumed for the porcelain tile.
Disclaimer
Stone Market USA recommends professional installation. Product appearance and sizing should be inspected before installation, and installed material is considered accepted. Installation errors, failure to follow manufacturer instructions, unsuitable substrate conditions, or use outside the product’s supported application may affect performance and are not the responsibility of Stone Market USA.