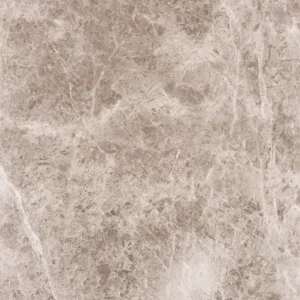
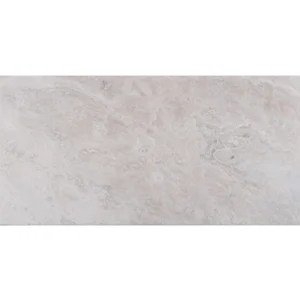
Flint White 12×24 Porcelain Tile Natural Rectified
Flint White 12×24 porcelain tile combines a clean white tone with a natural finish for a calm, versatile surface. Its rectified edges support precise layout and consistent grout lines, while the 12×24 format creates a streamlined look across floors and walls.
Made from durable porcelain with a PEI 5 rating, Flint White is designed for demanding interior applications and everyday maintenance. Its frost-free rating also supports select exterior installations where the tile system, substrate, drainage, and local conditions are appropriate.
Use this neutral tile as a refined foundation for contemporary, transitional, and minimalist designs. The natural surface pairs easily with decorative tile, mosaics, stone, and coordinated trim.
Features
- Porcelain construction for durable, practical performance
- White color with a natural finish
- 12×24 tile format
- Rectified edges for precise alignment and consistent joints
- 3/8-inch thickness
- PEI 5 wear rating
- DCOF: 0.62
- Frost-free rating for suitable exterior applications
- Coverage: 13.56 sq. ft. per box
- 7 pieces per box
Recommended Applications
- Residential interior floors
- Residential interior walls
- Commercial interior floors
- Commercial interior walls
- Backsplashes
- Shower walls
- Exterior walls and facades where suitable installation conditions are met
Installation Guide – Flint White 12×24 Porcelain Tile Natural Rectified
Important Advisory
Always follow Happy Floors installation instructions, applicable local building codes, and recognized tile industry standards, including relevant ANSI and TCNA guidance. Confirm that the substrate, setting materials, waterproofing, drainage, movement accommodation, and intended application are appropriate before installation.
Step 1: Layout & Planning
- Confirm the tile, lot, shade, dimensions, and quantity before beginning. Do not install material with visible defects.
- Ensure the substrate is clean, dry, structurally sound, properly prepared, and within the flatness requirements appropriate for a 12×24 tile installation.
- Dry-lay the planned layout where practical to establish balanced cuts and alignments. Account for walls, fixtures, transitions, and movement joints.
- Blend tiles from multiple boxes during installation to distribute normal shade and surface variation evenly. Use spacers and joint dimensions appropriate for rectified porcelain tile and the selected installation pattern.
Step 2: Tile Installation
- Use a setting material approved by its manufacturer for porcelain tile and the intended substrate and application.
- Apply mortar to the prepared substrate using an appropriate method and tool for the tile size, substrate, and site conditions. Key the mortar into the substrate and set each tile with adequate contact and proper alignment.
- Periodically lift tiles during installation to verify mortar coverage. Address inadequate coverage before the mortar skins over.
- Maintain required movement joints at perimeters, changes in plane, transitions, and other locations specified by applicable standards or the project design.
- Allow the setting material to cure according to the mortar manufacturer’s instructions before grouting or exposing the installation to traffic or moisture.
Step 3: Cutting
- Measure and mark cuts carefully, allowing for the planned joint and movement spaces.
- Use a wet saw or other cutting equipment with a diamond blade suitable for porcelain tile.
- Support the tile during cutting to help minimize chipping. Ease or finish exposed cut edges where appropriate for the design.
- Wear suitable eye, hearing, and respiratory protection and follow the equipment manufacturer’s safety instructions.
Step 4: Joint Filling
- Select grout compatible with porcelain tile, the planned joint width, and the intended application. Follow the grout manufacturer’s instructions for mixing, placement, cleaning, and curing.
- Ensure the setting material has cured as directed before grouting. Pack joints fully and remove excess grout without damaging the tile surface.
- Use an appropriate flexible sealant rather than grout at movement joints, changes of plane, perimeters, and other locations requiring flexible accommodation.
- Protect the completed installation from traffic, water, staining, and construction activity until the grout and setting materials have cured.
Step 5: Cleaning & Maintenance
- Remove installation residue promptly using products recommended for porcelain tile and the grout system. Avoid harsh acids, abrasive powders, and tools that may damage the surface or joints.
- Clean regularly with a pH-neutral cleaner suitable for porcelain tile and follow the cleaning-product manufacturer’s directions.
- Use mats or other reasonable measures at entries to limit tracked-in grit. Follow the grout manufacturer’s guidance for any required maintenance or sealing.
Disclaimer
Installation should be performed by qualified tile professionals. Actual suitability depends on the project substrate, environmental conditions, installation system, and applicable codes and standards. Stone Market USA is not responsible for problems caused by improper installation, handling, maintenance, or site conditions.