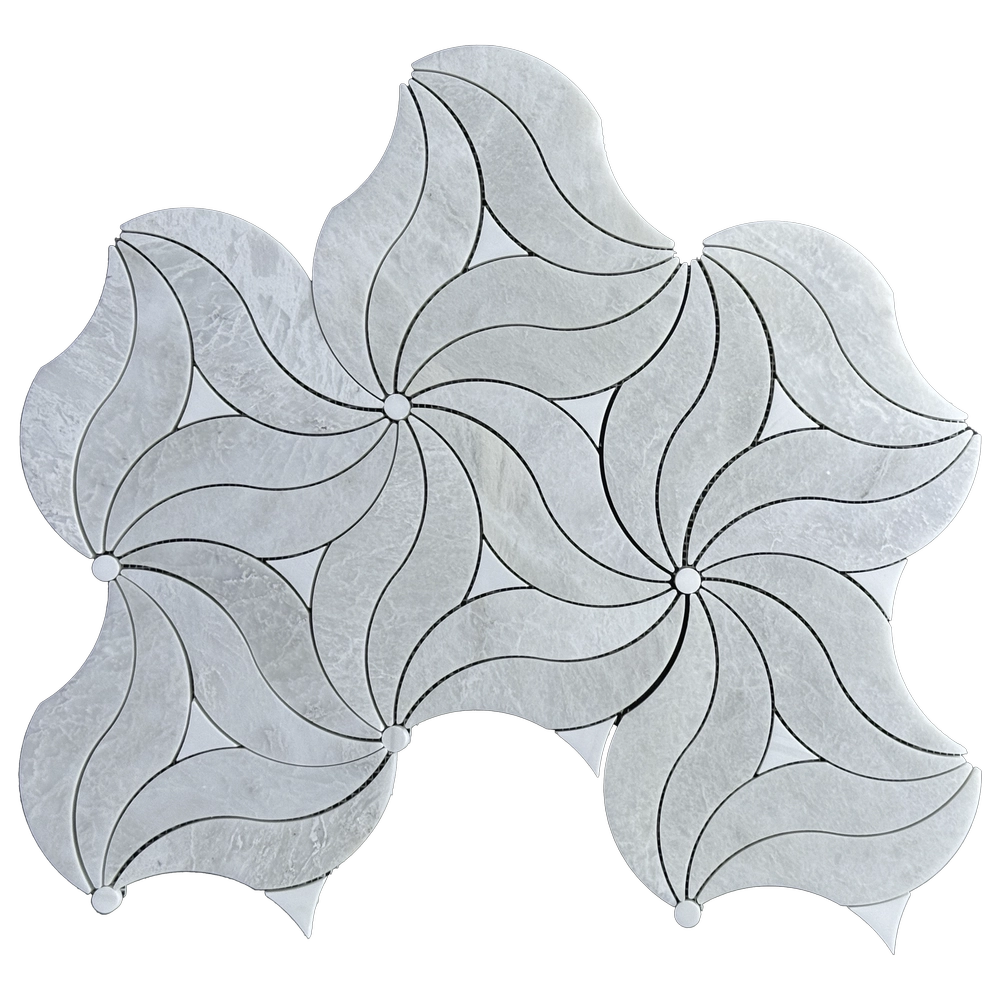
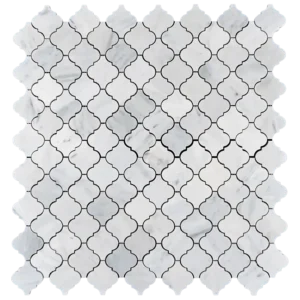
Rio Polished Mosaic Tile – Iceberg & Dolomite Marble
Contemporary Flow in Cool White Marble
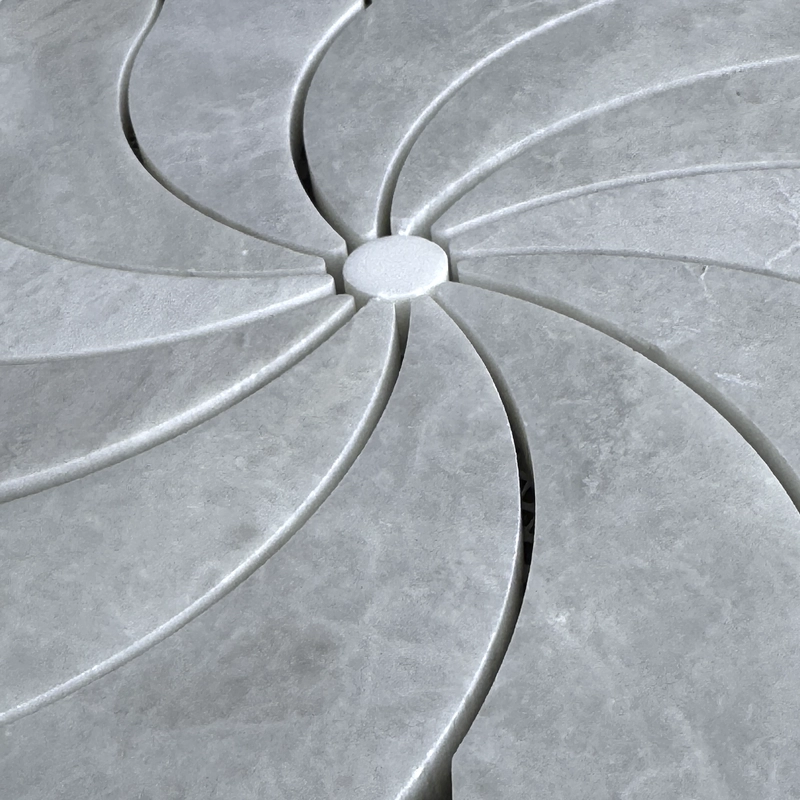
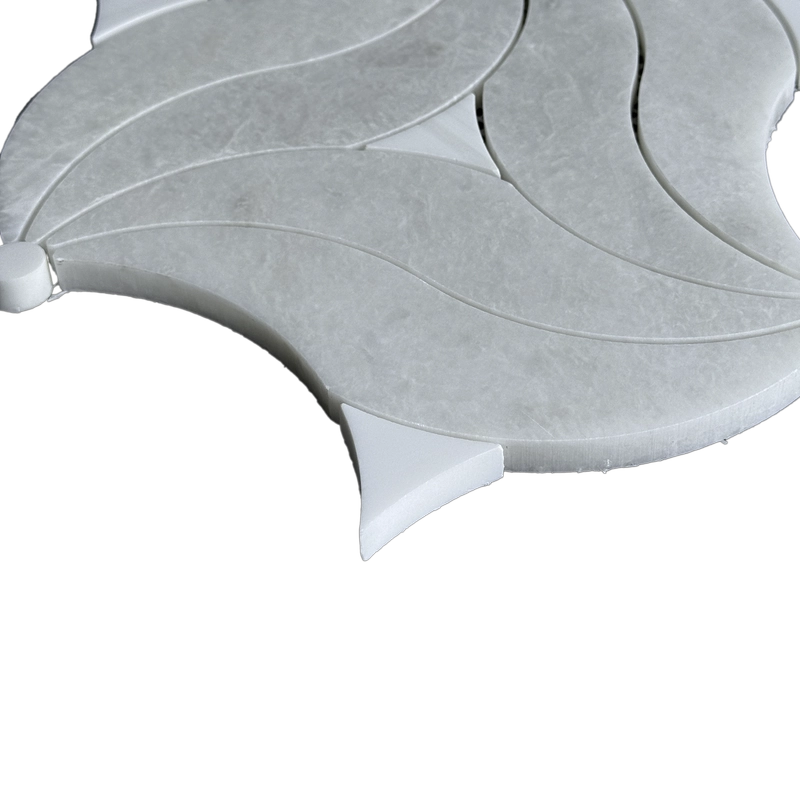
Elevate your interiors with the sleek elegance of the Rio Polished Mosaic Tile. Designed with a dynamic linear layout, this mosaic blends natural Iceberg and Dolomite marbles in a striking polished finish. The crisp white hues and icy veining create a clean, modern aesthetic, perfect for brightening up kitchens, bathrooms, or feature walls.
The Rio mosaic’s elongated pattern introduces a rhythmic flow that adds movement without overpowering the space. Whether installed horizontally or vertically, it delivers a sophisticated visual texture that complements minimalist and transitional interiors alike.
Product Features – Iceberg & Dolomite Mosaic
- Material: Iceberg Marble & Dolomite Marble
- Color Palette: Crisp white with subtle icy veining
- Finish: Polished – sleek, glossy surface
- Pattern: Linear Rio design with elongated tiles
- Sheet Size: 7.8″ x 15.7″ (20 x 40 cm)
- Thickness: 0.4″ (1 cm)
- Mounting: Mesh-backed for precise installation
- Ideal Applications: Kitchen backsplashes, bathroom walls, fireplace surrounds, accent panels
Why Choose the Rio Mosaic Tile?
With its fresh white tones and mirror-like polish, the Rio tile offers timeless appeal and contemporary edge in one design. The fusion of Iceberg and Dolomite marbles adds depth and variation, while the clean lines ensure a balanced, calming aesthetic. It’s a premium option for those seeking refinement with minimal effort.
Packaging & Coverage
- Sold per box – includes 5 mesh-mounted sheets
- Coverage: approx. 4.30 sq.ft. per box
- Weight: 28.8 lbs
- Carefully packaged to prevent damage in transit
Installation Guide – Rio Polished Waterjet Mosaic (Iceberg & Dolomite Marble)
Step 1: Surface Preparation – Smooth and Stable
- Ensure the substrate is clean, flat, dry, and free from debris or oil.
- Level uneven areas with a self-leveling compound.
- Use a waterproofing membrane in wet areas such as showers or backsplashes.
Step 2: Dry Layout – Preview the Flow
- Dry-lay sheets on the floor or wall surface before installation to ensure desired veining and pattern alignment.
- Blend tiles from different boxes to achieve visual consistency across Iceberg and Dolomite tones.
- Use 1/16″–1/8″ spacing between sheets to match interlocking design if applicable.
Step 3: Thin-Set Mortar Application – Adhesion with Precision
Recommended White Thin-Sets:
- Laticrete Glass Tile Adhesive
- Mapei Adesilex P10 with Keraply (for enhanced bonding)
- Ardex X5 White
Instructions:
- Use a 3/16″ V-notch or 1/4″ square-notched trowel to spread the adhesive on the substrate.
- Back-butter the mesh-backed sheets for even adhesion and to prevent voids beneath the intricate cuts.
- Press the sheet gently using a grout float or beating block to ensure full contact without damaging the waterjet cuts.
Step 4: Cutting & Adjustments – Fine Handling
- Use a wet saw with a high-quality diamond blade designed for marble and intricate shapes.
- Cut slowly and support the sheet from the mesh backing to avoid dislodging individual pieces.
- Smooth any rough edges using a marble-safe polishing pad or stone file.
Step 5: Grouting – Protect the Finish
- Pre-seal the surface with a penetrating marble-safe sealer before applying grout to minimize absorption and haze.
- Use non-sanded grout to avoid scratching the polished surface.
- Apply grout with a rubber float at a 45° angle to fill joints thoroughly.
- Clean excess grout immediately with a damp sponge, working in small sections.
- Buff surface with a dry microfiber cloth after 30–45 minutes to remove haze.
Step 6: Final Sealing – Lock in Protection
- Once grout has fully cured (typically 72 hours), apply a second coat of penetrating sealer.
- Reapply sealer periodically, especially in high-moisture areas.
Maintenance Tips
- Clean only with pH-neutral, marble-safe cleaners—avoid acidic or abrasive products.
- Wipe spills promptly to prevent staining or etching.
- Regularly check grout lines and reseal when needed to preserve the polished appearance.
Important Note
Due to the precision of waterjet cutting and natural variation in Iceberg and Dolomite marble, always dry-lay and inspect tiles before permanent installation. Stonemarket USA is not responsible for installation errors or color inconsistencies inherent in natural stone.