Loading... (Warehouse Local Time)
Mon–Fri: 9:00 AM – 6:00 PM |

Milas White Marble Mosaic Tile – 1×6 Herringbone Honed White

The Milas White Herringbone 1×6 Honed Marble Mosaic Tile features white marble with subtle gray veining in a classic herringbone pattern. Perfect for backsplashes, bathrooms, and floors.

$15.49 / Piece

Item Code: MM079-24191 Category

540 Pieces in stock

Est. Coverage: 0.95 sq. ft. per piece | 4.75 sq. ft. per box | 257 sq. ft. per crate |  Request Info
Note on Samples:
Sample pieces are small cut sizes, approximately 3" x 3" to 8" x 8", and intended for color and finish reference only.
If you need a full-size sample, please contact us.

Request Custom Pricing for Large Orders

Planning a large project? Orders over 500 sq. ft., full crates, or commercial applications may qualify for exclusive volume pricing. Reach out today and let us provide a custom quote tailored to your needs.

Request Volume Quote
  • Volume pricing available for qualified bulk orders.
  • We offer custom sizes, finishes, and crate-based shipments.

Color & Finish Options

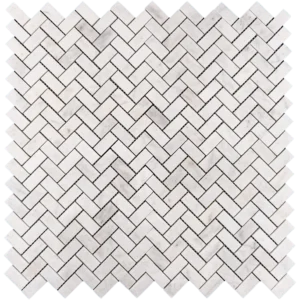
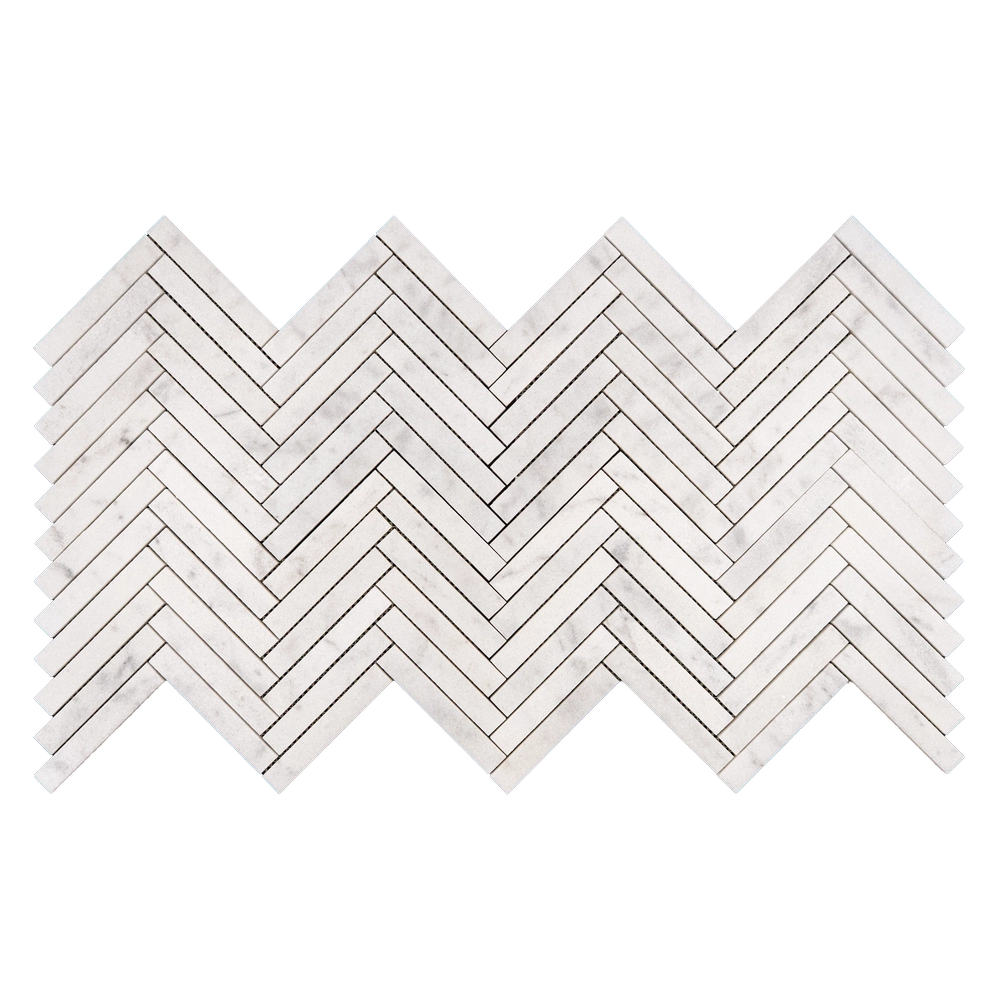
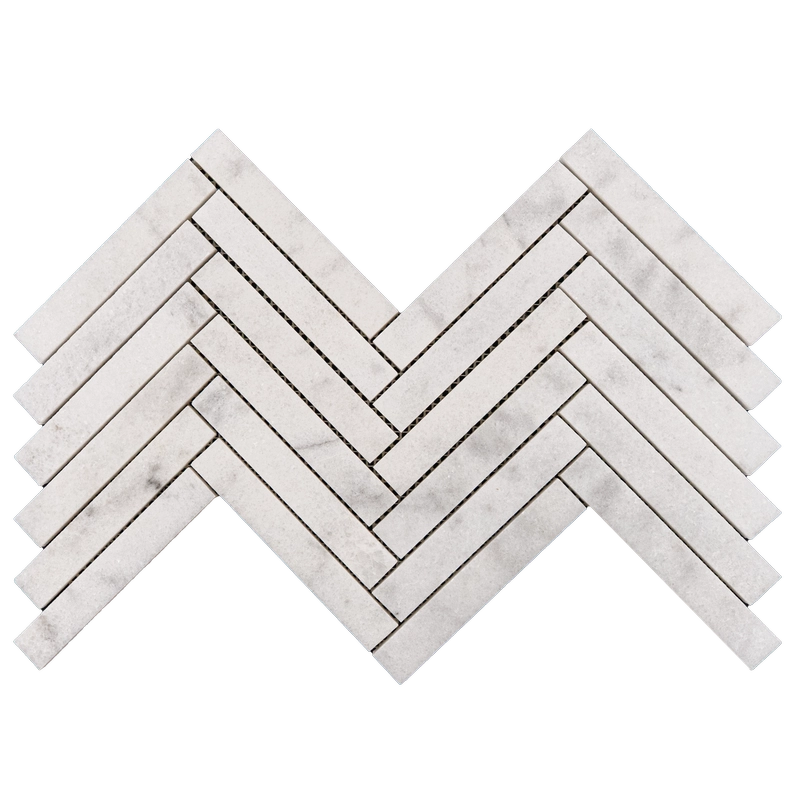
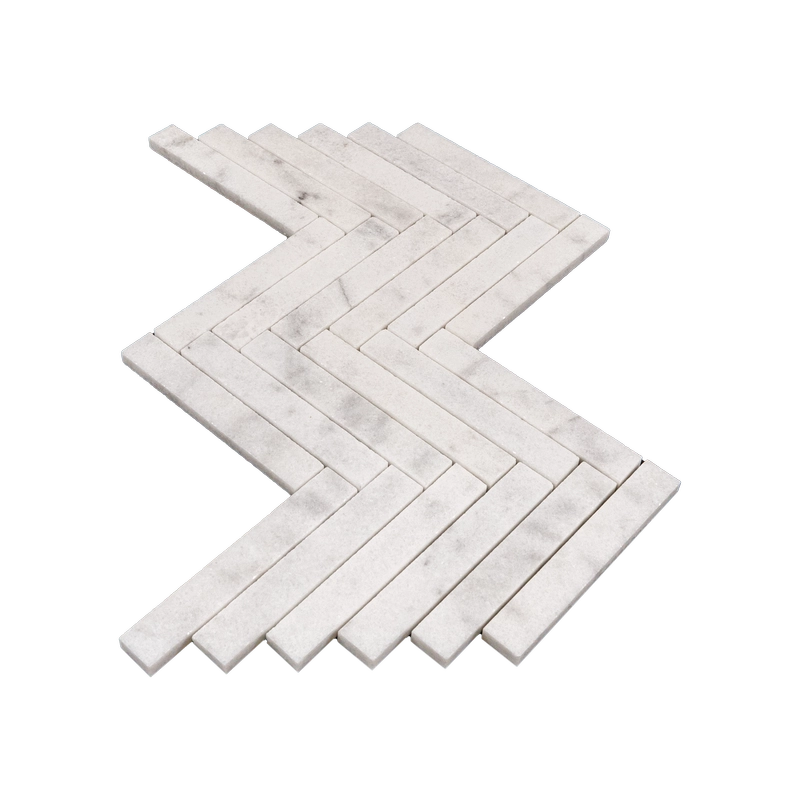
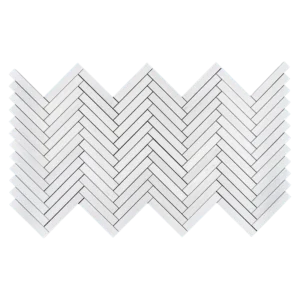
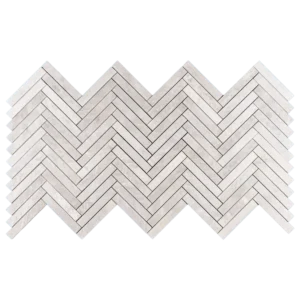
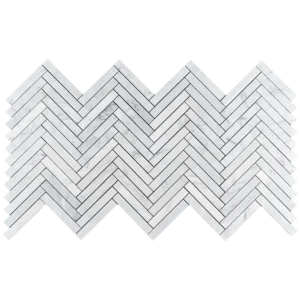
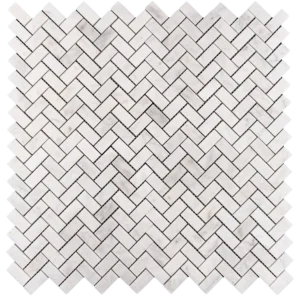
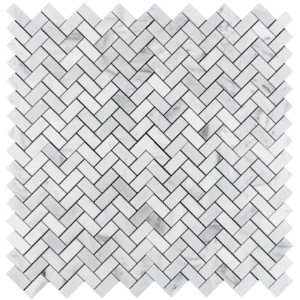
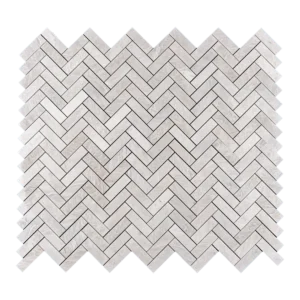
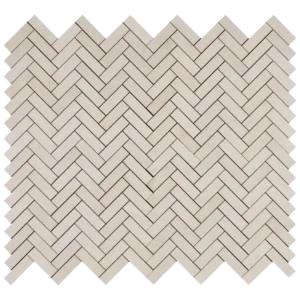
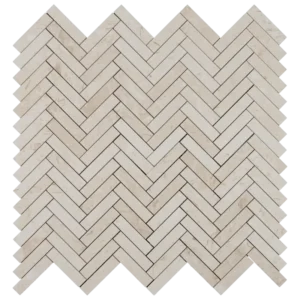
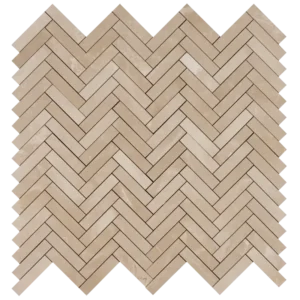
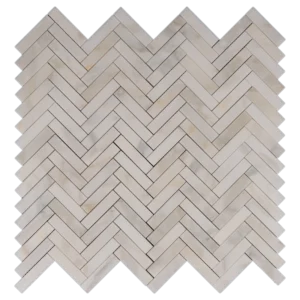
Milas White Herringbone 1×6 Honed Marble Mosaic Tile – Classic Elegance

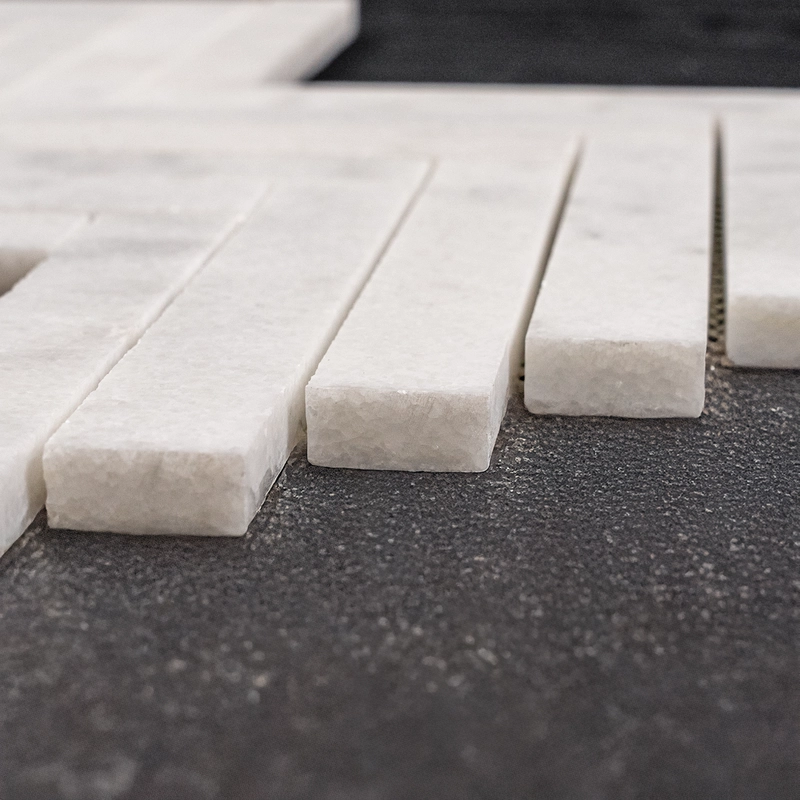
The Milas White Herringbone 1×6 Honed Marble Mosaic Tile brings a perfect balance of timeless design and modern sophistication. Crafted from premium white marble, it highlights delicate gray veining that enhances its natural character. The honed finish softens the brightness of the stone, giving the surface a smooth, refined texture.

Because of its classic herringbone layout, this mosaic creates movement and visual depth in any setting. Moreover, its elegant white tone pairs beautifully with both warm and cool palettes, making it versatile for a wide range of interiors. Whether you are refreshing a bathroom, elevating a kitchen backsplash, or designing a feature wall, this tile delivers style and durability.

Key Features:

  • Material: Premium Milas White marble
  • Finish: Honed for a soft, matte look
  • Pattern: Classic 1×6 herringbone design
  • Color: White background with subtle gray veining
  • Applications: Suitable for kitchens, bathrooms, accent walls, and flooring
  • Style: Blends traditional elegance with contemporary charm

In addition, the durability of marble ensures long-lasting performance, even in high-use areas. For example, you can use it in a shower wall for a spa-like effect or combine it with metallic fixtures to create a modern, upscale finish. Its design flexibility makes it a favorite for both homeowners and designers.

Weight7.7 lbs
Dimensions8.40 × 16.35 × 0.40 in
Color

, ,

Finish

Thickness

Size (inches)

Chip Size (Inches)

Material

Design

Herringbone

Collection

Milas White Collection

Installation Guide – Milas White Herringbone 1″x6″ Honed Marble Mosaic Tile

Material Notes

  • Natural Milas White marble with a honed (matte) finish.
  • 1″x6″ linear strips arranged in a herringbone pattern, typically mesh-mounted (sheet ≈12″x12″; some lots may be paper-faced).
  • Suitable for walls, backsplashes, shower surrounds, and light-traffic residential floors. Numerous grout joints add traction.

Step 1: Surface Preparation

  • Substrate must be clean, dry, rigid, and very flat (≤1/8″ variation in 10′; ≤1/16″ preferred for long, thin strips).
  • Approved substrates: cement backer board, properly cured concrete, or mortar bed meeting ANSI standards.
  • Wet areas: install ANSI A118.10 waterproofing; shower floors require a ¼” per foot slope to the drain.
  • Use only white setting materials beneath light marble to avoid shadowing/picture framing.

Step 2: Dry Layout & Planning

  • Blend sheets from multiple boxes to distribute natural shade/vein variation.
  • Snap level reference lines to control the herringbone angle and keep courses straight.
  • Stagger sheet seams so the mesh grid disappears; trim sheet edges for a tight interlock.
  • Pre-plan perimeter/fixture cuts to avoid narrow slivers and maintain pattern flow.

Step 3: Adhesive (White Thin-Set) Application

Use:

  • White, polymer-modified thin-set for natural stone (ANSI A118.4/A118.15). Avoid premixed mastic, especially in wet zones.

Trowel & Technique:

  • 3/16″ V-notch (or 1/4″×3/16″ V-notch) on flat substrates.
  • Key in with the flat side, comb in one direction, then lightly flatten ridges so they do not telegraph through the narrow strips.
  • Work in small areas you can cover within 10–15 minutes to prevent skinning.

Step 4: Setting the Sheets

  • Align the first sheet to your reference lines; press in using a rubber grout float or beating block for full contact and a flat plane.
  • Use wedge spacers as needed to keep long linear joints straight and the herringbone angle consistent.
  • Back-butter individual strips where mesh irregularities create lippage; lift and reset immediately if needed.
  • Clean any squeeze-through thin-set from joints and faces immediately with a barely damp sponge.
  • If paper-faced: set paper out, beat in, lightly wet paper after initial grab (≈10–20 min), remove paper, and true up joints before the mortar fully sets.

Step 5: Cutting & Detailing

  • Use a wet saw with a continuous-rim diamond blade for marble; tape the cut line to minimize chip-out.
  • For tiny trims, use mosaic nippers sparingly; dress exposed cuts with a rubbing stone.
  • Finish exposed terminations with stone trim, metal profiles, or matching moldings as desired.

Step 6: Grouting (Honed Marble)

  • Allow thin-set to cure (typically 24 hours).
  • For joints ≤1/8″, use unsanded grout. For slightly wider joints, choose a fine-aggregate, marble-safe grout and test first.
  • Optional: apply a grout release or pre-seal to reduce pigment uptake on light marble.
  • Pack joints diagonally with a rubber float; clean with minimal water to prevent washout or shading.

Step 7: Sealing

  • After grout cures (≈72 hours), apply a penetrating, breathable sealer approved for marble and grout.
  • Re-seal periodically based on use/exposure (e.g., every 1–2 years in wet zones).

Maintenance

  • Clean only with pH-neutral, non-abrasive stone cleaners; avoid acids, vinegar, bleach, or abrasive pads.
  • In showers, squeegee/wipe dry after use to limit mineral deposits; use marble-safe scale removers if needed.

Movement Joints

  • Honor structural joints and provide soft joints per TCNA EJ171 at perimeters, changes of plane, and over transitions.
  • Use 100% silicone (stone-safe) in corners and where tile meets dissimilar materials.

Important Notes & Disclaimer

  • Natural marble varies in tone and veining; dry-lay and blend sheets before setting.
  • Flat substrates are critical for long, thin strips—correct unevenness before installation.
  • Stonemarket USA is not responsible for substrate issues or improper installation. Professional installation is recommended.

Category
Category
Material
Material
Color
Color
Size
Size
Finish
Finish
Design
Design
Thickness
Thickness
Application
Usage Area
Request a Quote
Tell us briefly about your project, sq ft, and timing.