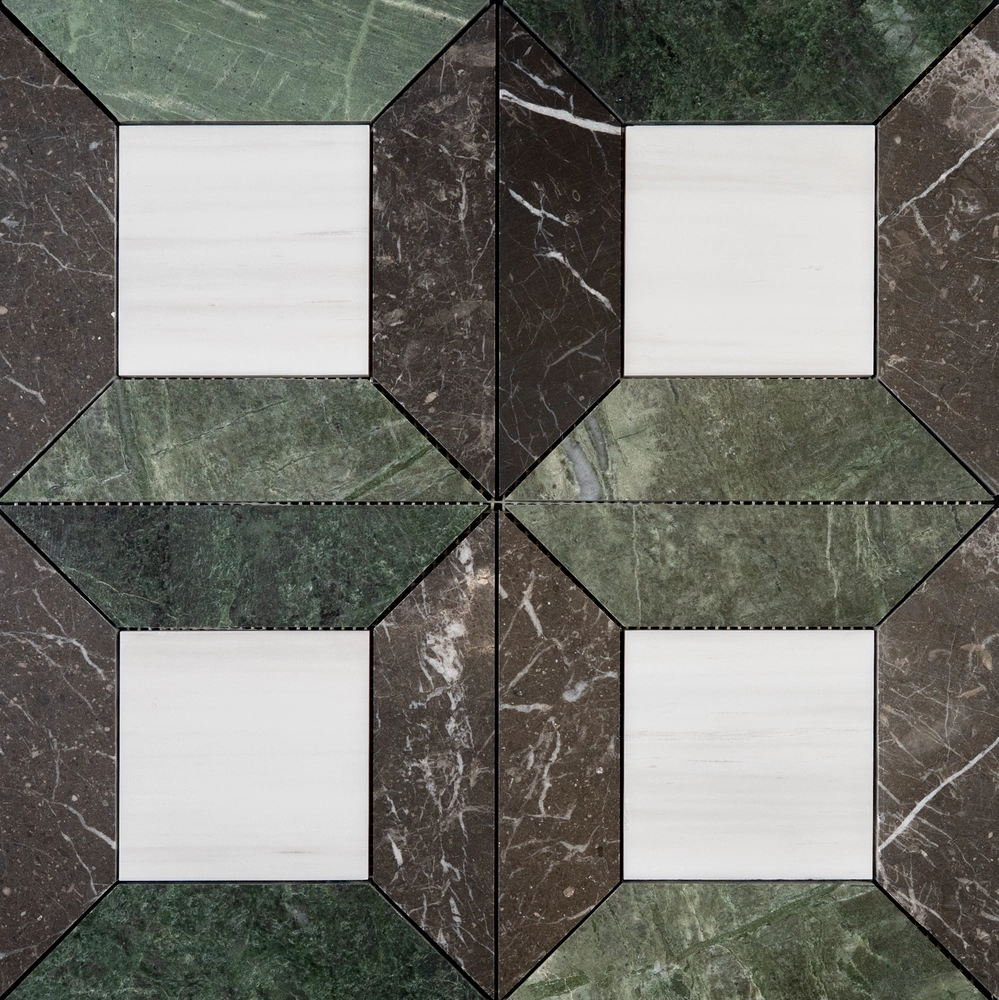
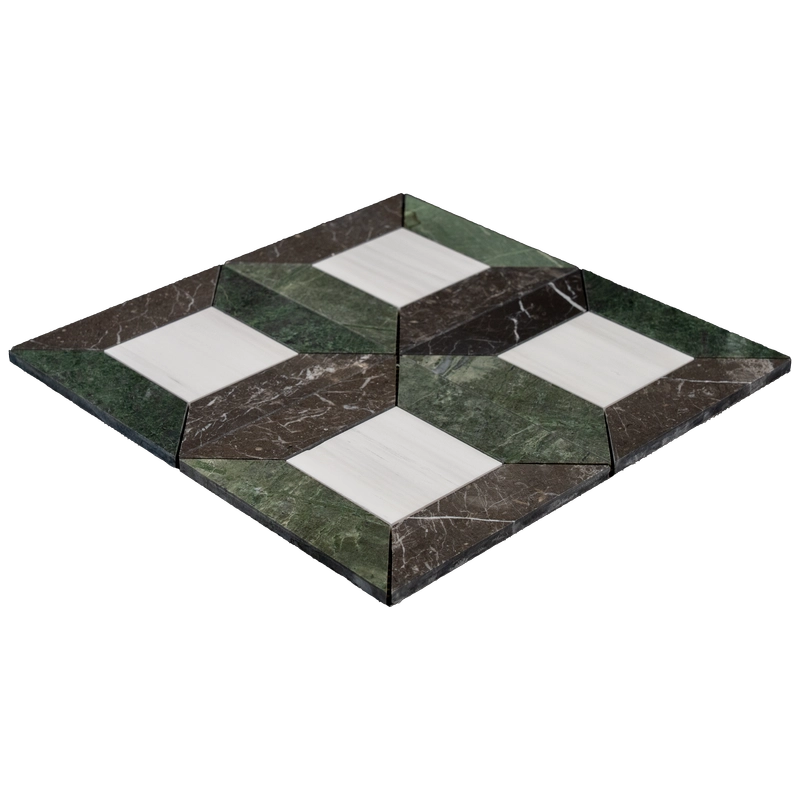

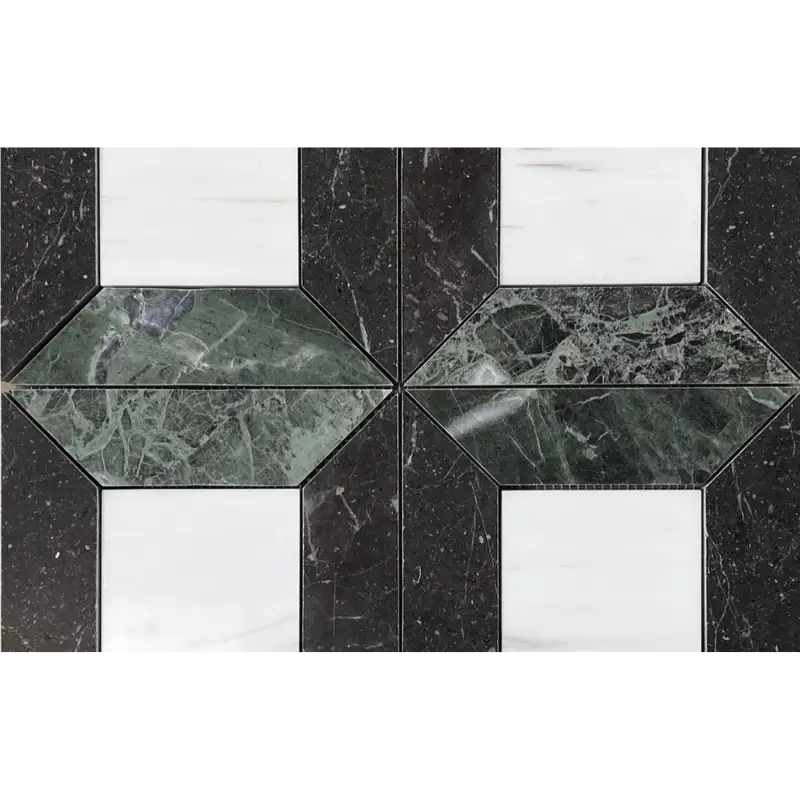
Dolomite, Ruby Green & Pearl Black Star Square Honed Marble Mosaic Tile
Bring striking character and timeless artistry into your interiors with the
Dolomite, Ruby Green & Pearl Black Star Square Honed Marble Mosaic Tile.
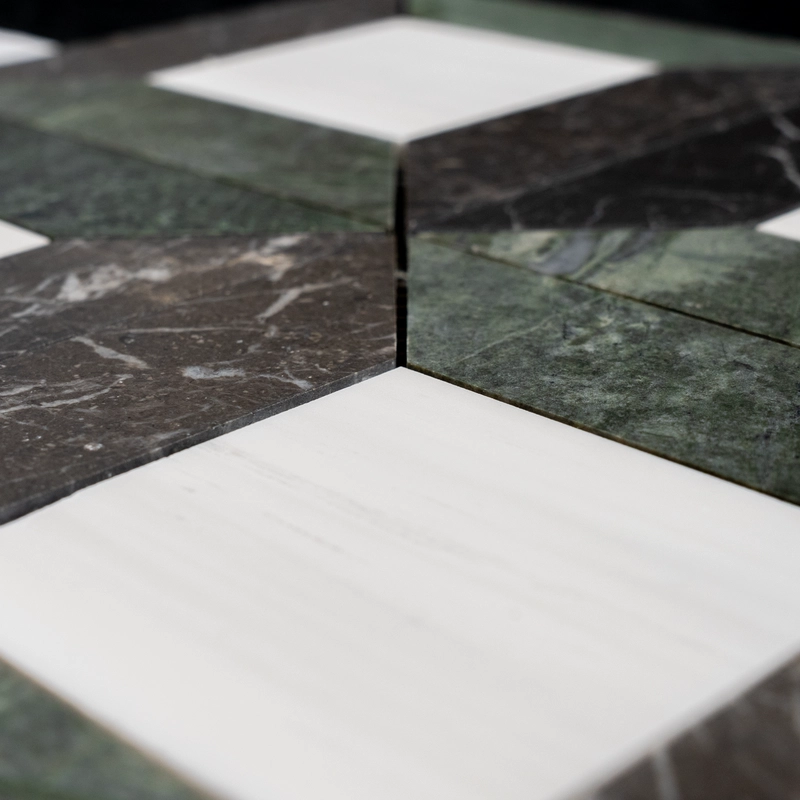
This exquisite design blends the cool elegance of Dolomite, the rich depth of Pearl Black,
and the vibrant tones of Ruby Green marble into a captivating star and square motif.
Perfect for those seeking a bold yet refined aesthetic, this mosaic tile delivers
sophistication with every detail.
The honed finish gives the surface a smooth, matte texture that reduces glare while
highlighting the stone’s natural color contrasts. Its geometric star-square layout makes
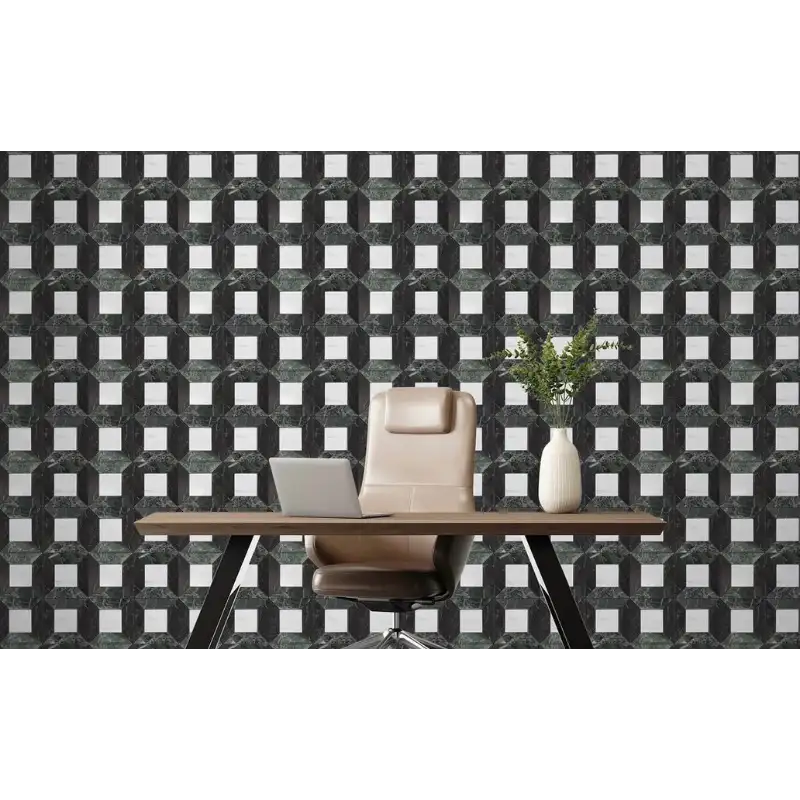
a powerful design statement, whether featured on backsplashes, accent walls, or
floor installations. With its unique pattern and premium craftsmanship, this mosaic
transforms ordinary surfaces into extraordinary works of art.
Key Features
- Material: Natural Dolomite, Ruby Green, and Pearl Black Marble
- Finish: Honed – soft matte surface
- Pattern: Star and square geometric design
- Color Palette: Crisp white, deep black, and vibrant green tones
- Tile Sheet Size: Approx. 16″x16″
- Applications: Backsplashes, feature walls, bathrooms, and accent flooring
Why Choose This Mosaic?
This star square honed marble mosaic tile is more than a surface covering –
it’s a design centerpiece. The bold color contrasts create visual rhythm, while
the honed finish ensures a contemporary, understated appeal. Furthermore, the
combination of Dolomite, Ruby Green, and Pearl Black marbles offers durability
and timeless charm, making it a versatile choice for both modern and classic spaces.