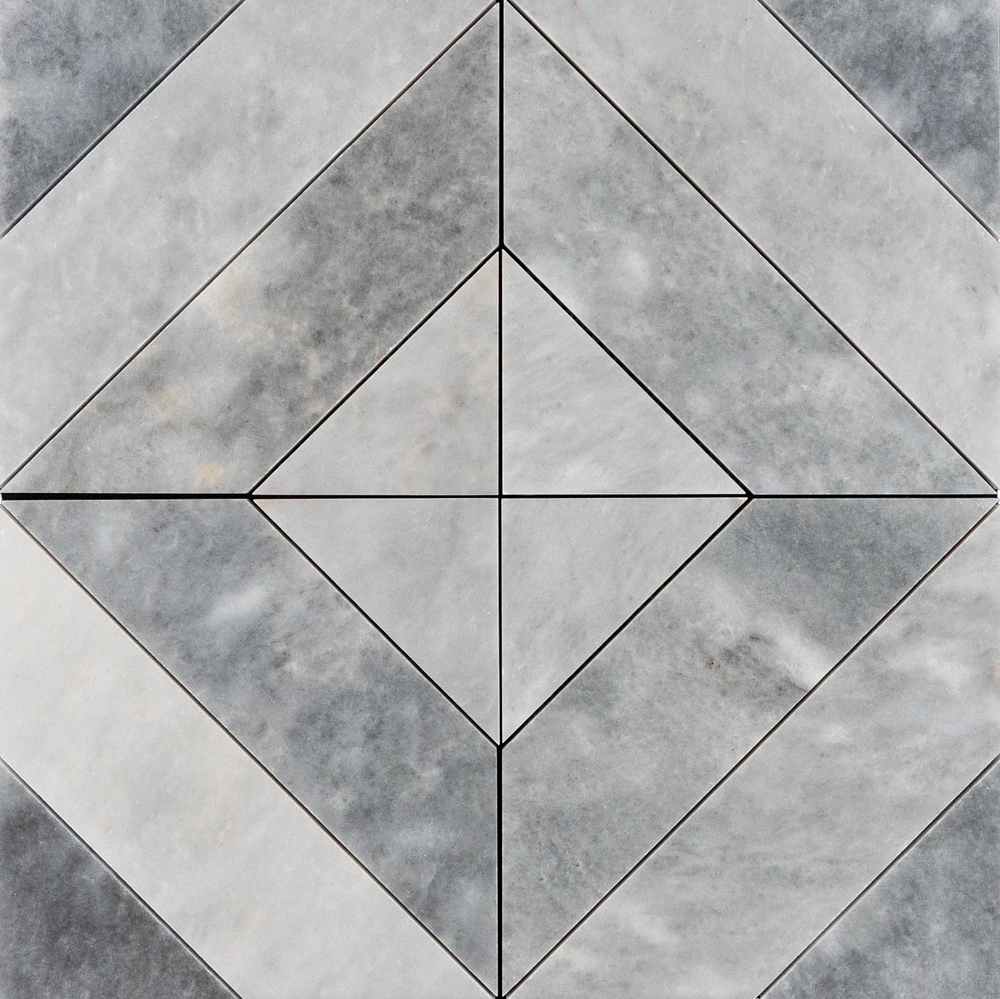
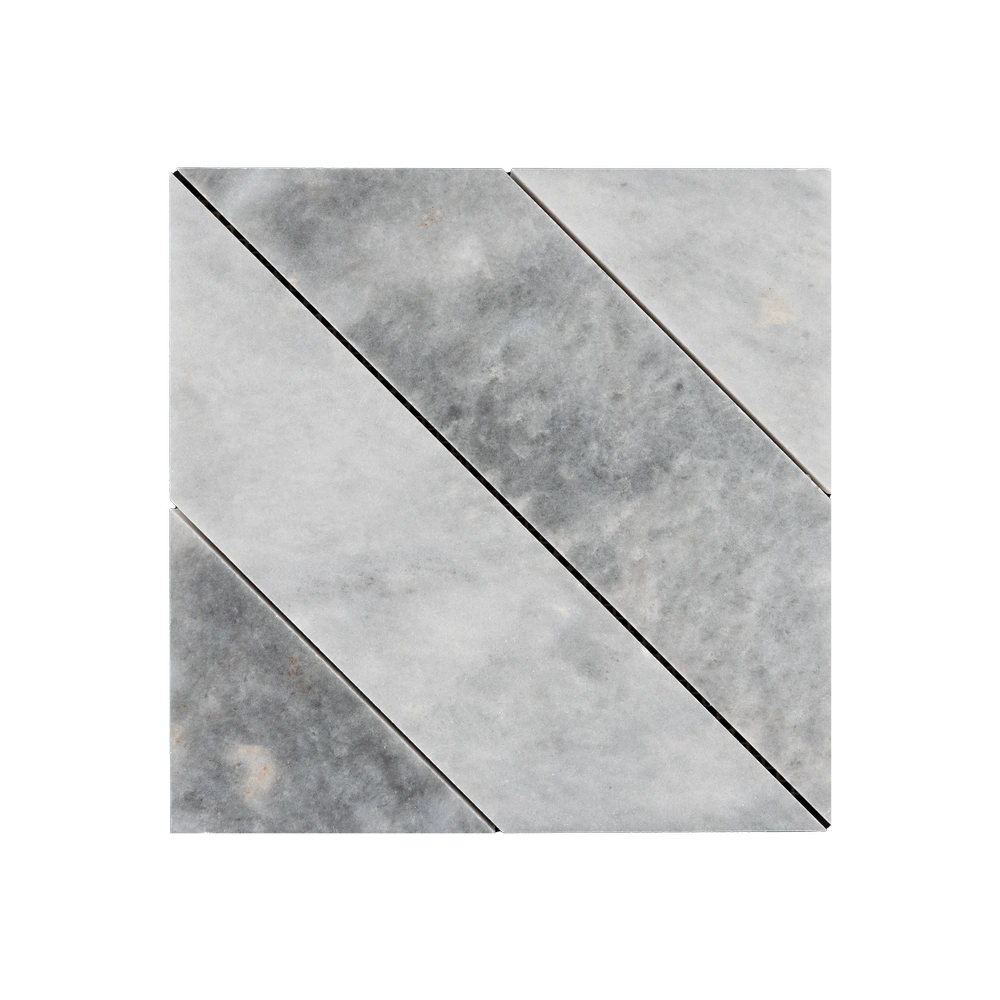
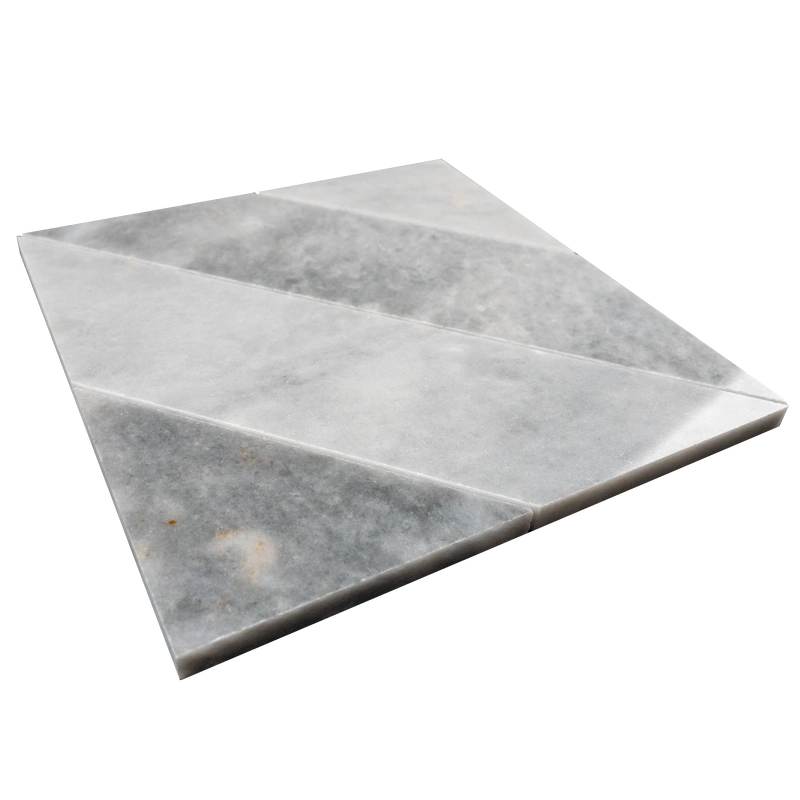
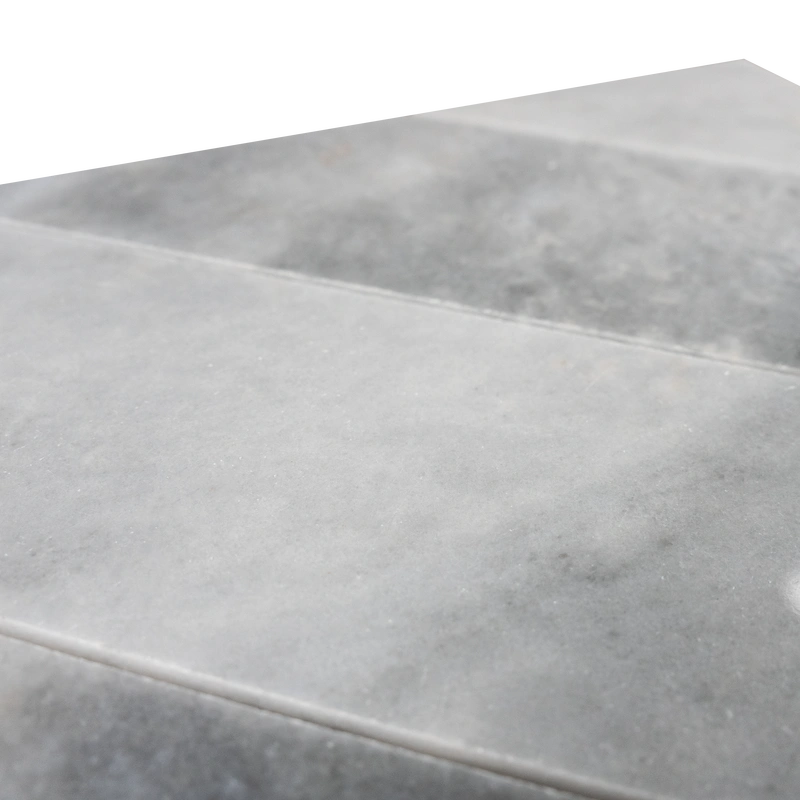
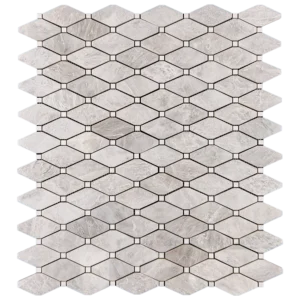
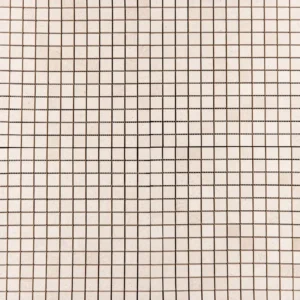
Bardiglio Gray Piela Mosaic Tile – Polished Marble 8″ x 8″
Smoky Elegance in a Modern Pattern
Create bold, refined spaces with the Bardiglio Gray Piela Mosaic Tile. This polished marble tile combines deep smoky gray tones with clean geometric forms, delivering a modern look that works well in kitchens, bathrooms, and accent areas.
The polished surface adds light and clarity, enhancing both small and large spaces. Additionally, the interlocking Piela pattern brings depth and rhythm, making your walls stand out without overwhelming the design.
Key Features
- Material: Bardiglio and gray marble
- Color: Smoky gray, charcoal, and soft white
- Finish: Polished – smooth and glossy
- Shape: Piela geometric pattern
- Sheet Size: 8″ x 8″ (20.3 x 20.3 cm)
- Thickness: 0.4″ (1 cm)
- Installation: Mesh-mounted for easy setup
- Applications: Indoor walls – backsplashes, bathrooms, and decorative panels
Why Choose Bardiglio Gray Piela Mosaic Tile?
This mosaic blends modern style with timeless materials. Its dark tones offer contrast, while the polished finish reflects light for a fresh, clean effect. Moreover, its durable marble construction makes it suitable for high-use areas.
Installation & Maintenance Tips
- Use a white thin-set adhesive for strong bonding
- Apply non-sanded grout to protect the finish
- Seal after installation to prevent staining
- Clean with pH-neutral stone-safe products
Packaging & Coverage
- Sold per box – 10 mesh-mounted sheets
- Coverage: approx. 2.25 sq. ft. per box
- Weight: approx. 12.85 lbs
- Secure packaging for safe delivery
Installation Guide – Step by Step
Step 1: Surface Preparation – The Foundation of Excellence
- Ensure the surface is clean, dry, and free of dust, oil, and debris—an immaculate foundation is key to a lasting installation.
- Verify that the substrate is level, stable, and crack-free. Any imperfections can affect the pattern and finish.
- For wet areas (e.g., showers), apply a premium waterproofing membrane to protect the stone from moisture damage.
- Remove any obstructions such as outlet covers or trims that may interfere with layout accuracy.
- Use a self-leveling compound where needed to create a perfectly smooth surface for your Piela mosaic tiles.
Step 2: Layout Planning – Symmetry Meets Style
- Identify the center point of your installation area to ensure a balanced, symmetrical layout that showcases the geometry of the 8″ x 8″ Piela design.
- Dry-lay several sheets to preview the mix of Bardiglio’s smoky gray veining and softer gray accents—each sheet brings subtle variation and natural depth.
- Adjust sheet placement to avoid thin or awkward cuts near edges or corners.
- Use 1.5–3 mm spacers between sheets to maintain uniform grout joints and alignment.
Step 3: Adhesive Application – Choose the Right Bond
Recommended Thin-Set Brands (for Natural Stone):
Instructions:
- Use a white, non-staining thin-set mortar formulated for natural stone to protect the marble’s polished surface from discoloration.
- Mix in small batches to ensure consistency and usability within a 30-minute window.
- Apply thin-set with a 1/4″ notched trowel—spread with the flat side first, then comb at a 45° angle for even adhesive coverage.
- Back-butter each mosaic sheet to improve adhesion and eliminate air gaps, especially on smaller tiles.
- Work in small sections to prevent thin-set from drying out before tiles are installed.
Step 4: Cutting & Fitting – Craftsmanship Matters
- Use a wet saw equipped with a fine diamond blade to make clean cuts through the marble without chipping.
- Mark all cuts with precision using a pencil or non-permanent marker.
- Smooth cut edges with a stone file or rubbing stone to maintain the tile’s refined look and feel.
- Dry-fit sheets in tricky areas (corners, outlets, edges) to confirm accuracy before final setting.
Step 5: Setting Tiles – Showcase the Pattern
- Start at the center and work outward to preserve layout symmetry and ensure pattern flow.
- Press mesh-backed mosaic sheets gently but firmly into the thin-set, aligning each sheet carefully with spacers.
- Lightly tap with a rubber mallet to level tiles and eliminate air pockets or unevenness.
- Immediately clean excess thin-set from the surface with a damp sponge to prevent residue on the polished marble.
- Allow to cure for 24 hours before proceeding to the grouting step.
Step 6: Grouting & Sealing – Final Touches
- Use non-sanded grout to protect the polished marble surface from scratching.
- Apply grout diagonally with a rubber float, pressing it into joints to ensure full coverage.
- Wipe off excess grout promptly with a damp sponge to maintain clarity and shine.
- After 15–20 minutes, buff with a soft, dry cloth to remove haze and enhance the polished finish.
- Let the grout cure for 72 hours, then apply a penetrating sealer suitable for polished marble to protect against stains and moisture.
Maintenance Tips – Preserve the Elegance
- Clean with pH-neutral stone cleaners only—avoid vinegar, bleach, or acidic products that could etch the surface.
- Reseal the marble periodically based on traffic and use to maintain its luster and water resistance.
- Use felt pads on furniture legs to prevent scratching.
- Wipe up spills promptly to avoid staining, especially from dark liquids or oils.
Shipping & Packaging
Each Bardiglio & Gray Piela mosaic tile sheet is carefully packed and cushioned to minimize breakage during transport. Mesh backing ensures fast, accurate installation and consistent sheet alignment.
Important Note
Due to the natural variation of Bardiglio and gray marble, expect subtle shifts in tone, veining, and pattern from sheet to sheet. This natural diversity is what makes your installation truly one-of-a-kind. Stonemarket USA recommends professional installation and the use of premium adhesives and sealers. Improper installation voids any responsibility from the manufacturer.