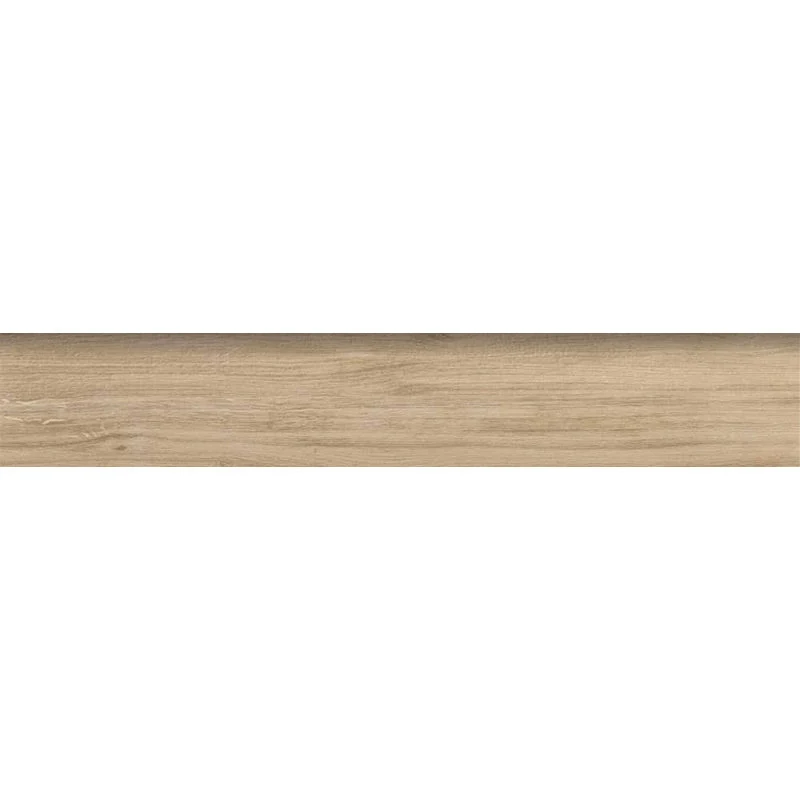
Acorn Pecan 3×18 Natural Porcelain Bullnose
The Acorn Pecan 3×18 Natural Porcelain Bullnose provides a clean, coordinated finish for exposed tile edges and terminations. Its warm Pecan tone pairs seamlessly with Acorn field tiles to create refined, continuous transitions around walls, backsplashes, and shower surrounds.
In a versatile 3×18 format, this bullnose trim helps complete outside corners, window returns, niches, and other detail areas where a factory-finished edge elevates the final look. The Painted-Bevel edge delivers a smooth, professional transition to adjacent surfaces.
Crafted from porcelain with a natural finish, this trim piece offers reliable durability and low-maintenance performance while maintaining a cohesive appearance across your installation.
Features
- Coordinating 3×18 bullnose trim for the Acorn collection in Pecan
- Natural finish for a cohesive look with coordinating Acorn field tiles
- Painted-Bevel factory edge for clean, finished transitions
- Durable porcelain construction with low-maintenance performance
- Elongated format suitable for vertical and horizontal finished edges
- Ideal for window returns, niches, borders, and wall terminations
- Suitable for residential and commercial interior wall applications
Recommended Applications
- Exposed tile edges
- Wall terminations and transitions
- Kitchen backsplashes
- Bathroom and shower wall edges
- Niches and window returns
- Accent borders and decorative transitions
- Residential and commercial interior walls
Installation Guide – Acorn Pecan 3×18 Natural Porcelain Bullnose
Important Advisory
Follow manufacturer instructions, applicable building codes, and ANSI A108/A118 standards. Ensure substrates are sound, flat, and appropriate for tile. Use approved waterproofing in wet areas and provide proper movement joints per TCNA EJ171.
Step 1: Layout & Planning
- Plan the finished edge locations before setting tile to ensure consistent alignment and reveal.
- Dry-fit bullnose pieces with coordinating field tiles to verify joint spacing and orientation of the Painted-Bevel toward exposed edges.
- Check walls for plumb and flatness; adjust layout to minimize small slivers and ensure balanced terminations.
- Blend pieces as desired to achieve a uniform overall appearance.
Step 2: Bullnose Installation
- Use a high-quality thin-set mortar suitable for porcelain and the substrate (e.g., ANSI A118.4 or A118.15).
- Key mortar into the substrate and comb with an appropriate notched trowel; ensure adequate coverage behind each piece.
- Press the bullnose firmly into place and align with adjacent field tiles, maintaining consistent grout joints.
- Periodically check straightness with a level or straightedge; clean excess mortar from joints before it skins over.
- Allow mortar to cure per manufacturer instructions before grouting.
Step 3: Cutting
- Use a wet saw with a porcelain-rated diamond blade for clean cuts.
- Measure carefully and dry-fit cut pieces before installation.
- Keep factory-finished edges at exposed terminations whenever possible; lightly ease cut edges with a rubbing stone if needed.
- Plan corners and returns so the finished edges present a continuous, professional look.
Step 4: Joint Filling
- Select a grout appropriate for porcelain and the joint width.
- Choose a grout color that complements the Acorn Pecan tone and surrounding finishes.
- Apply grout per manufacturer directions, then clean with a damp sponge and buff after initial set.
- Provide movement accommodation joints per TCNA EJ171 at changes of plane and perimeter areas.
Step 5: Cleaning & Maintenance
- Clean routinely with a pH-neutral cleaner approved for porcelain tile.
- Avoid abrasive pads, acidic cleaners, or harsh chemicals that may affect the tile or grout appearance.
- Porcelain typically does not require sealing; follow grout manufacturer guidance regarding grout sealer.
- Wipe residue and soap film promptly in wet areas to maintain a fresh appearance.
Disclaimer
Verify shade, size, and finish before installation; install from multiple cartons as applicable. Always follow setting material and waterproofing manufacturer instructions and industry standards. Stone Market USA is not responsible for improper installation or site conditions.