

Patio Paver Planning Guide: Edges, Transitions, Drainage, and Joint Layout
A successful paver patio is planned as a system, not just as a pattern of attractive units. The surface needs a clear boundary, a logical relationship to the house and surrounding grade, a way to manage water, and a joint layout that works with the patio’s dimensions. Solving those decisions on paper first can reduce cutting, awkward transitions, standing water, and last-minute material changes.
This patio paver planning guide explains how to think through the major decisions before ordering materials or preparing the site. It focuses on layout and coordination rather than prescribing a single installation method, since the appropriate base, bedding, restraint, drainage, and setting details depend on the site, materials, climate, and local requirements.
Begin by comparing patio paver options with the overall project in mind. Size, shape, surface character, color variation, and the intended joint pattern all affect how much cutting and visual adjustment the patio may require.
Start with the patio’s fixed points
Material Guidance
Plan the edges before the field pattern
Material Guidance
Coordinate transitions between surfaces
Application Guide
Start with the patio’s fixed points
Before choosing a running bond, grid, or modular pattern, draw the patio in relation to the features that cannot move. These may include the exterior wall, door thresholds, steps, retaining walls, property lines, planting beds, utility covers, posts, and existing walkways.
Measure the usable area and mark the dimensions on a scaled sketch. A simple drawing should show the house wall, proposed patio perimeter, steps, nearby drainage features, and the direction in which water can safely move. If the patio connects to more than one surface, mark each transition separately rather than treating the whole perimeter as one continuous edge.
Door locations deserve special attention. A patio that looks centered in the yard may feel poorly aligned if its joints, border, or main walking route conflict with the primary door. Establish the most important sightlines and paths first, then fit the paver pattern around them.
Plan the edges before the field pattern
Edges do more than frame the patio visually. They help define the installation boundary and must be coordinated with the surrounding grade, adjacent materials, and the system used to keep the pavers from shifting. The exact restraint approach should be selected with the installer and product guidance because site conditions and construction methods vary.
Choose an edge strategy
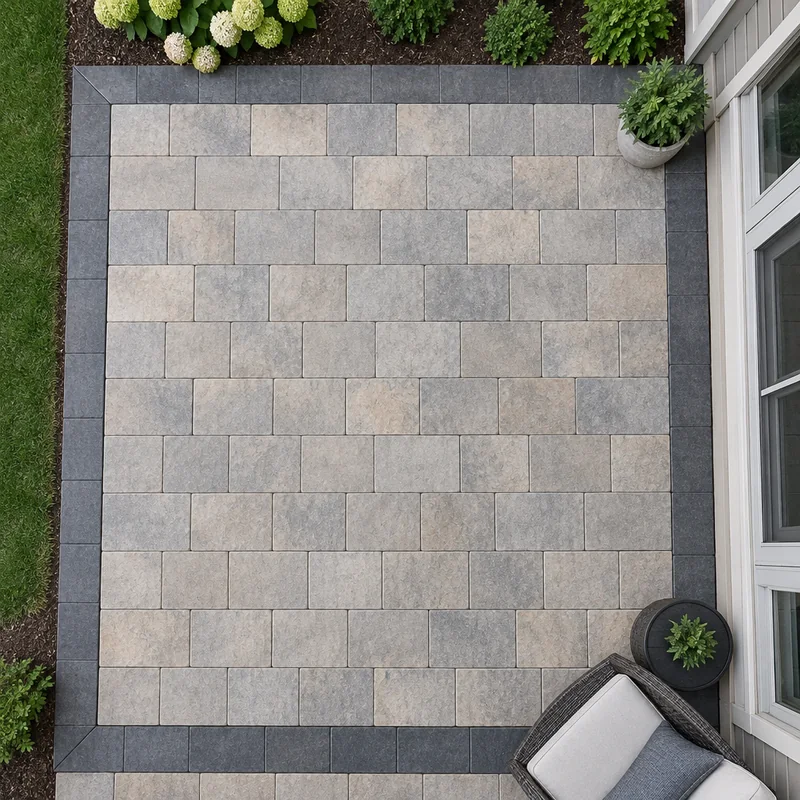
A patio may use a contrasting border, the same paver turned in a different orientation, a separate curb-like detail, or a restrained field with minimal visual emphasis. A border can create a clear finish line and simplify the appearance of cut pieces, but it also takes space away from the main field and changes the layout calculations.
Decide whether the border is decorative, functional, or both. If the outer edge meets lawn or planting soil, consider how mowing, soil migration, and future landscape work will affect that boundary. If it meets a wall or step, the edge must also accommodate the physical relationship between the two surfaces rather than simply stopping at the first convenient joint.
Use the perimeter to control cuts
Lay out the border and field together. A pattern that begins with a full paver at one side may end with narrow slivers at the opposite side. Small cuts can be difficult to place attractively and may create a weak-looking visual edge. Adjusting the starting point, border width, or joint alignment can often distribute cuts more evenly.
For natural stone, plan with the understanding that individual pieces can vary in color, movement, texture, and shade. A sample helps establish the general direction of the material, but it cannot represent every piece in a natural-stone installation. Sorting and dry-laying may therefore be useful where appearance and pattern continuity matter.
Coordinate transitions between surfaces
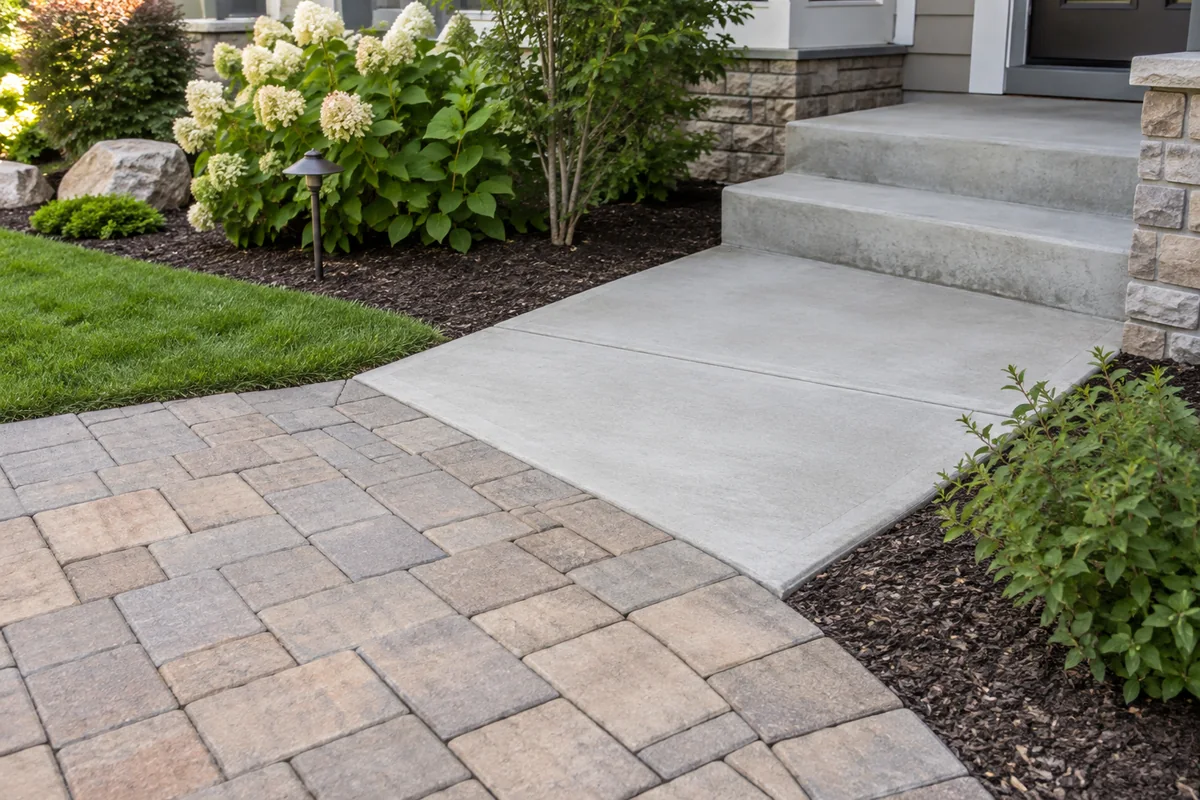
Most patio problems occur where the pavers meet something else. Common transitions include a door threshold, concrete walkway, pool surround, driveway, garden bed, lawn, steps, and a change in elevation. Each one should be drawn and reviewed before installation begins.
House and door transitions
At the house, confirm the planned finished elevation in relation to the threshold, siding, exterior wall, steps, and any existing drainage path. Do not assume that raising or lowering the patio is a simple matter of adding or removing bedding material. The relationship between the patio, building, and water-management details needs project-specific review.
At a door, the joint pattern should support the approach to the entrance instead of creating a distracting row of narrow cuts or an abrupt change in direction. If the patio serves as an outdoor room, align the most prominent joints or border with the door where practical, while still preserving the required slope and edge conditions.
Walkways, steps, and adjacent paving
When the patio connects to a walkway, decide whether the two areas should share a pattern or have a deliberate visual separation. Continuing the same material can make the route feel unified, while a border or orientation change can clarify where one zone ends and another begins.
Steps require more than a visual match. Their elevations, nosings, risers, and landing relationships should be coordinated by someone familiar with the project’s construction requirements. A paver layout should not be allowed to dictate unsafe or impractical step geometry.
For a modular appearance, review French pattern pavers before finalizing the patio dimensions. A repeating modular set can influence the required field size, border treatment, and placement of cuts around the perimeter.
Confirm that the selected tile, finish, format, and installation system are appropriate for the exact surface where the material will be used.
Design drainage into the plan
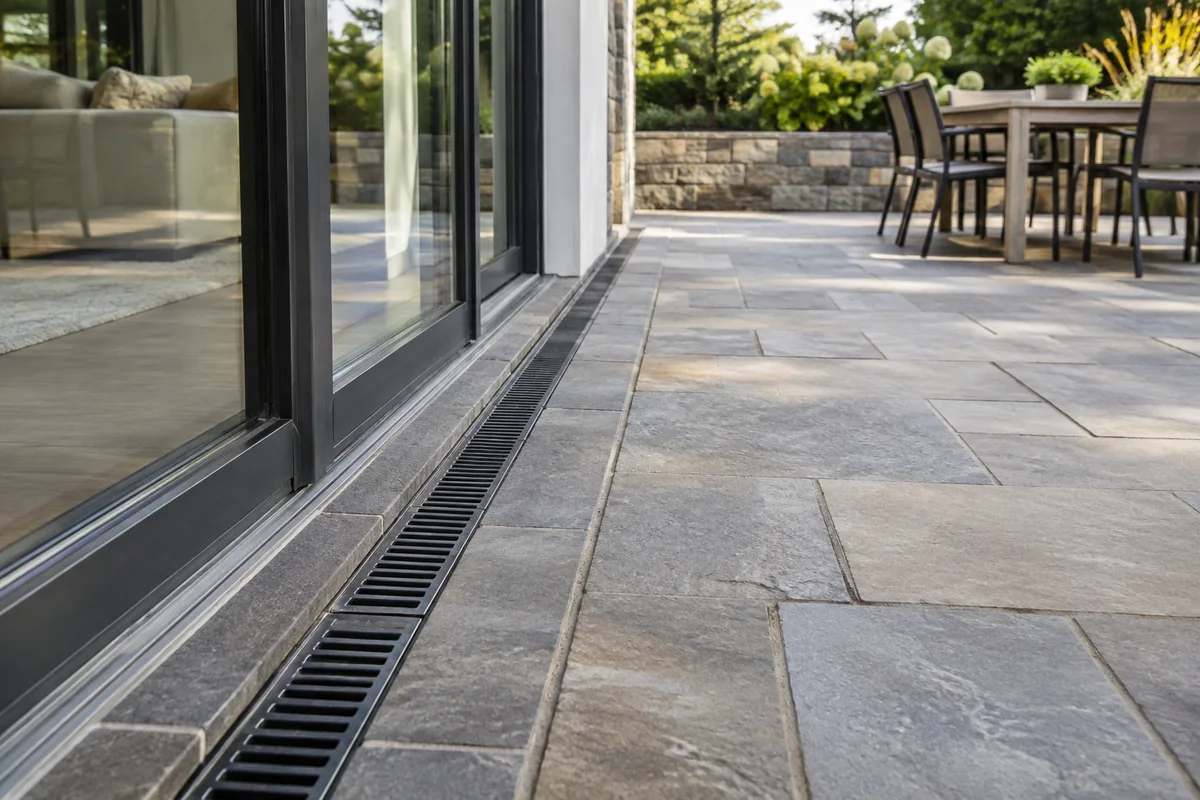
Drainage should be considered before the patio footprint is fixed. First identify where water currently flows during heavy rain and where it can go after construction. The finished surface should not direct runoff toward the building, trap water against walls, or create a nuisance for neighboring areas.
Establish the intended slope
Outdoor surfaces generally need a planned fall so water can move away from the building or toward an appropriate collection and discharge point. The necessary slope depends on the construction system, surface material, local conditions, and applicable requirements. Use the project’s verified installation guidance rather than treating one generic number as universal.
Show the high and low points on the drawing, along with the direction of fall. This helps reveal conflicts early. For example, a patio may appear level relative to the yard but still be too high at a doorway, or a low corner may send runoff toward a foundation or neighboring hardscape.
Account for drains and grade changes
If a drain, channel, swale, or catchment area is needed, place it on the plan before laying out the joints. Drains should not be added as an afterthought simply because the finished surface has nowhere else to send water. Their location also affects cuts, border continuity, maintenance access, and the visual rhythm of the patio.
Check the patio against surrounding grades at several points, not just at the corners. A long edge can sag or rise relative to the landscape even when the drawing looks correct. On sloped sites or near structures, a qualified installer or site professional should verify the grading and drainage approach.
Choose a joint layout that suits the space
Joint layout affects both appearance and waste. The best pattern is not necessarily the one that looks most interesting in a product photograph; it is the one that works with the patio’s proportions, traffic paths, borders, transitions, and available cuts.
Common layout decisions
- Running bond: A staggered arrangement can emphasize length and is often easy to adapt, but the offset should be planned around borders and focal points.
- Stacked or aligned joints: Straight joint lines create a more ordered appearance and can align well with walls or architecture, though small dimensional errors may be more noticeable.
- Grid layout: A regular grid can suit square or rectangular patios and makes the field easy to read, but it requires careful attention to the perimeter so the cuts remain balanced.
- Modular patterns: A repeating set of different sizes can add variation, but the repeat must be understood before the patio dimensions and edge details are finalized.
Lay out the pattern from the most visible or functionally important area. That may be the main door, a dining table, a fire feature, or the centerline of the house. Avoid creating a prominent narrow strip along the most noticeable edge just to preserve full pieces elsewhere.
Review the joint lines in both directions. A pattern may look balanced in plan view but create an awkward alignment at a step, drain, or walkway. Mark likely cuts and transitions on the drawing before calculating quantities.
Confirm measurements, cuts, pattern direction, grout joints, transitions, and waste allowance before quantities are finalized.
Estimate materials after the layout is tested
Measure the patio’s area, then account for the border, pattern repeat, cuts, and any areas that use a different material. The amount of additional material needed for cuts and breakage depends on the design, shape of the site, installation method, and the material itself. Ask for project-specific guidance rather than applying an arbitrary allowance.
Natural stone deserves additional planning because pieces may not be visually identical. If the material has noticeable variation, the installation may benefit from distributing shades and movement across the entire patio instead of concentrating similar pieces in one area. A dry layout can reveal whether the selected pattern works before material is permanently installed.
For a specific visual reference, you can review the charcoal travertine paver as one example of how a rectangular paver may read within a patio plan. No performance or installation conclusion should be drawn from the product name alone; confirm the applicable product information before specifying it.
Common planning mistakes to avoid
- Choosing the pattern before measuring doors, steps, drains, and fixed structures.
- Ignoring the finished elevation until the material has already been ordered.
- Sending runoff toward the house or relying on a flat surface to drain by chance.
- Allowing a border to become too narrow for the intended visual or functional purpose.
- Leaving utility covers, cleanouts, or drainage features out of the joint plan.
- Assuming a product sample represents the full color and movement range of natural stone.
- Ordering material before reviewing likely cuts and the amount of pattern repetition.
- Treating the patio as independent from adjacent steps, walkways, and landscape grades.
A practical review before ordering
Before committing to a material or pattern, walk through the plan with these questions:
- Where is the patio’s high point, and where will water go?
- How does the finished surface relate to the house, door thresholds, steps, and nearby pavement?
- Is the edge detail appropriate for lawn, planting beds, walls, and changes in elevation?
- Will the chosen pattern create narrow or visually awkward cuts?
- Are the most important joints aligned with the primary door, walkway, or outdoor-use area?
- Have drains, covers, posts, and other fixed obstacles been included?
- Has the material been evaluated for natural variation, and has the installer reviewed the proposed system?
For broader material-selection criteria, read how to choose outdoor pavers before narrowing the layout to a particular product type.
If natural stone is under consideration, the natural stone paver guide can help frame questions about variation, samples, and project evaluation.
Final takeaway
A well-planned patio begins with the site rather than the pattern. Establish the finished elevations and drainage direction, coordinate each transition, select an edge strategy, and test the joint layout against the actual dimensions. Once those decisions are clear, comparing materials and estimating quantities becomes more reliable, and the finished patio is more likely to look intentional from every approach.
Frequently asked questions
Quick answers to practical selection, installation, care, and planning questions.
Should the paver pattern be centered on the patio?
Not always. Centering can work well in a symmetrical space, but aligning the pattern with a primary door, walkway, step, or architectural feature may produce a more useful result. The perimeter cuts and drainage plan should also influence the starting point.
Can a patio be planned without a border?
Some designs use the same paver throughout or rely on a restrained perimeter detail, but every patio still needs a clearly considered edge condition. The boundary must relate to adjacent grades and the method used to keep the installation stable.
How should drainage be handled near a house?
Plan the finished elevation and direction of fall so water is not directed toward the building. The appropriate drainage and installation details depend on the site and construction system, so they should be reviewed against project requirements and qualified professional guidance.
Is a sample enough to choose natural stone?
A sample is useful for understanding the general color, texture, and character, but it cannot show every piece in a natural-stone installation. Ask how variation should be evaluated and, when practical, review more than one piece before finalizing the design.
Find the Right Tile or Stone for Your Project
Browse Stone Market USA collections or contact our team for help comparing materials, finishes, applications, samples, quantities, and current availability.