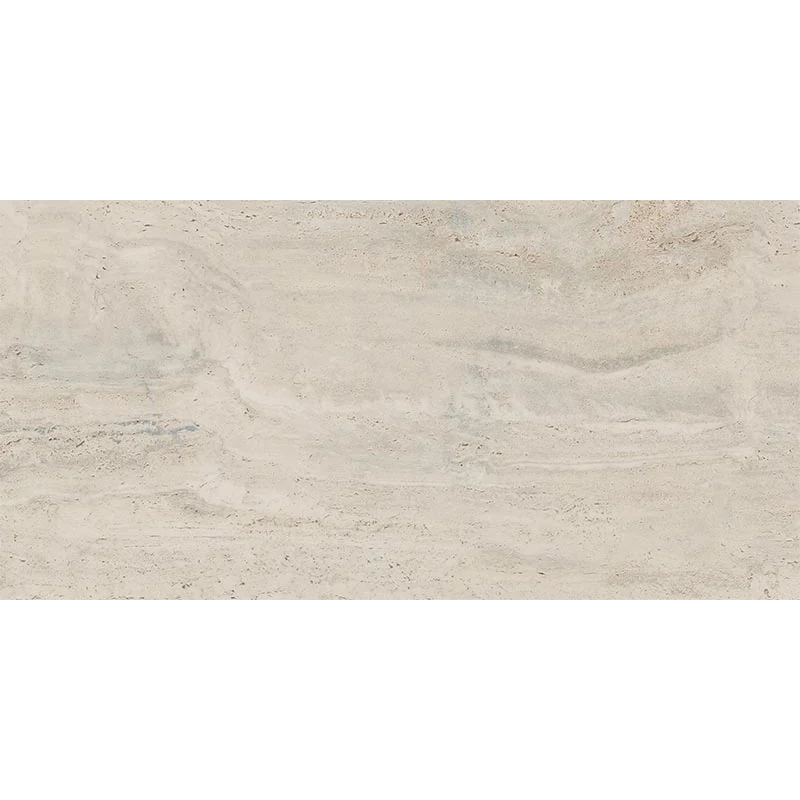
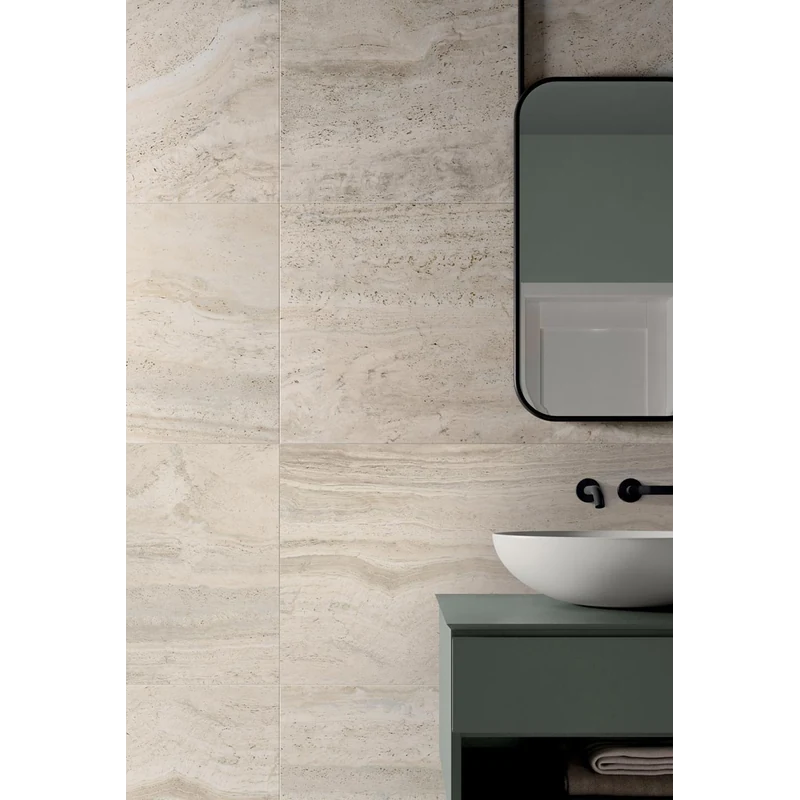
Navona Bone Vein Cut 12×24 Porcelain Tile Natural Rectified
Subtle and sophisticated, Navona Bone Vein Cut brings a linear, vein‑cut look in a warm bone tone. The natural (matte) surface feels refined without glare, while the 12×24 format minimizes grout lines for a smooth, modern layout. Precisely rectified edges support tight, consistent joints and crisp alignments across floors and walls.
Crafted in durable porcelain at 8.5mm (5/16") thickness, this tile balances style with everyday practicality. A PEI 4 wear rating suits busy residential spaces and light commercial traffic, DCOF 0.60 offers confident traction, and frost resistance opens design possibilities for exterior facades in freeze–thaw climates.
Use Navona Bone Vein Cut to anchor minimalist schemes or to complement layered finishes and textures—the neutral palette pairs easily with both warm and cool materials.
Features
- Porcelain body for durability and easy maintenance
- Color: Bone Vein Cut with a refined linear pattern
- Finish: Natural (matte) surface
- Edge: Rectified for precise, narrow grout joints
- Size: 12×24 format
- Thickness: 8.5mm (5/16")
- PEI rating: 4
- DCOF: 0.60
- Frost resistant for freeze–thaw exterior wall use
- Coverage: 11.63 sq ft per box | 6 pieces per box
Recommended Applications
- Residential interior floors
- Residential interior walls
- Light commercial interior floors
- Commercial interior walls
- Backsplashes
- Shower walls
- Fireplace surrounds
- Exterior walls/facades (freeze–thaw)
Installation Guide – Navona Bone Vein Cut 12×24 Porcelain Tile Natural Rectified
Important Advisory
Always follow the tile manufacturer’s instructions, local building codes, and recognized industry standards (ANSI A108/A118 and TCNA guidelines). Verify substrate suitability, movement accommodation, and waterproofing/drainage where required.
Step 1: Layout & Planning
- Confirm the substrate is clean, dry, structurally sound, and flat within tolerances appropriate for 12×24 porcelain tile.
- Dry-lay to balance cuts and align the vein-cut direction as desired; center the layout to avoid narrow perimeter pieces.
- Blend tiles from multiple boxes to distribute any shade or pattern variation uniformly.
- Select a grout joint appropriate for rectified tile and incorporate movement joints per TCNA EJ171.
Step 2: Tile Installation
- Use a polymer-modified thin-set mortar approved for porcelain tile.
- Key mortar into the substrate, comb with an appropriate notched trowel, and back-butter larger tiles to improve bond.
- Set tiles with a slight sliding motion to collapse ridges; target mortar coverage consistent with location and service (typically 80–95%).
- Use a leveling system if needed to help reduce lippage on larger-format installations.
- Observe open time, traffic, and cure periods per mortar manufacturer instructions before grouting or use.
Step 3: Cutting
- Cut with a wet saw and a high-quality diamond blade rated for porcelain.
- Mark and support cuts carefully to minimize chipping; ease exposed cut edges as needed.
- Drill or notch using porcelain-rated tools at low feed pressure to avoid cracking.
Step 4: Joint Filling
- Choose a grout suitable for porcelain and the selected joint width; mix and apply per manufacturer directions.
- Pack joints fully with a rubber float, clean diagonally, and remove haze promptly with clean water.
- Use flexible sealant at movement joints and changes of plane; do not grout these areas.
- Protect the installation from traffic until grout has cured.
Step 5: Cleaning & Maintenance
- Clean routinely with a pH-neutral cleaner approved for porcelain tile; avoid acids and harsh abrasives.
- Use entry mats and protective pads under furniture to limit grit and scratching.
- Follow grout manufacturer maintenance guidance; reseal cementitious grout if recommended.
Disclaimer
Installation should be performed by qualified professionals. Confirm actual materials, lot-to-lot variations, and suitability for the specific application before installation. Stone Market USA is not responsible for issues arising from improper installation, handling, or site conditions.