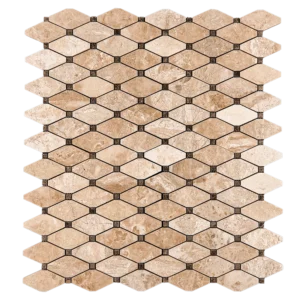
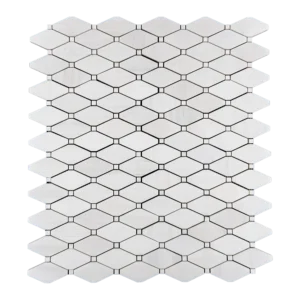
Clipped Diamond Silver Beige Diamond with Emperador Dot – Polished Marble Mosaic Tile
Striking Geometry with Timeless Warmth
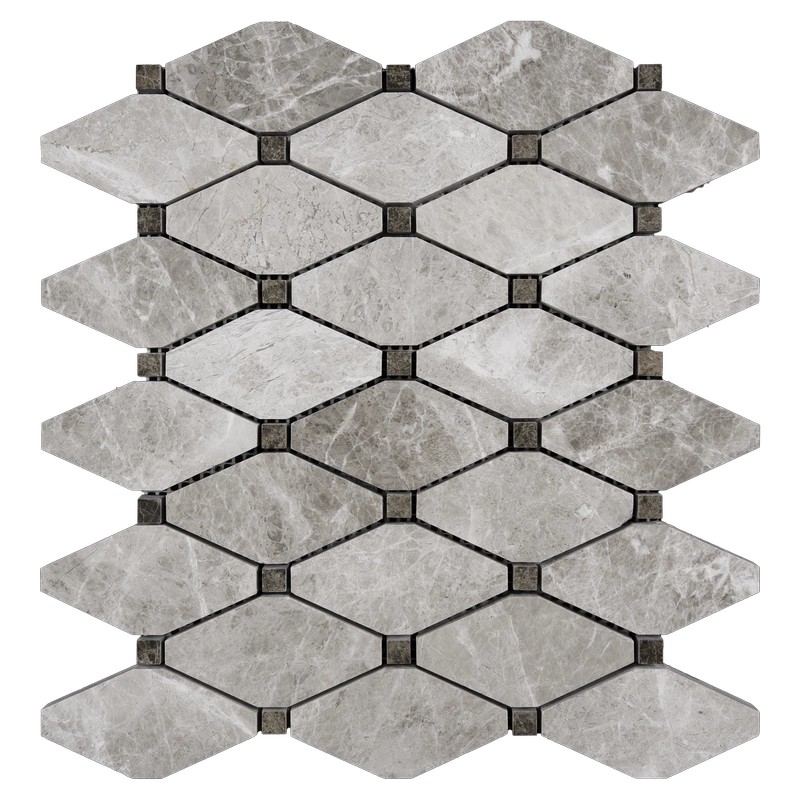
The Clipped Diamond Beige Diamond with Emperador Dot Mosaic Tile brings together classic warmth and geometric refinement. Featuring a luxurious blend of polished beige marble and contrasting Emperador brown dot inlays, this design creates a sense of depth and architectural interest that elevates any surface it touches.
Its clipped diamond pattern adds dynamic movement while the polished finish enhances natural veining and reflective elegance. Perfect for accent walls, backsplashes, and decorative flooring in both residential and commercial interiors, this tile offers a bold yet harmonious visual narrative.
Product Details
- Material: Natural Beige Diamond and Emperador Marble
- Finish: Polished – high-gloss surface enhances color and detail
- Design: Clipped diamond pattern with accent dots for geometric dimension
- Color Palette: Warm beige and rich brown for sophisticated contrast
- Applications: Ideal for walls, backsplashes, niche areas, and feature floors
- Installation: Mesh-mounted sheets ensure quick, accurate placement
Why Choose This Tile?
Whether you’re designing a boutique-style bathroom or an elegant kitchen backsplash, this mosaic tile offers flexibility and artistic appeal. The clipped diamond layout and striking color contrast invite visual interest while maintaining a balanced, upscale look. Additionally, the polished marble ensures durability and ease of maintenance in high-traffic areas.
Installation Guide – Step by Step
Step 1: Surface Preparation – Start on Solid Ground
- Ensure the substrate is clean, dry, flat, and free of grease or dust.
- Correct surface irregularities with a self-leveling compound.
- Apply a waterproof membrane for wet areas like showers or backsplashes.
Step 2: Layout Planning – Symmetry and Flow
- Mark the center of your installation area for balanced alignment.
- Dry-lay mosaic sheets to preview veining flow and dot alignment.
- Blend sheets from multiple boxes to ensure natural variation consistency.
- Use 1/16″ to 1/8″ spacers between sheets to maintain uniform grout lines.
Step 3: Thin-Set Application – Precision is Key
Recommended Mortars:
- Mapei Adesilex P10 (with Keraply for added strength)
- Laticrete Glass Tile Adhesive Mortar (white)
- Ardex X77 White
Instructions:
- Use a 3/16″ V-notched trowel or 1/4″ square-notched trowel for proper coverage.
- Apply thin-set evenly and comb in one direction at a 45° angle.
- Back-butter mosaic sheets for full bonding when necessary.
- Gently press sheets into place with a rubber grout float or beating block.
Step 4: Cutting & Adjustments – Finish Neatly
- Use a wet saw with a fine diamond blade to cut marble tiles cleanly.
- Cut sheets from the back mesh side to reduce chipping.
- Use a stone file to smooth sharp edges if needed.
Step 5: Grouting – Handle the Finish with Care
- Seal tiles with a marble-safe penetrating sealer before grouting to prevent staining.
- Use non-sanded grout to avoid scratching the polished surface.
- Apply grout diagonally using a rubber float to fill joints evenly.
- Clean the surface promptly with a damp sponge to avoid residue build-up.
- Buff away haze with a microfiber cloth after 30–45 minutes.
Step 6: Final Sealing – Lock in Beauty
- Once grout has cured (typically 72 hours), apply a second coat of sealer.
- Use a penetrating marble-safe sealer for long-term protection.
Maintenance Tips – Keep It Radiant
- Use only pH-neutral, non-acidic stone cleaners.
- Wipe spills quickly to prevent etching or staining.
- Regularly reseal surfaces depending on location and usage frequency.
Shipping & Packaging
Each mosaic sheet is secured with protective mesh backing and individually padded to prevent damage in transit. Inspect all sheets before installation to ensure color and layout consistency.
Important Note
Natural marble varies in tone and veining. Always dry-lay sheets before final installation. Stonemarket USA is not responsible for natural variation or installation errors.