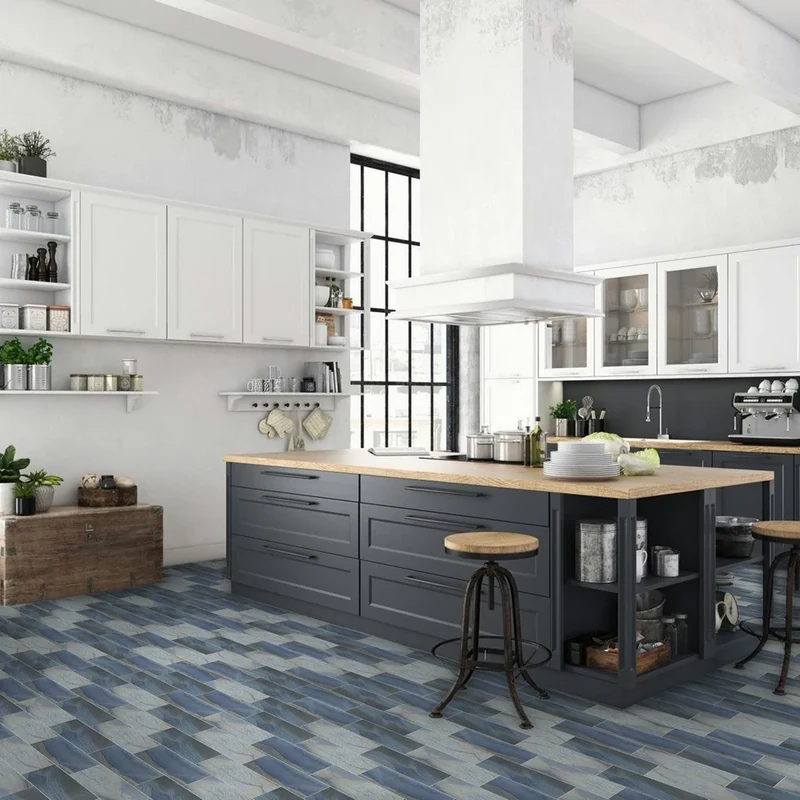
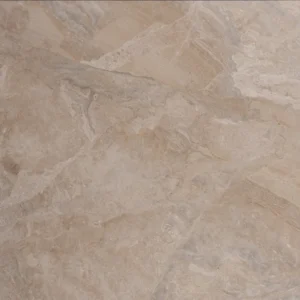
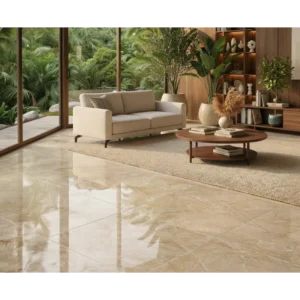
Macaubas Azul Anticato 4×12 Rectified Porcelain Tile
Macaubas Azul Anticato porcelain tile brings a rich Azul color and antiqued Anticato finish to interior design projects. Its 4×12 format offers a versatile proportion for floors, walls, borders, backsplashes, and other coordinated tile layouts, while the rectified edge supports clean, carefully aligned installations.
Made from porcelain and rated PEI 3, this 3/8-inch-thick tile is suited to residential applications where its performance characteristics meet the project requirements. Its frost-free rating may also support select exterior uses when the complete installation system, climate, drainage, and local requirements are properly evaluated by a qualified professional.
The elongated format can be arranged in horizontal, vertical, stacked, offset, or decorative patterns. Review material before installation and plan the layout carefully to create a balanced appearance across the finished space.
Features
- Porcelain construction
- Macaubas collection
- Azul color
- Anticato finish
- 4×12 size
- 3/8-inch thickness, approximately 10 mm
- Rectified edge
- PEI 3 rating
- Frost-free rating
- Sold using square-foot coverage-based purchasing
Recommended Applications
- Residential interior floors where a PEI 3 porcelain tile is appropriate
- Residential interior walls and decorative accent areas
- Kitchen backsplashes and other interior tile features
- Borders and coordinated design layouts
- Select exterior installations when climate, substrate, drainage, and installation requirements are verified by a qualified professional
- Applications requiring a 4×12 rectified porcelain tile with an Anticato finish
Installation Guide – Macaubas Azul Anticato 4×12 Rectified Porcelain Tile
Important Advisory
Review the material before installation and follow Happy Floors installation instructions, mortar and grout manufacturer directions, applicable local building codes, and recognized tile-industry standards. Confirm that the selected tile, setting materials, substrate, waterproofing, drainage, and environmental conditions are appropriate for the intended application.
Step 1: Layout & Planning
- Confirm the required quantity using the project area, layout, cuts, and an appropriate allowance for waste; the product is purchased using square-foot coverage.
- Inspect all cartons before installation for color, finish, size, edge condition, and other visible characteristics. Do not install material with unacceptable defects.
- Establish control lines and dry-lay representative tiles to plan the 4×12 layout, border locations, transitions, and cut pieces.
- Consider horizontal, vertical, stacked, offset, or other planned arrangements before setting the tile. Coordinate the layout with corners, openings, fixtures, and changes of plane. Use grout-joint dimensions recommended by the tile, mortar, and grout manufacturers.
Step 2: Tile Installation
- Prepare a clean, dry, flat, stable, and properly cured substrate that meets applicable tile-installation requirements. Correct cracks, contamination, uneven areas, or structural concerns before beginning.
- Where the installation environment requires it, coordinate an appropriate waterproofing or moisture-management system with the substrate and project design. Exterior installations also require suitable drainage and compliance with local requirements.
- Use a quality mortar or thin-set specifically suitable for porcelain tile and compatible with the prepared substrate and installation location. Apply and comb the mortar according to the mortar manufacturer’s instructions.
- Set the tile while the mortar is within its recommended open time. Press and move each piece as needed to achieve proper contact, and periodically remove a tile to verify mortar transfer and coverage.
- Use spacers or an approved layout system as appropriate to maintain consistent joints. Check lines, plane, alignment, and surface cleanliness frequently during installation, and remove excess mortar from joints before it hardens if possible. Allow the setting material to cure as directed before grouting.
Step 3: Cutting
- Measure and dry-fit cut pieces before applying setting material.
- Use a professional wet saw or tile-cutting tool with equipment suitable for porcelain tile.
- Make detailed cuts for outlets, plumbing penetrations, corners, and fixtures with appropriate porcelain-tile tooling.
- Handle cut pieces carefully and inspect exposed edges before placement. Protect adjacent finished surfaces during cutting.
Step 4: Joint Filling
- Select a grout compatible with porcelain tile, the planned joint width, and the installation environment.
- Apply grout according to the grout manufacturer’s instructions, working it fully into the joints and removing excess from the tile surface in a timely manner.
- Use a clean, damp sponge to remove residue without washing grout from the joints. Allow the grout to cure as directed, and follow the grout manufacturer’s guidance regarding sealing or ongoing care.
- Provide movement accommodation at changes of plane, perimeters, transitions, and other locations required by applicable standards and the installation system. Use an appropriate flexible sealant where specified rather than rigid grout.
Step 5: Cleaning & Maintenance
- Remove mortar, grout residue, and construction debris using cleaning products and methods approved for porcelain tile and the selected grout.
- Clean regularly with a mild, non-abrasive product suitable for porcelain tile. Avoid harsh chemicals, abrasive pads, and tools that could damage or discolor the finish.
- Wipe spills and buildup promptly, and maintain grout joints according to the grout manufacturer’s care recommendations.
- For exterior installations, keep drainage paths clear and monitor joints and transitions as part of routine maintenance.
Disclaimer
Stone Market USA is not responsible for installation errors, substrate conditions, improper product selection, or material installed without prior inspection. Product suitability depends on the complete installation system and site conditions; verify requirements with the manufacturer, a qualified tile professional, and applicable local codes before installation.