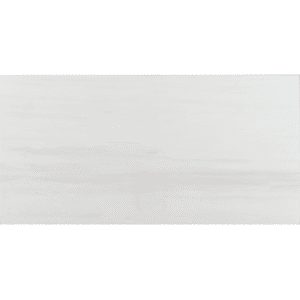
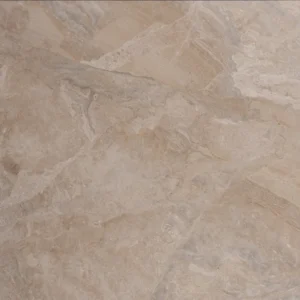
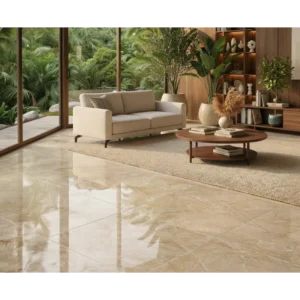
Acorn Grey 9×36 Natural Rectified Porcelain Tile
Acorn Grey 9×36 porcelain tile introduces cool, contemporary character for design-forward interiors. The elongated plank format emphasizes clean lines and a seamless, linear look in versatile shades of grey.
A natural matte finish keeps glare to a minimum for a refined appearance, while rectified edges support tighter grout joints and crisp alignment. Crafted in durable, frost-resistant porcelain and tested to a DCOF >0.42, Acorn Grey offers low-maintenance practicality for stylish spaces.
Confirm suitability with your installer for the intended application and always follow manufacturer instructions and industry standards for best results.
Features
- Collection: Acorn
- Color: Grey
- Material: Porcelain
- Size: 9×36 plank
- Finish: Natural (matte appearance)
- Edge Type: Rectified
- DCOF: >0.42 (per manufacturer)
- Frost resistant porcelain body
- Coverage per box: 13.08 sq ft
- Plank format supports streamlined, contemporary layouts
Recommended Applications
- Interior walls
- Kitchen backsplashes
- Shower walls
- Feature walls and accent panels
- Fireplace surrounds
- Entry and hallway wall cladding
Installation Guide – Acorn Grey 9×36 Natural Rectified Porcelain Tile
Important Advisory
Always follow the tile manufacturer’s instructions, ANSI A108/A118 standards, TCNA guidelines (including EJ171 for movement joints), and local building codes. Verify product suitability for the intended application before installation. Ensure the substrate is properly prepared for porcelain tile and maintain proper drainage and waterproofing where required.
Step 1: Layout & Planning
- Confirm the substrate is structurally sound, flat, clean, and dry; long planks benefit from especially flat surfaces.
- Establish reference lines and plan the direction of the 9×36 planks to achieve a balanced, linear layout.
- Dry-lay several pieces to evaluate overall appearance and blend from multiple boxes as needed.
- When using a staggered pattern, a maximum offset of about one-third is commonly recommended for long planks unless the manufacturer specifies otherwise, to help reduce lippage risk. Use appropriate spacers to maintain consistent joints and plan perimeter/movement joints per standards.
Step 2: Tile Installation
- Prepare the substrate so it is plumb, flat, and free of contaminants that could inhibit bond.
- Use a polymer-modified thin-set mortar suitable for porcelain; a large-and-heavy-tile (LHT) mortar is often recommended for plank formats. Select trowel size to achieve proper coverage.
- Comb mortar in one direction and set tiles perpendicular to the ridges; back-butter tiles as needed to reach required coverage.
- Use a leveling system where appropriate to help minimize lippage between long planks.
- Maintain the manufacturer-recommended minimum grout joint. Clean excess mortar from joints and surfaces before it hardens, and allow the installation to cure per mortar instructions before grouting or traffic.
Step 3: Cutting
- Use a professional wet saw with a porcelain-rated diamond blade for clean, accurate cuts.
- Measure carefully and dry-fit cut pieces before setting.
- Ease sharp edges on exposed cuts with a suitable stone or diamond pad as needed.
- Take extra care with narrow or detailed cuts in the elongated plank format.
Step 4: Joint Filling
- Select a grout appropriate for porcelain tile and the chosen joint width.
- Choose a grout color that complements the tile and overall design intent.
- Pack joints fully and clean according to grout manufacturer instructions, changing rinse water frequently.
- Allow grout to cure fully; seal cementitious grout if recommended by the grout manufacturer. Maintain movement joints with an appropriate sealant per EJ171.
Step 5: Cleaning & Maintenance
- Sweep, dust, or vacuum regularly to remove grit that can abrade surfaces.
- Clean with a pH-neutral cleaner suitable for porcelain tile; rinse thoroughly and dry with a soft cloth or mop.
- Avoid harsh acids, oil-based soaps, or abrasive pads and powders that may affect the appearance of tile or grout.
- Use entry mats and protective pads under furniture. Porcelain tile typically does not require sealing; follow grout manufacturer guidance for grout care.
Disclaimer
Guidance provided is general and not a substitute for manufacturer instructions or professional judgment. Always confirm suitability, follow product-specific documentation, and comply with applicable standards and local codes. Stone Market USA is not responsible for installation practices or substrate conditions.