

Mosaic Sheet Installation Planning: Align Sheets, Manage Seams, and Avoid Repeating Patterns
Mosaic sheets can make installation more manageable, but they do not eliminate the need for careful layout planning. A small alignment error can repeat across an entire wall or floor, while poorly blended sheet edges may create visible lines through the finished surface. The most useful mosaic sheet installation tips focus on planning before setting material: establish reference lines, test several sheets together, control transitions, and decide where seams and cuts will be least noticeable.
If you are still comparing materials, you can shop mosaic tiles before finalizing the layout. The sheet format, tile shape, surface variation, and pattern direction all affect how the installation should be planned.
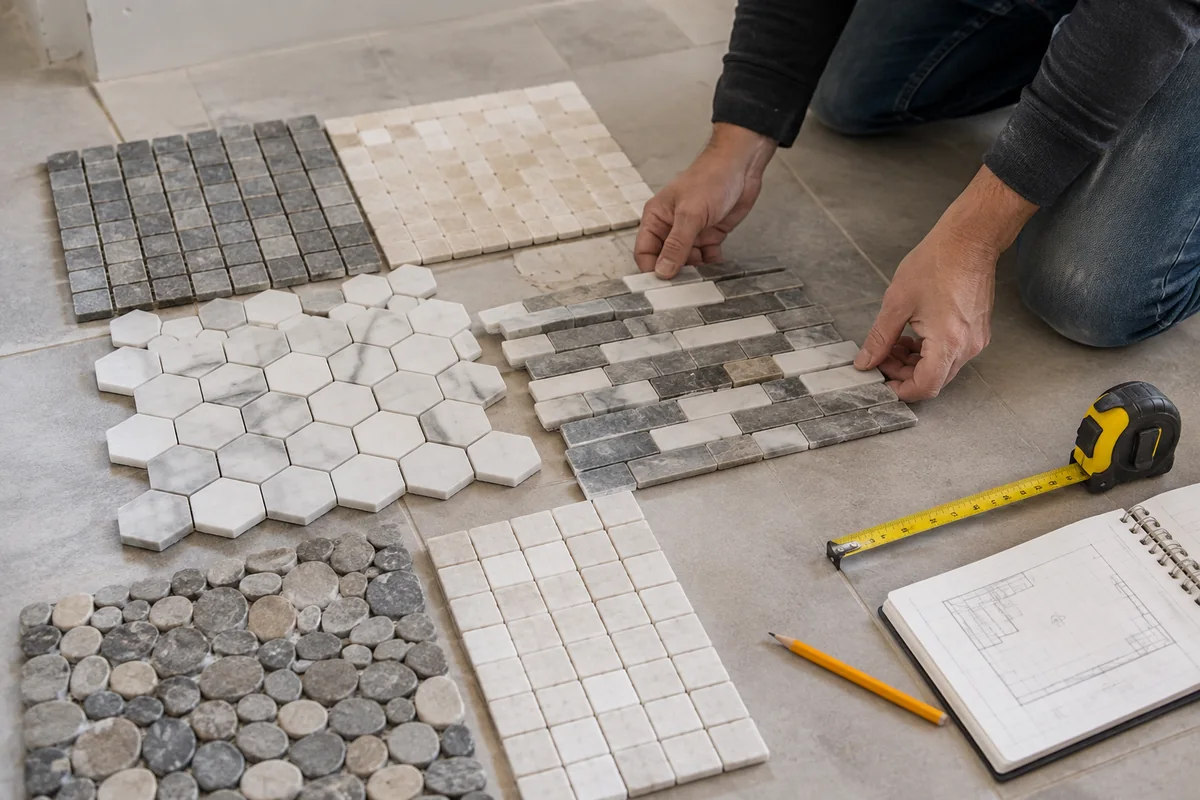
Start with the actual sheets, not just the product image
Before applying setting material, open and inspect enough sheets to understand how they work together. A single sheet may look balanced by itself but reveal obvious repetition when placed beside several others. This is especially important for natural stone mosaics, where color, veining, texture, and movement may vary from piece to piece.
Set a group of sheets on a clean, flat surface in the approximate arrangement you expect to use. Look for differences in shade, tile orientation, edge spacing, and pattern density. If the sheets contain directional pieces or varied stone movement, mark the orientation on the back of each sheet with a pencil or removable tape. Do not assume that every sheet can be rotated or flipped without changing the appearance.
A sample can help you evaluate color and scale, but it cannot represent every piece in a natural-stone installation. Reviewing multiple sheets together gives you a more realistic sense of how repetition and variation will appear across the project.
Plan the field before planning the cuts
Measure the installation area and identify the most visible boundaries first. These may include the center of a vanity, the edge of a niche, the middle of a range hood, a doorway, or the point most often seen when entering the room. A layout that looks acceptable at a hidden corner may look unbalanced when centered on a prominent architectural feature.
Use a level or laser to establish reference lines appropriate to the surface. On a wall, a level horizontal line can help prevent the sheets from gradually drifting upward or downward. A vertical reference can help center a pattern and distribute cuts more evenly. On a floor, the starting point should account for room geometry, thresholds, cabinetry, and other transitions rather than being chosen only by convenience.
Dry-lay the sheets against these reference lines and check the perimeter cuts. Very narrow slivers at one side often look less intentional than a layout that shares the adjustment between opposite sides. The exact approach depends on the room and pattern, but the general goal is to avoid making one edge carry all of the correction.
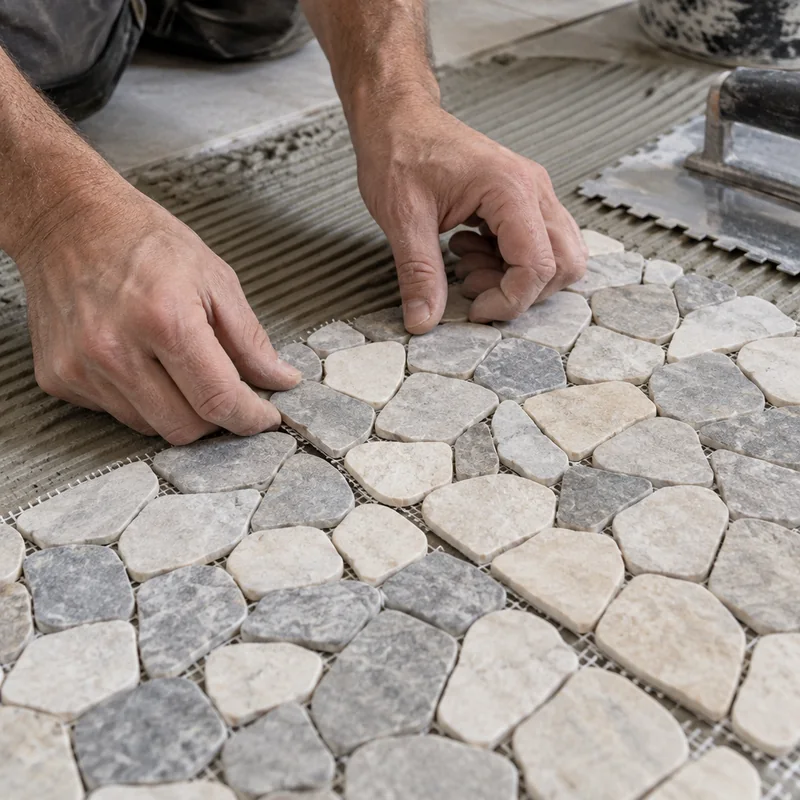
How to align mosaic sheets without creating a grid of seams
Sheet edges are not always the same as finished grout joints. The individual tiles may be evenly spaced within the sheet while the distance between sheets is slightly different. If those outer gaps are placed directly beside one another, they can form a continuous stripe that reveals the sheet format.
After positioning the first sheet, compare its joint spacing with the internal joints of the neighboring sheet. Adjust the second sheet so the transition resembles the surrounding joints. This may require small, controlled movement before the setting material firms up. Avoid forcing sheets together so tightly that the tiles lose their intended spacing or the setting material is pushed out of the joints.
For many layouts, it helps to avoid lining up every sheet edge in a regular vertical or horizontal grid. That does not mean randomly offsetting material. The pattern itself should remain consistent, and any adjustment should preserve the intended spacing and geometry. The objective is to make the sheet boundaries read as part of the overall mosaic rather than as repeating panels.
Use a seam strategy before installation begins
Decide where sheet transitions will occur and how they will relate to corners, changes in plane, fixtures, and cuts. A seam hidden near a corner or beneath a planned cut may be less noticeable than one placed in the center of a highly visible field. However, corners and changes in plane also require careful installation planning, so do not treat them as places where alignment can be ignored.
Keep a few loose mosaic pieces available for areas where a transition needs visual adjustment. In some installations, a piece can be repositioned at an edge to soften a visible break. Whether that is practical depends on how the mosaic is assembled and how the setting system is being used. Follow the material and installation-system instructions rather than assuming every sheet can be modified in the same way.
Prevent unwanted repeating patterns
Repetition is easiest to spot when every sheet has the same orientation, the same prominent color cluster, or the same directional movement. A repeated motif may be part of the design, but an accidental panel-by-panel pattern can make the surface look segmented.
During the dry layout, compare at least four adjoining sheets at a time. Look for:
- Repeated dark or light clusters appearing in the same location on each sheet.
- Linear pieces creating unintended stripes across several sheet boundaries.
- Distinctive veins or textures pointing in one direction.
- Identical shapes lining up to create larger geometric forms that were not part of the intended design.
- Color changes that become concentrated in one section instead of being distributed through the field.
When the material allows it, varying sheet orientation can reduce a panelized appearance. But rotation is not automatically appropriate. Directional mosaics, patterned layouts, and natural stone with prominent movement may look worse if sheets are turned without a plan. Labeling sheets during dry layout can help preserve a deliberate arrangement once the installation starts.
For natural stone, blend variation across the area instead of grouping all darker, lighter, or more heavily marked pieces in one location unless that concentration is intentional. This is a visual planning decision, not a way to make natural material uniform. Natural variation will remain part of the finished surface.
Account for corners, niches, outlets, and other interruptions
Small mosaics often interact with many details: inside corners, outside corners, plumbing penetrations, electrical boxes, shelves, niches, and fixture edges. These locations can expose poor planning because short cuts and interrupted seams are easier to notice than they are in a broad uninterrupted field.
Mark these features on the dry layout before setting sheets. Check whether a prominent joint would terminate directly at an outlet or whether a narrow strip would be left beside a niche. The best adjustment may be to shift the field slightly, change the starting point, or distribute cuts across both sides of the feature.
At corners, inspect the finished appearance from the normal viewing angle rather than only from directly in front. The corner treatment should be coordinated with the surrounding pattern and the selected edge or trim approach. Because substrates, setting materials, and site conditions differ, a qualified installer should confirm the appropriate method for the specific installation.
Installation details that affect seam visibility
Surface preparation matters because uneven movement or inconsistent setting material can make neighboring sheets sit at different heights. The substrate should be suitable for the selected tile and installation system, and the installer should follow the applicable product instructions. A flat, properly prepared surface makes it easier to maintain consistent joints and plane transitions.
Apply setting material in a controlled area rather than covering more surface than can be worked while maintaining proper placement. Comb the material consistently, then use the appropriate technique to avoid leaving excessive material in the joints. Press sheets into position without sliding them so far that the pattern shifts or the joints close.
Check each sheet from several angles before the setting material firms up. A small corner lift, a shifted row, or excess material in one seam may be difficult to correct later. Clean material from joints according to the installation-system instructions, taking care not to disturb the sheets.
For a broader overview of substrate preparation, setting, grouting, and related considerations, review the mosaic installation guide before beginning the work.
Grout can either blend seams or emphasize them
Grout joint width and color influence how strongly the sheet boundaries are perceived. A color that contrasts sharply with the mosaic may outline every individual tile and make inconsistencies more visible. A closer visual match may allow the tile shapes and material variation to remain the focus, but the appropriate choice depends on the mosaic, lighting, and design objective.
Do not use grout color to compensate for a layout that has obvious sheet lines. Grout can affect the final reading of the surface, but it cannot fully disguise poorly aligned sheets or inconsistent spacing. Review a small area or sample arrangement when the grout decision is important, and follow the grout manufacturer’s instructions for mixing, application, cleaning, and curing.
For help comparing the visual effect of different layouts, consult mosaic patterns explained as part of the design-planning process.
A practical pre-installation checklist
- Inspect multiple sheets together instead of relying on one sample.
- Identify the most visible centerlines, edges, corners, and transitions.
- Dry-lay enough material to reveal repetition and variation.
- Mark sheet orientation when the pattern or stone movement is directional.
- Plan perimeter cuts so narrow slivers are not concentrated in one location.
- Compare sheet-edge spacing with the internal joint spacing before setting.
- Decide how seams will relate to niches, outlets, fixtures, and corners.
- Confirm substrate, setting-material, grout, and movement requirements for the specific installation.
- Check every sheet from multiple viewing angles while adjustments are still possible.
Frequently asked questions
Practical answers to common questions related to this material, application, care, selection, and project planning.
Should mosaic sheets be staggered like brick?
Not necessarily. Some mosaics benefit from avoiding a strict sheet-to-sheet grid, but the correct arrangement depends on the tile shape and intended pattern. Staggering should preserve the designed geometry and joint spacing rather than create an arbitrary offset.
How can I tell if sheet seams will be visible?
Dry-lay several sheets and look for continuous gaps, aligned color clusters, or repeated lines across the boundaries. View the arrangement from the distance and angle at which the surface will normally be seen.
Can every mosaic sheet be rotated to reduce repetition?
No. Rotation may help with some non-directional designs, but it can disrupt directional patterns or natural stone movement. Test the arrangement first and label sheets if a specific orientation is intentional.
Is a contrasting grout color a good way to define mosaic shapes?
It can emphasize individual tiles, but it may also make spacing differences and sheet seams more noticeable. Evaluate the grout color with the actual mosaic and lighting rather than choosing it in isolation.
Plan the pattern before the adhesive
The cleanest mosaic installations usually result from decisions made before the first sheet is set. Confirm the field layout, distribute natural variation, check several sheets for repetition, and establish a method for blending transitions. Once the pattern is planned around the room’s visible features, installation becomes less about correcting surprises and more about executing a deliberate layout.
Find the Right Tile or Stone for Your Project
Browse Stone Market USA collections or contact our team for help comparing materials, finishes, applications, samples, quantities, and current availability.