

How to Plan a Mosaic Accent Wall or Feature Area
A mosaic accent wall can define a room, frame an architectural feature, or add pattern without covering every surface. The strongest results usually come from planning the wall as part of the entire room rather than choosing a tile first and deciding where it belongs later. This guide explains how to plan a mosaic accent wall, including location, scale, material, layout, grout, quantity, and installation considerations.
If you are still comparing patterns and materials, you can shop mosaic tiles while keeping the room's lighting, surrounding surfaces, and maintenance needs in view. The goal is not simply to find a mosaic that looks appealing in a sample; it is to choose one that works at the intended scale and in the conditions of the project.
Start with the wall's job in the room
Material Guidance
Choose the right scale and coverage
Selection Guide
Compare material, color, and pattern together
Natural Stone Character
Start with the wall's job in the room
Before measuring, decide what the feature area should do visually. A mosaic might draw attention to a fireplace surround, highlight a vanity wall, define the back wall of a kitchen, or create a focal point in an entryway. Each use suggests a different approach to size and placement.
- Frame an existing feature: Align the mosaic with the edges or centerline of the fireplace, mirror, niche, range, or other architectural element.
- Emphasize one wall: Treat the wall as a composition and consider how the mosaic will meet adjacent corners, cabinets, trim, and flooring.
- Create a smaller panel: Use a defined area when a full wall would feel too busy or when the feature needs to remain subordinate to other finishes.
Look at the wall from the main approach to the room. A feature area that is partly hidden by a door, furniture, or a large appliance may not justify the same visual complexity as a wall that remains in view. Also note outlets, plumbing fixtures, windows, switches, shelves, and other interruptions before settling on a pattern.
Choose the right scale and coverage
Mosaic sheets contain many small units, but the finished installation should still be judged from the distance at which people will normally see it. A highly detailed pattern can read as texture from across a room, while a simpler geometric arrangement may remain visually clear at a greater distance.
For a full-height accent wall, consider whether the pattern should run from floor to ceiling or stop at a natural horizontal boundary. In a backsplash or vanity area, the relationship between the mosaic and the countertop, cabinet height, mirror, and underside of wall cabinets may matter more than the total wall size. Avoid arbitrary stopping points when a clean edge can align with a cabinet, shelf, trim line, or architectural break.
Measure the actual field to be covered rather than relying on the room's nominal dimensions. Record the width and height in several places if the wall may not be perfectly consistent. Subtract openings only when you are confident they will not be tiled, then discuss the final quantity with the installer or tile supplier. Cutting, pattern matching, layout adjustments, and potential damage all affect how much material a project needs, so a simple area calculation should not be treated as a final order quantity.

Compare material, color, and pattern together
Color is only one part of the decision. Material, surface texture, joint pattern, lighting, and the surrounding finishes all influence how a mosaic will look. Natural stone may have variation in shade, movement, texture, or veining, so individual pieces and sheets may not appear identical. A sample is useful for evaluating general character, but it cannot represent every piece in a larger natural-stone installation.
Compare the mosaic with flooring, countertops, paint, cabinetry, metal finishes, and nearby tile. A useful sample review includes both daylight and the room's planned artificial lighting. Gloss, texture, and small-format grout lines can change the appearance as the light moves across the wall.
For a deeper framework on color, material, pattern, and project conditions, read how to choose the right mosaic tile. That research is especially helpful when several options look similar online but would create different visual effects once installed.
Think about visual rhythm
Some mosaics have a repeating pattern that must be aligned from sheet to sheet. Others are more irregular and rely on variation for their character. Ask how the pattern will behave at corners, around outlets, beneath cabinets, and along the top and bottom edges. A design that looks balanced in a small sample may need careful centering or trimming to avoid an awkward partial motif at a highly visible boundary.
Review more than one sample or the expected variation range whenever possible, especially when veining or movement is visually prominent.
Plan the layout before installation
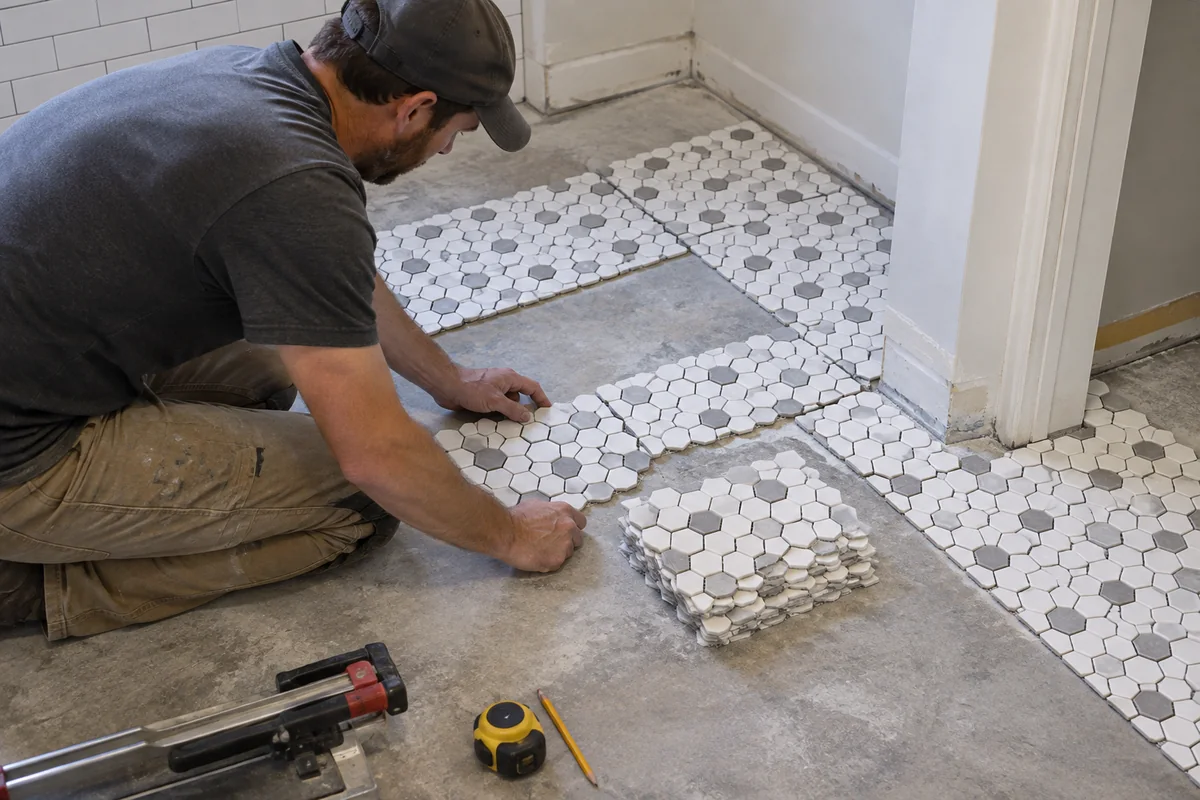
A dry layout is one of the most valuable planning steps. It allows the installer to test the starting point, inspect how sheets meet, and identify where cuts will fall. The layout should be reviewed from the room, not only from a close-up on the floor.
Important layout questions include:
- Where is the visual center of the wall or feature?
- Will the pattern be centered on a sink, range, mirror, fireplace, or other focal element?
- Where will full sheets, partial sheets, and cut pieces appear?
- Will narrow slivers be left at corners or edges?
- How will the pattern transition to adjacent tile or an untiled surface?
- Are the sheet joints and individual pieces consistent enough to create the intended rhythm?
In a prominent feature area, it is often preferable to balance cuts on opposite sides rather than placing a very narrow strip in one location. The best solution depends on the wall, pattern, and surrounding construction, so layout decisions should be confirmed before setting material.
Confirm substrate preparation, waterproofing where required, setting materials, drainage, joints, cuts, and transitions before ordering.
Do not overlook grout and edge details
Grout lines are part of the mosaic's appearance. A contrasting grout can make each shape more noticeable, while a closer color may create a quieter, more continuous field. The appropriate grout and joint treatment depend on the tile, installation system, joint size, substrate, and project conditions; they should be selected with the installer and applicable product instructions.
Edges also need a deliberate finish. Decide whether the mosaic will meet trim, a metal edge profile, a return at a corner, another tile, or a painted wall. If the feature ends in an exposed location, the edge treatment may be as visible as the mosaic itself. Discuss outside corners, inside corners, transitions, and changes in plane before installation rather than treating them as last-minute details.
For terminology and additional planning considerations, the mosaic tile guide can help you compare common formats and think through the questions to ask before ordering.
Account for the installation conditions
A mosaic accent wall is not automatically suitable for every location simply because the material is sold as a tile. The substrate, moisture exposure, heat exposure, cleaning demands, and local requirements all matter. A qualified installer should confirm that the selected material and installation system are appropriate for the specific project, and manufacturer instructions should take priority over general advice.
In areas exposed to water, planning includes more than choosing a decorative surface. The underlying assembly, transitions, penetrations, setting materials, and grout must be addressed as a coordinated system. In kitchens and other areas near cooking or cleaning activity, also consider how easily the surface can be reached and maintained. Natural stone may require care appropriate to its particular material, and sealing should never be treated as making stone stain-proof, waterproof, or maintenance-free.
Before work begins, verify that the wall is suitable for tile, sufficiently prepared, and free of conditions that could affect the installation. Substrate preparation, movement accommodation, waterproofing where required, and setting methods are project-specific topics that should be handled according to product instructions and professional recommendations.
Build a practical ordering and approval checklist
Once the design direction is established, gather the information needed to avoid preventable surprises. Confirm the exact area to be tiled, the intended orientation of the pattern, the edge treatment, the grout direction, and the areas that will remain untiled. If natural stone is involved, review available samples and ask how much variation may occur between pieces or batches. Do not assume that a small sample predicts every detail of the finished wall.
Before approving the layout, make sure the project team has discussed:
- the measured coverage area and a suitable allowance for cuts and waste;
- the location of visible seams, corners, outlets, niches, and penetrations;
- the relationship between the mosaic and adjacent materials;
- the planned grout color and edge treatment;
- the installation requirements for the selected tile and site conditions;
- how the finished area will be cleaned and maintained.
Common planning mistakes to avoid
The most common problems are often visible before installation. Choosing a pattern without checking its relationship to the room can make the wall feel disconnected. Ordering from a small measurement can leave insufficient material for balanced cuts. Ignoring corners and edges can produce an unfinished appearance. Selecting grout only after the tile is installed can also change the visual emphasis of the entire design.
Another mistake is treating every mosaic sheet as if it can be installed without a layout plan. Sheet-mounted mosaics still require alignment, trimming, and inspection at joints. Finally, avoid judging the design only from a product image or a single close-up sample. Review the material at the intended viewing distance, under representative lighting, and alongside the other finishes that will remain in the room.
A simpler way to make the final decision
Begin with the wall's purpose, then work outward: define the coverage area, measure the field, compare the mosaic with surrounding materials, test the pattern in a dry layout, and resolve grout and edge details before installation. If the project involves natural stone, include variation in the approval process rather than expecting a perfectly uniform surface. If the area has water, heat, or unusual substrate conditions, obtain project-specific guidance before purchasing.
The best accent walls are planned as complete installations, not just selected as attractive sheets. A careful review of scale, pattern, transitions, maintenance, and installation conditions gives you a clearer basis for comparing options and moving forward with confidence.
Frequently asked questions
Quick answers to practical selection, installation, care, and planning questions.
Should a mosaic accent wall cover the entire wall?
Not necessarily. Full coverage can create a strong focal surface, while a framed panel or defined band may work better when the room already contains several visual features. Let the wall's purpose, surrounding finishes, and visible boundaries guide the decision.
How do I decide where to center a mosaic pattern?
Center the layout on the feature that people will read first, such as a mirror, range, sink, fireplace, or the wall itself. Then check the resulting cuts at corners, edges, openings, and transitions before installation.
Is a sample enough to approve a natural-stone mosaic?
A sample is an important starting point, but it cannot show every piece of a natural-stone installation. Review the sample under relevant lighting and discuss expected variation in color, movement, texture, or veining before approving the material.
What should be decided before ordering mosaic tile?
Confirm the measured coverage, pattern orientation, layout centerline, cut locations, grout approach, edge treatment, installation conditions, and maintenance expectations. These decisions can affect both the quantity needed and how the finished feature will look.
Find the Right Tile or Stone for Your Project
Browse Stone Market USA collections or contact our team for help comparing materials, finishes, applications, samples, quantities, and current availability.