

Outdoor Paver Drainage and Slope Planning for Patios, Walkways, and Pool Areas
Good outdoor paver drainage and slope planning does more than move rainwater away from a patio. It helps prevent ponding, directs runoff away from structures, protects transitions to doors and pool coping, and gives the installation a better chance of performing as intended. Drainage problems are often difficult to correct after the pavers, base, and surrounding landscape are in place.
This guide explains how to think through slope, collection points, surface materials, base preparation, and finished elevations for patios, walkways, and pool areas. It is general planning guidance, not a substitute for project-specific design, local requirements, or recommendations from a qualified installer.
If you are still comparing materials, you can begin by reviewing the outdoor paver collection and then evaluate each option against the drainage and installation conditions at your site.
Start with the water path, not the paver pattern
Material Guidance
How much slope does a paver surface need?
Application Guide
Plan drainage features where slope alone is not enough
Material Guidance
Start with the water path, not the paver pattern
Before choosing a layout, identify where water comes from and where it can safely go. Consider roof downspouts, neighboring properties, sloped lawns, retaining walls, irrigation, pool splash-out, and water that may flow toward the project from an uphill area. A patio can have a carefully planned surface slope and still experience problems if surrounding grades send water underneath or across it.
Sketch the proposed hardscape, nearby structures, property boundaries, planting beds, drains, and low points. The goal is to establish a continuous route from the surface to an approved discharge or collection area. That route may be a landscape swale, drainage inlet, trench drain, drywell, stormwater system, or another method selected for the site. Not every property can discharge runoff wherever it is most convenient, so local requirements and site conditions matter.
How much slope does a paver surface need?
A paved surface generally needs a deliberate fall so water does not remain on top of the installation. A commonly used planning reference for exterior hardscape is approximately 1/4 inch of fall per foot, but the appropriate slope depends on the project, materials, setting method, drainage design, local requirements, and tolerances of the installation system. A qualified installer should confirm the final layout rather than treating one number as universal.
For example, a 12-foot-wide patio planned at that reference slope would have a difference of about 3 inches from one side to the other. That elevation change affects steps, doors, planting beds, pool edges, fences, and transitions to existing pavement. Check those relationships before excavation begins.
The slope should be consistent enough to avoid isolated depressions. A surface can have the correct average fall and still hold water if the base or setting bed contains birdbaths, ridges, or settlement. Long straightedges, laser levels, string lines, and careful elevation checks can help an installer verify the plane during preparation and placement.
Direct water away from buildings
Patios and walkways near a home usually need to fall away from the structure rather than toward walls, doors, or foundation areas. Door thresholds create a particularly sensitive transition because the finished paver elevation must allow drainage while maintaining a suitable step and protecting the opening. Do not assume that raising or lowering the patio at the last minute will solve a threshold conflict; finished elevations should be coordinated before the base is installed.
Use cross slope thoughtfully on walkways
A walkway may need both a lengthwise slope and a cross slope. Excessive cross slope can make walking uncomfortable or create difficulties for users with mobility devices, while too little cross slope may allow water to linger. The right balance depends on the route, accessibility needs, surrounding grades, and applicable requirements. Review these constraints before finalizing the path width and alignment.
Plan drainage features where slope alone is not enough
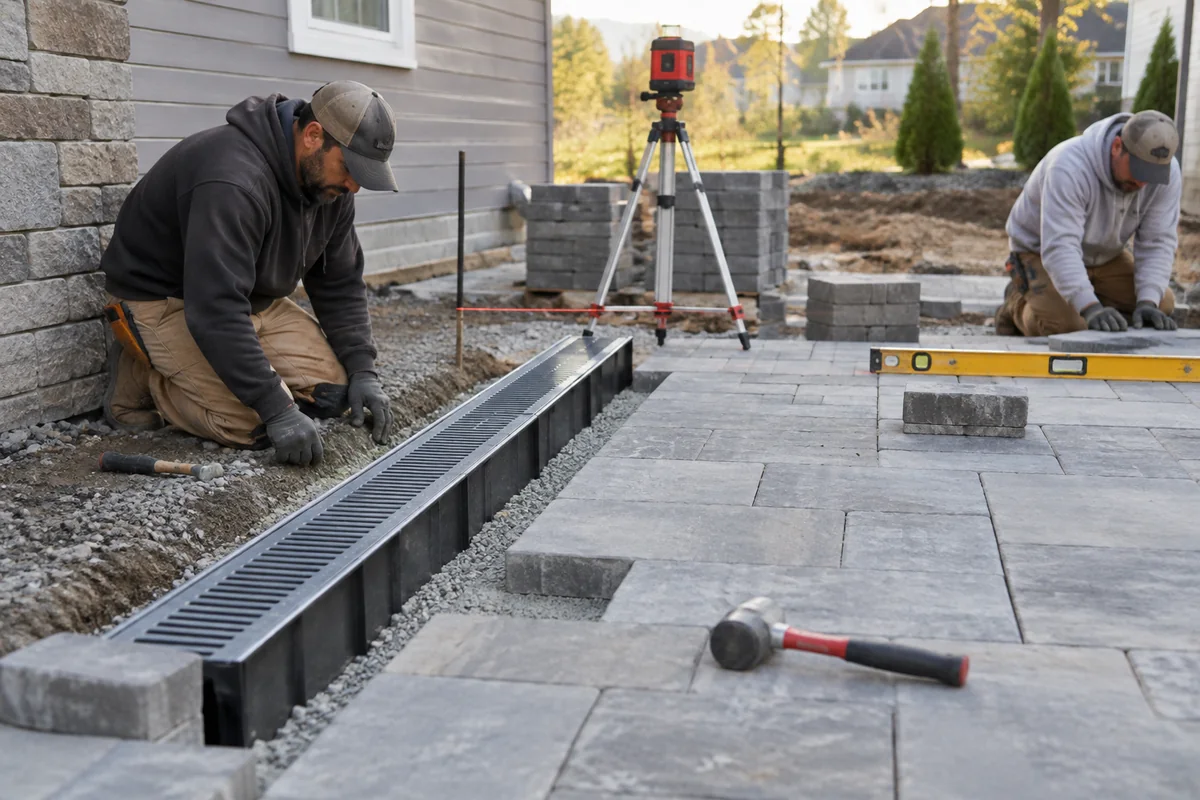
Surface slope moves water, but it does not eliminate the need for collection and interception. A trench drain may be useful where a patio meets a garage, retaining wall, pool enclosure, or other area that sends water toward the paved surface. Point drains can collect water at designed low points, although they require accurate elevation work and a suitable outlet.
Drains should be planned as part of the whole grading system. A grate located at the lowest point is not useful if the outlet is blocked, undersized for the expected flow, or directed toward a foundation. Drainage components also need access for inspection and maintenance. Ask the installer how the system will be cleaned and where collected water will discharge.
Permeable or open-jointed paving can change how water moves through an installation, but it should not be treated as an automatic drainage solution. Performance depends on the joint material, base and subbase design, soil conditions, rainfall, maintenance, and the specific system. If infiltration is being considered, the installer or designer should evaluate whether the site can accept water and whether local requirements apply.
Base preparation controls more than stability
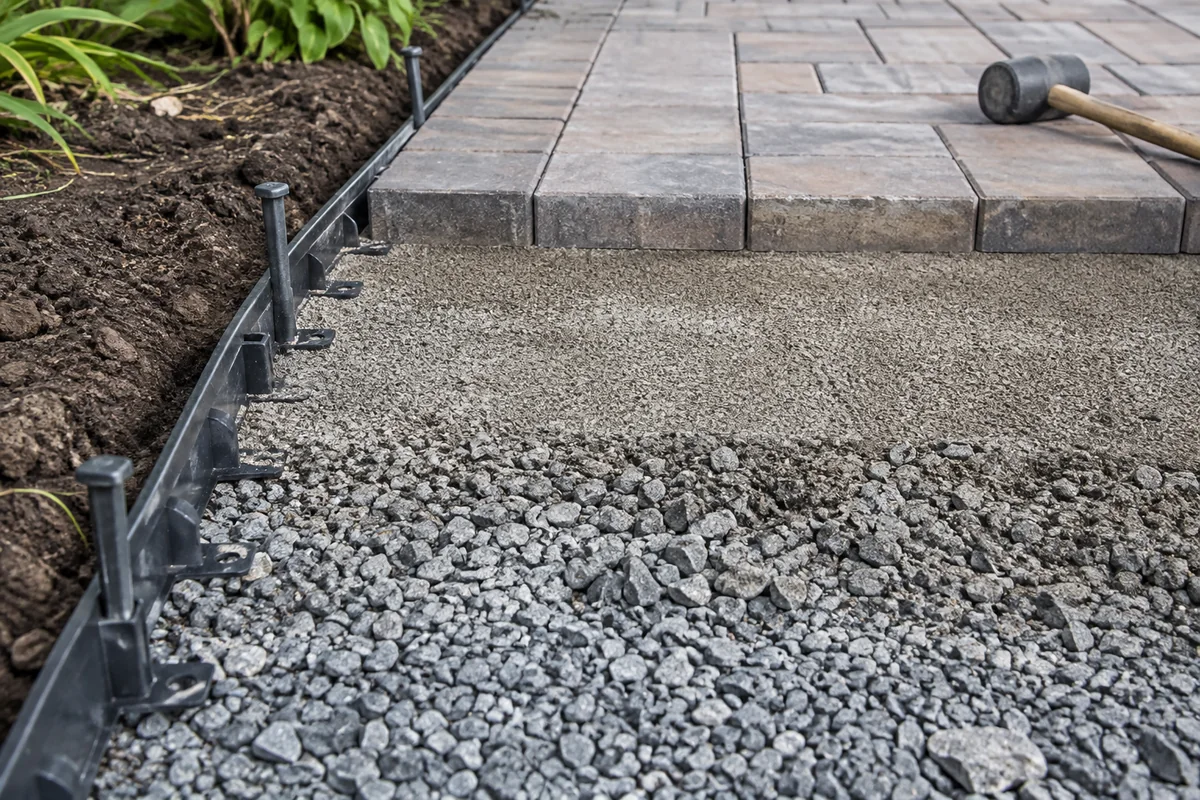
The compacted base is also part of the drainage strategy. Poorly prepared soil, inconsistent compaction, trapped organic material, or an unsuitable base profile can contribute to settlement and low spots. Once those depressions form, water may collect even when the original surface layout was correct.
General preparation commonly involves removing unsuitable material, shaping the subgrade, compacting it in appropriate stages, and installing a base system suited to the soil and project conditions. The exact materials, thicknesses, compaction methods, and edge details should come from the selected installation system and the qualified installer. Climate, soil type, traffic, drainage goals, and whether the surface is pedestrian or vehicular all affect the design.
Do not use the pavers themselves to compensate for an incorrect base elevation. Adjusting individual units with excessive bedding material can create inconsistent support and an uneven surface. It is usually better to correct the underlying grades before the pavers are laid.
Account for edges, joints, and adjacent surfaces
Edge restraints help keep the paving field from spreading, but they also need to work with the drainage design. A rigid border, concrete edge, stair, or wall can interrupt the intended water path. Review how water will pass around or through each edge rather than assuming the perimeter is neutral.
Joints and transitions deserve the same attention. Where pavers meet concrete, pool coping, masonry, landscaping, or a building, the joint detail may need to accommodate movement or prevent water from being directed into an unwanted location. The suitable joint and movement approach depends on the materials and installation system. Follow the relevant manufacturer and installer guidance.
Natural stone deserves an additional visual and practical review. Color, veining, texture, and thickness can vary from piece to piece, so a sample will not represent every unit in a larger installation. Review samples for appearance, but also confirm the material’s intended use, installation requirements, and compatibility with the project conditions through the supplier and installer.
When comparing natural stone materials, review travertine paver options alongside the project requirements.
For material-specific background, the natural stone paver guide can help you organize questions about stone selection before the drainage plan is finalized.
Special considerations for pool areas
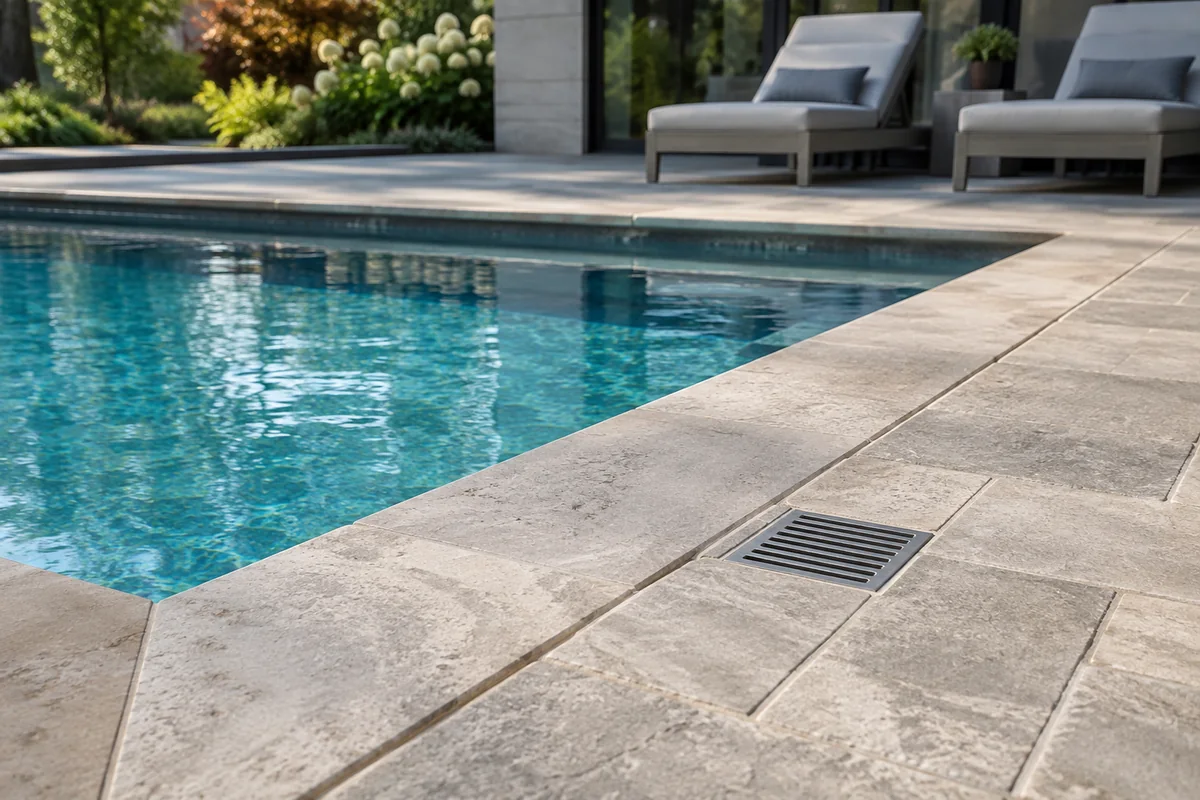
Pool decks combine frequent water exposure, foot traffic, changing elevations, coping, drainage structures, and nearby structures. Plan the finished deck height in relation to the pool shell, coping, steps, equipment areas, doors, and surrounding grade. The surface should not casually direct runoff, cleaning water, or landscape drainage into locations where it can create a maintenance or safety problem.
Pool-area drainage also needs to account for splash-out and routine cleaning, not only rainfall. Keep drains and collection points accessible, and coordinate the paving layout with the pool builder or other trades responsible for the shell, coping, and deck interfaces. Material performance in a wet environment depends on the specific product, finish, installation, and maintenance plan; do not assume that a general material category guarantees a particular level of traction or suitability.
For broader material comparisons, see how to choose outdoor pavers after you have identified the site’s slope, drainage, and maintenance requirements. A material that looks appropriate in a sample may still require a different installation approach than another option.
A practical pre-installation checklist
- Identify all sources of water, including roof drainage, uphill runoff, irrigation, and pool splash-out.
- Mark the intended high points, low points, finished elevations, and discharge locations.
- Confirm the planned slope with the installer and check its effect on doors, steps, walls, landscaping, and property lines.
- Decide whether drains, swales, or another collection method are needed instead of relying on surface slope alone.
- Verify that the subgrade and base design suit the soil, climate, expected use, and selected installation system.
- Coordinate paver elevations with pool coping, thresholds, concrete, retaining walls, and other adjacent construction.
- Ask where collected water will go and how drains or permeable areas will be maintained.
- Review samples while allowing for natural variation if the project uses stone.
Common drainage mistakes to avoid
- Starting with the pattern: A visually attractive layout cannot correct a poor grading plan.
- Ignoring existing elevations: New paving may create a step, trap water, or conflict with a door if it is designed independently of nearby construction.
- Assuming a drain fixes everything: Collection points need a functioning outlet and must be placed at appropriate low points.
- Skipping a water test: Before final completion, ask the installer to check the surface and drainage paths under controlled water conditions where appropriate.
- Overlooking maintenance: Leaves, soil, joint debris, and blocked grates can change drainage performance over time.
Make drainage part of the material decision
The best paver choice is not determined by color or format alone. Compare the appearance you want with the project’s slope, base, joints, edges, wet-area conditions, natural variation, maintenance expectations, and available installation guidance. A clear drainage plan should exist before the final order and before excavation begins.
When reviewing options with a contractor or supplier, bring a site sketch, approximate dimensions, photos of adjacent grades, and information about downspouts or existing drains. Those details make it easier to identify elevation conflicts early and to determine whether a particular paving system fits the project. If the proposed grade cannot move water safely, revise the design before selecting a pattern that will be difficult to change later.
Frequently asked questions
Quick answers to practical selection, installation, care, and planning questions.
Can pavers be installed flat?
Exterior pavers generally need planned slope or another engineered drainage approach so water does not remain on the surface. The required design depends on the site, installation system, and local requirements. A qualified installer should confirm the elevations.
Should a patio slope toward the house or away from it?
In many situations, the surface is planned to drain away from the house, but the correct solution depends on existing grades, thresholds, foundation conditions, and the available discharge route. A site-specific design is necessary when those constraints conflict.
Do paver joints drain water?
Some water may pass through joints, but joint drainage alone does not guarantee that water will leave the installation. The base, subgrade, joint material, soil, and overall drainage design determine what happens below the surface.
How can I tell if my planned patio has a drainage problem?
Look for low spots, runoff flowing toward buildings, blocked discharge routes, conflicting elevations at doors or steps, and areas where surrounding grades send water onto the patio. A contractor can verify the plan with measured elevations before construction.
Find the Right Tile or Stone for Your Project
Browse Stone Market USA collections or contact our team for help comparing materials, finishes, applications, samples, quantities, and current availability.