

Natural Stone Shower Wall Planning: Waterproofing, Niches, Corners, and Surface Selection
A natural stone shower wall can bring substantial visual character to a bathroom, but a successful installation depends on more than choosing an attractive tile. The waterproofing assembly, wall layout, niche details, corners, surface finish, grout, and maintenance requirements all affect the finished result. This natural stone shower wall guide explains the decisions to make before ordering materials or beginning installation.
Start with the waterproofing assembly
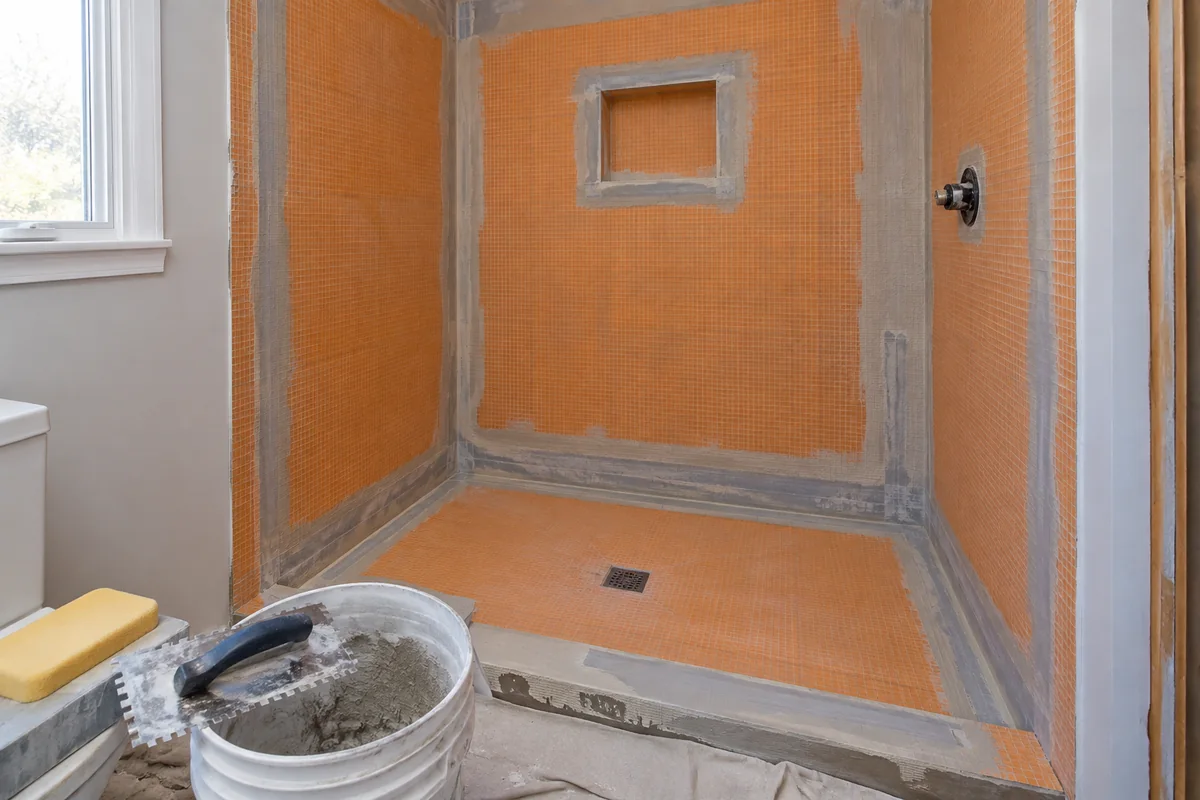
Tile and stone are the visible finish, not the waterproofing system. A properly planned shower needs a compatible waterproofing approach behind or beneath the wall finish, including attention to seams, inside corners, fasteners, penetrations, benches, niches, and the transition at the shower floor. The exact materials and sequence should follow the selected system’s instructions and applicable local requirements.
Standard moisture-resistant wallboard by itself should not be treated as a complete shower waterproofing solution. Likewise, grout joints are not a substitute for a continuous waterproofing layer. Before selecting stone, confirm that the installer has identified the substrate, membrane or waterproofing method, setting materials, and transitions that will be used together.
Waterproofing is especially important around recessed niches and plumbing penetrations because these areas interrupt the simple plane of the wall. Ask how the niche will be integrated into the waterproofing assembly, how corners will be treated, and how the wall system will connect to the shower pan or floor waterproofing. A visually clean installation still requires careful work behind the finished surface.
Plan niches and storage before choosing tile sizes
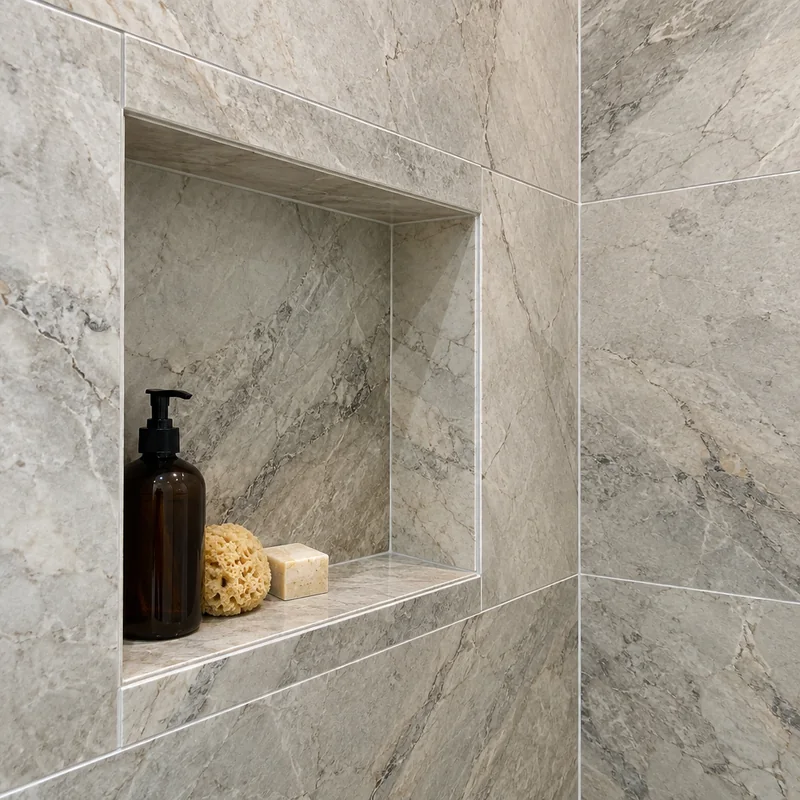
A niche should be planned alongside the tile layout, not added after the main wall pattern has already been established. Its width, height, shelf position, trim details, and location can affect where full tiles end and where cuts appear. If the niche is intended for bottles, allow enough usable depth after accounting for the wall assembly and finish materials.
Consider the niche’s relationship to grout joints and stone movement. Centering a niche on a wall may look balanced, but aligning its edges with surrounding tile joints can produce a more deliberate layout. With highly veined stone, the installer may also need to review which pieces are most appropriate for the niche back, side returns, and shelf.
For a simpler alternative or an added storage element, you can browse stone corner shelves as part of the early layout discussion. Their placement still needs to work with the waterproofed wall and the shower’s use, so the installer should confirm the attachment and sealing details for the selected system.
Give corners a design and installation plan
Outside and inside corners deserve attention before installation begins. Inside corners may be handled with carefully cut stone, a compatible profile, or another detail selected by the installer. The right approach depends on the material, tile thickness, wall alignment, and the waterproofing and movement requirements of the assembly.
A corner is rarely the place to hide poor planning. Walls that are out of plane can create narrow slivers, uneven joints, or difficult transitions. Measuring the walls and checking their alignment before ordering helps identify whether the layout should be centered, shifted, or adjusted to avoid awkward cuts.
Movement accommodation also matters. Changes where walls meet, or where different materials meet, may require a flexible joint rather than a rigidly filled grout joint. The appropriate treatment depends on the installation system and project conditions, so it should be resolved with a qualified installer before the stone is set.
Choose the surface by appearance and daily-use requirements
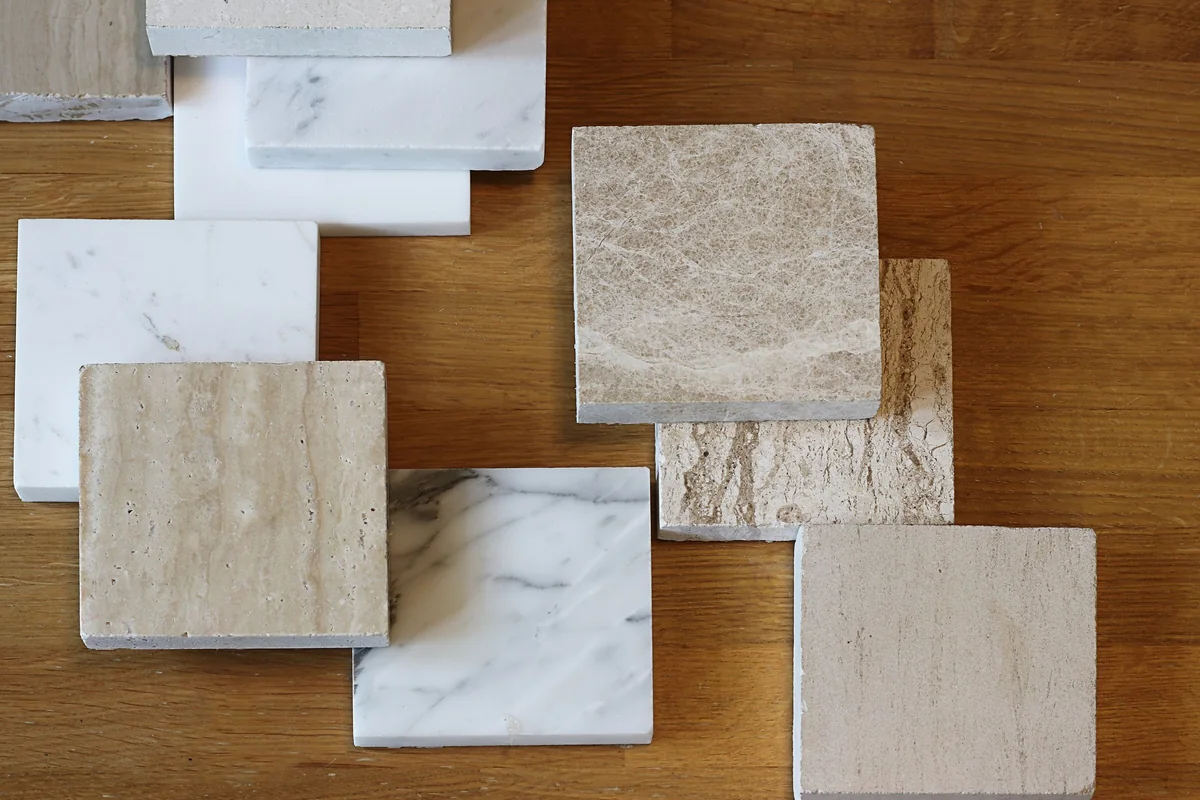
Natural stone selection should balance visual goals with the way the shower will be cleaned and used. Marble, limestone, and travertine can have different levels of porosity, mineral composition, texture, and sensitivity to cleaning products. Some acid-sensitive stones can be etched or dulled by acidic substances, so the cleaning method must be compatible with the selected material.
Granite and other stones may also vary in absorption, texture, and maintenance needs. A stone’s name alone does not provide enough information to determine whether it is appropriate for a particular shower installation. Review the specific material, finish, intended use, care guidance, and installer recommendations rather than assuming that all stone within a broad category performs the same way.
Finish and texture
Polished surfaces can emphasize color and veining, while honed finishes generally present a softer, lower-sheen appearance. Textured or cleft surfaces may introduce more visual and tactile variation, but they can also create more places for residue to collect and may require more attention during cleaning. For shower walls, think about whether the texture will be comfortable to touch, practical to wipe, and compatible with the desired grout detail.
Wall surface selection should not be confused with shower-floor selection. A finish that is being considered for a wall may not be appropriate for a wet walking surface. Floor slip considerations, drainage, tile size, and local requirements should be reviewed separately with the installer.
Format, pattern, and grout
Larger tiles can reduce the number of visible grout joints, but they demand accurate wall preparation and careful handling. Smaller tiles and mosaics can help follow curves or create visual detail, though they involve more joints and a more complex cleaning surface. The best format often depends on the wall dimensions, drain and niche locations, stone pattern, and installer capability.
Grout color changes how strongly the pattern reads. A close color can make the layout feel quieter, while stronger contrast emphasizes each joint and cut. Grout is part of the maintenance and appearance decision, not merely a final color choice. Confirm that the selected grout is compatible with the tile, joint size, waterproofing assembly, and manufacturer instructions.
Readers comparing finishes and formats can review natural stone tiles and mosaics to understand the range of materials and patterns available before narrowing the shower layout.
Review natural variation before ordering
Natural stone is not manufactured to look identical from piece to piece. Color, veining, fossil marks, movement, texture, and shade can vary within a shipment and sometimes within a single lot. This variation should be evaluated as part of the design rather than assumed from one product photograph or a small sample.
A sample is useful for reviewing general color, finish, and scale, but it cannot represent every piece in a larger installation. For a prominent shower, ask how the material will be selected and arranged, and discuss whether the installer will dry-lay or review pieces before setting them where the project warrants that level of planning.
Pay particular attention to areas that will be viewed together, such as a main wall, niche back, bench, and side returns. A plan for orienting veining and distributing variation can make the installation feel intentional without implying that every piece will match.
Marble shower walls require compatible care planning
Marble can be considered for shower walls when the complete installation and maintenance plan are appropriate for the specific material. Its appearance may change with finish, lighting, grout color, and natural variation, so reviewing samples in the actual bathroom is valuable.
Before committing, review marble shower tiles alongside the planned format, edge detail, niche treatment, and cleaning approach. Avoid assuming that sealing makes marble waterproof, stain-proof, or etch-proof. Sealing may be part of a manufacturer- or installer-recommended care plan, but it does not eliminate the need for compatible cleaning and reasonable maintenance.
Questions to resolve before installation
- What waterproofing system will be used, and how will its seams, corners, penetrations, niche, and shower-floor transition be treated?
- Is the selected stone and finish appropriate for the intended wall location and cleaning routine?
- How will the layout handle wall irregularities, niche edges, corners, and narrow cuts?
- Which grout and movement-joint details are compatible with the installation system?
- How will natural variation, veining, and shade differences be reviewed before pieces are set?
- What cleaning products and maintenance steps are recommended for this specific stone and finish?
Make the material decision after the assembly is understood
The safest planning sequence is to define the shower’s waterproofing approach first, then coordinate the niche and corner details, and only afterward finalize the stone format, finish, grout, and pattern. This order helps prevent a common mistake: choosing a surface based solely on appearance and discovering later that the layout, care routine, or installation details do not suit the project.
Bring the selected stone, proposed layout, and waterproofing questions to a qualified installer before ordering. That conversation can reveal substrate corrections, edge conditions, material compatibility issues, and design adjustments while changes are still manageable. The result should be a shower wall that is visually considered and supported by an installation plan appropriate to the specific materials and site.
Frequently asked questions
Practical answers to common questions around selection, installation, care, and project planning.
Does natural stone make a shower waterproof?
No. Stone is a finish material. The shower requires a properly designed and installed waterproofing assembly behind or beneath the finish, with careful treatment at seams, corners, niches, penetrations, and transitions.
Is sealing natural stone enough for a shower?
Sealing may be included in the care plan for some natural stones, but it does not make stone waterproof, maintenance-free, stain-proof, or resistant to etching. Follow guidance for the specific stone and finish, and use compatible cleaning products.
Should a shower niche be planned before tile is ordered?
Yes. The niche affects tile cuts, grout-joint alignment, trim or edge details, and the waterproofing sequence. Planning it early generally gives the installer more control over the finished layout.
Can the same stone be used on shower walls and the floor?
Not automatically. Wall and floor applications have different functional demands. Confirm that the selected material and finish are appropriate for each location, especially where the floor is exposed to standing water and foot traffic.
Find the Right Tile or Stone for Your Project
Browse Stone Market USA collections or contact our team for help comparing materials, finishes, applications, samples, quantities, and current availability.