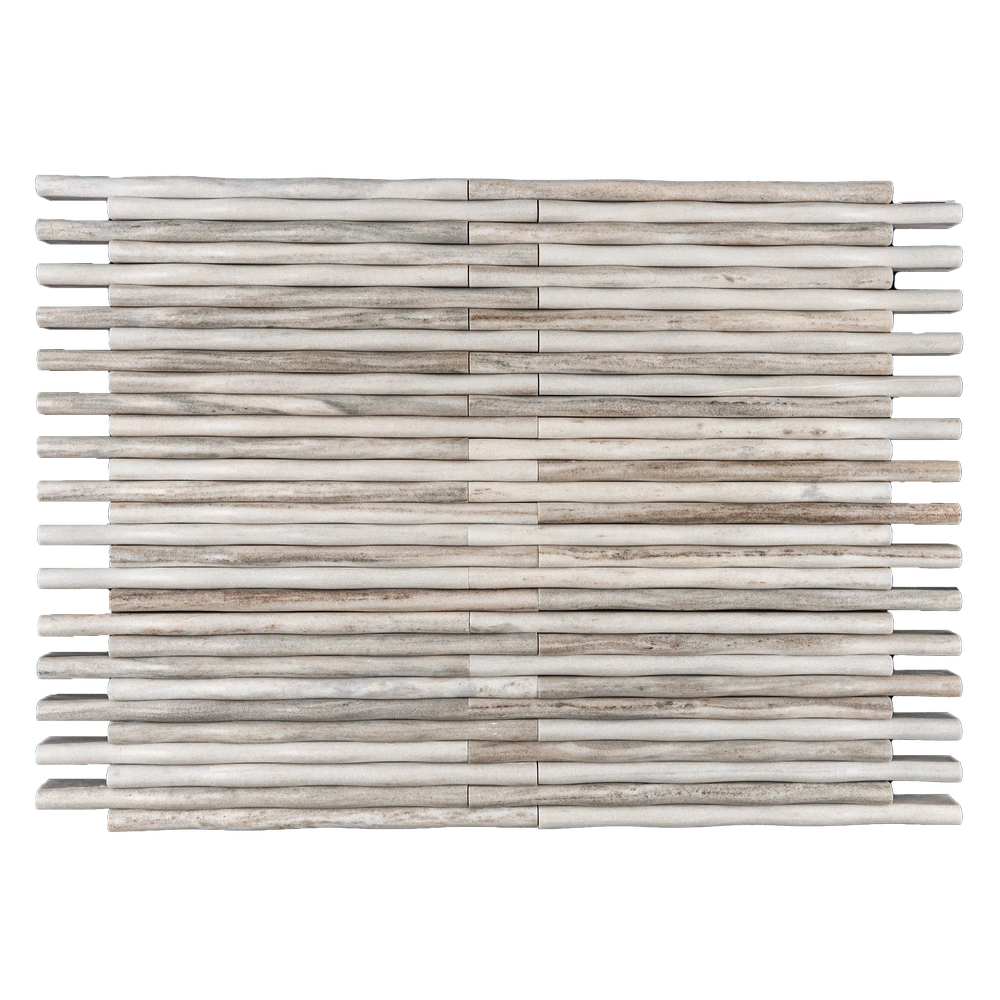
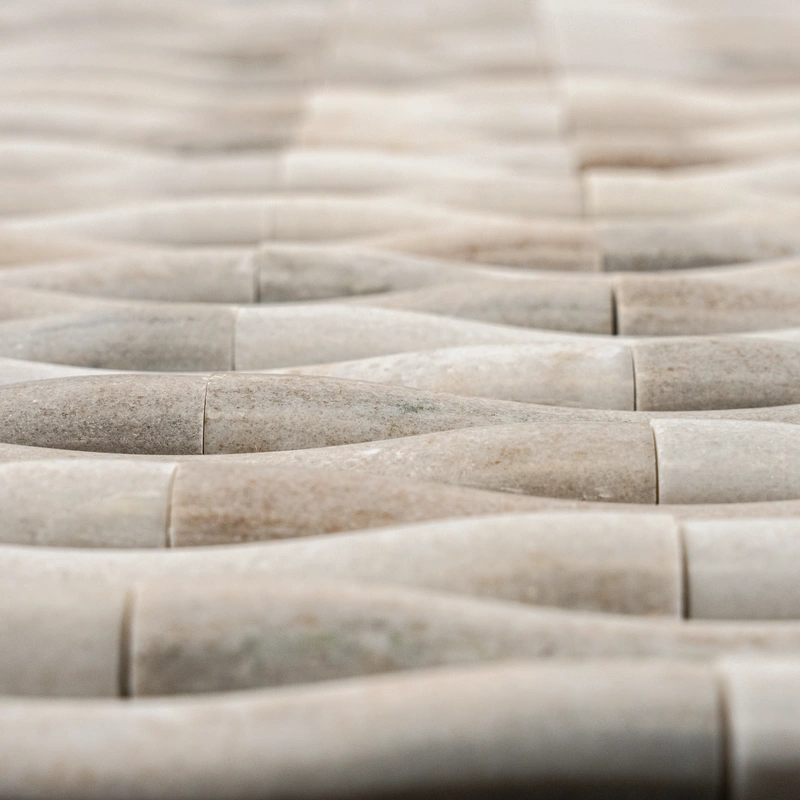
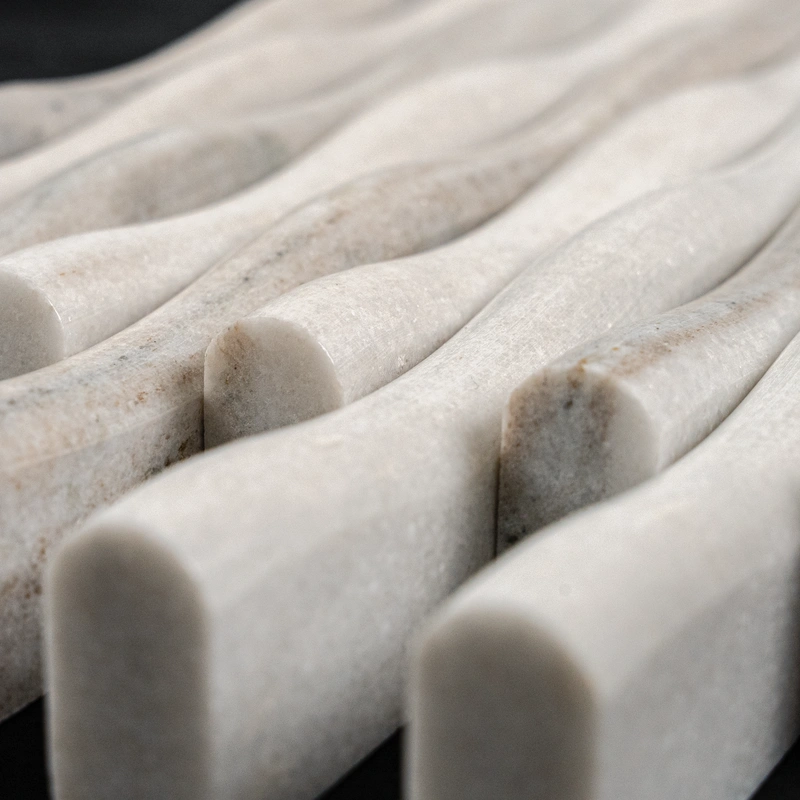
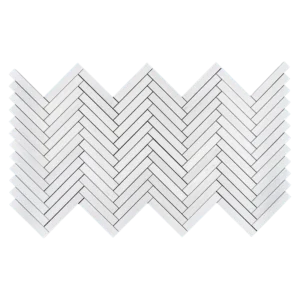
Lilium Polished Mosaic Tile – 5.9″ x 11.8″ Palissandro Marble
Warm Palissandro Beauty in a Flowing Lilium Pattern
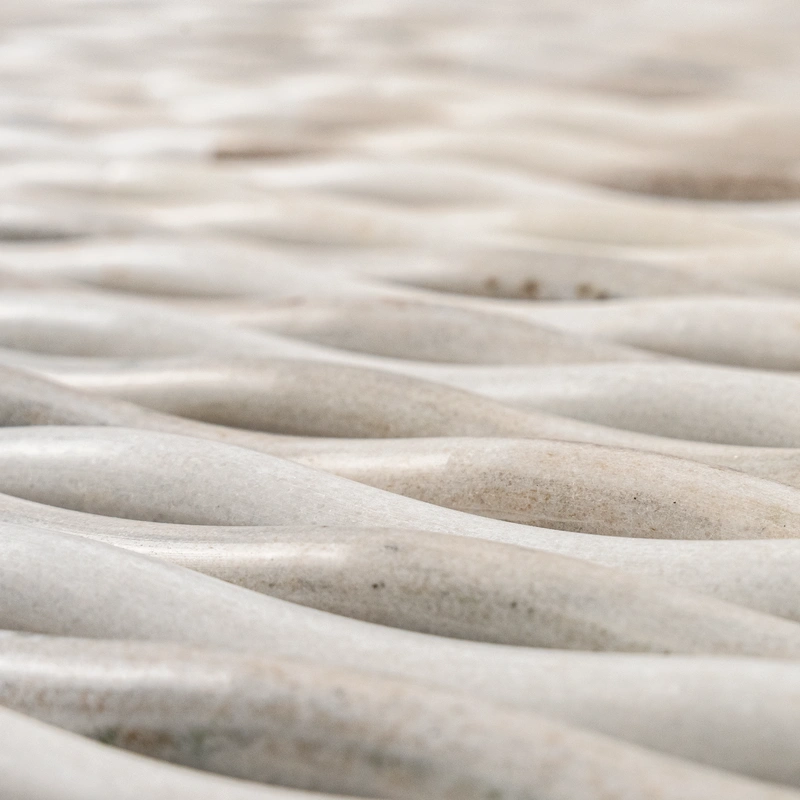
Bring refined warmth to your interiors with the Lilium Polished Mosaic Tile, crafted from natural Palissandro marble. Featuring a dynamic wave-inspired pattern, this tile blends soft beige, taupe, and cream tones into an elegant layout. The polished finish enhances the natural stone’s movement, adding depth and light reflection that elevate any bathroom, or feature wall.
With its balanced format and graceful lines, the Lilium mosaic offers a sculptural aesthetic that’s ideal for both modern and transitional spaces. The natural striations and earthy palette of Palissandro marble ensure each piece delivers unique beauty and character.
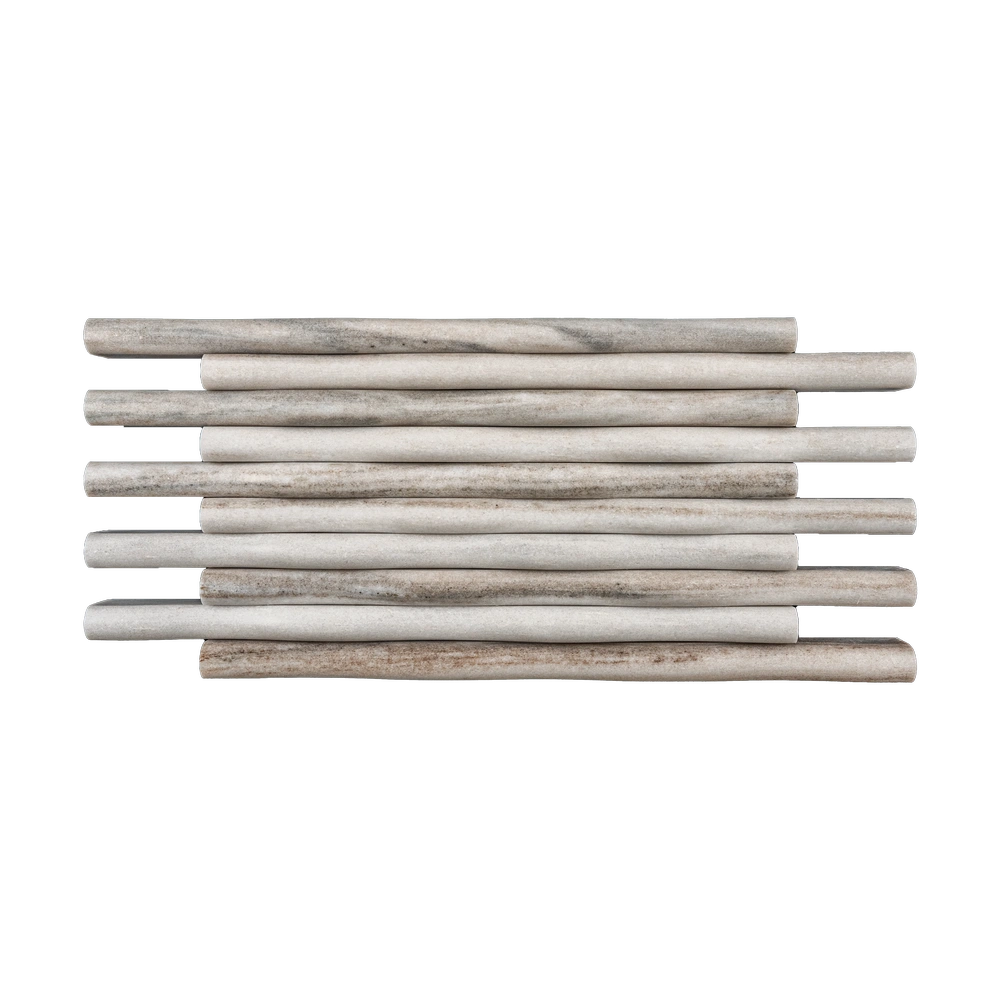
Key Features – Palissandro Marble in Lilium Form
- Material: Premium Palissandro Marble
- Color Palette: Warm beige, soft taupe, and ivory
- Finish: Polished – glossy surface with light-enhancing qualities
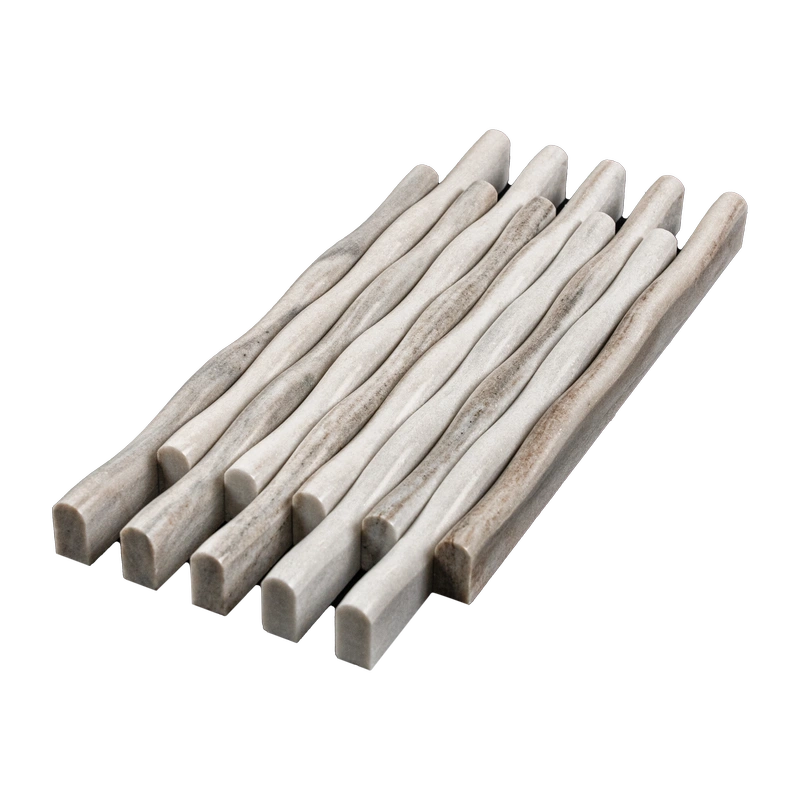
- Shape: Flowing Lilium pattern
- Sheet Size: 5.9″ x 11.8″ (15 x 30 cm)
- Thickness: 0.4″ (1 cm)
- Installation: Mesh-mounted for quick and clean layout
- Ideal Use: Walls, accents walls
Why Choose Lilium Mosaic Tile?
This mosaic tile blends rich earth tones with graceful movement, offering a distinctive and upscale design. Its polished finish brings out the best in Palissandro marble, while the fluid layout adds visual interest without overwhelming the space. Whether for a boutique project or home renovation, it brings sophistication and a sense of flow.
Packaging & Coverage
- Sold per box – includes 8 mesh-backed sheets
- Coverage: approx. 3.84 sq.ft. per box
- Net Weight: 34.10 lbs
- Securely packaged for safe delivery
Installation Guide – Seamless, No-Joint Application
Step 1: Surface Preparation – A Smooth Start
- Clean and dry the surface completely. Remove all dust, oil, and debris to ensure strong bonding.
- Verify that the substrate is level, solid, and crack-free. Seamless installations highlight even the slightest surface imperfections.
- Apply a waterproofing membrane in wet areas such as showers or backsplashes to protect from moisture infiltration.
- Remove all fixtures, trims, or obstructions that could interfere with precise sheet placement.
- If necessary, use a leveling compound to create a flat, even substrate before tile installation.
Step 2: Layout Planning – Precision with No Gaps
- Find and mark the center of the installation area to achieve a symmetrical, balanced layout.
- Dry-lay multiple Lilium sheets to ensure color and veining consistency. Because the design is butt-jointed, continuity between sheets is especially important.
- Mix sheets from different boxes to blend natural Palissandro variation evenly across the surface.
- Align sheets tightly—**no spacing or grout joints** should be visible between chips or between sheets.
Step 3: Adhesive Application – Full Coverage Matters
Recommended White Thin-Set Mortar:
- Mapei Ultraflex LFT White
- Laticrete 254 Platinum White
- Ardex X77 White
Instructions:
- Use a white, non-staining thin-set mortar suitable for polished natural stone to prevent shadowing or discoloration.
- Mix only as much adhesive as needed for 30–40 minutes of application.
- Spread adhesive with a 1/4″ notched trowel—flat side first to coat the substrate, then comb it at a 45° angle for consistent depth.
- Back-butter each sheet fully to ensure solid adhesion across every chip and eliminate voids beneath the surface.
- Set each sheet **tight against the next**—do not use spacers or allow gaps between sheets or chips.
Step 4: Cutting & Fitting – Maintain Seamless Flow
- Use a wet saw with a fine diamond blade suitable for marble to produce clean, accurate cuts.
- Mark cuts precisely with a pencil. Each chip must align perfectly due to the no-joint layout.
- Smooth sharp edges with a marble file if visible cuts are required.
- Dry-fit cut pieces before installation to confirm flawless alignment with neighboring tiles.
Step 5: Setting Tiles – Seamless and Aligned
- Begin installation from the center or the most visible area and work outward, ensuring pattern continuity.
- Place each sheet tightly edge-to-edge, making sure individual chips align perfectly with adjacent sheets.
- Tap lightly with a rubber mallet to level and seat the sheets. Ensure no lips or gaps are visible.
- Clean any excess thin-set from the surface immediately with a damp sponge—especially critical with polished marble.
- Allow adhesive to cure undisturbed for 24 hours before exposing the surface to moisture or cleaning.
Step 6: Finishing – Skip Grouting, Seal Instead
- Do not grout. The Lilium mosaic is designed for **zero-joint, no-gap installation** between chips and sheets.
- After the surface is fully cured, clean it thoroughly with a soft cloth and pH-neutral marble cleaner.
- Apply a penetrating, marble-safe sealer to protect the polished surface against water, stains, and etching.
- Re-seal periodically, based on the tile’s exposure to moisture and use.
Maintenance Tips – Keep It Seamless and Bright
- Clean only with pH-neutral, non-abrasive stone cleaners.
- Avoid acidic or alkaline products (like vinegar or bleach) which can etch polished marble.
- Use soft cloths or microfiber pads—never abrasive brushes or pads.
- Reseal every 6–12 months depending on traffic and moisture exposure.
Shipping & Packaging
Each 5.9″ x 11.8″ mosaic sheet is mesh-backed and individually wrapped to prevent breakage. Packaging is optimized for pattern continuity and tight alignment during installation.
Important Note
Lilium tiles are made from natural Palissandro marble, with each chip exhibiting its own veining and color tone. Slight variation between sheets is expected and desired. Professional installation is highly recommended, especially for seamless no-joint applications. Stonemarket USA is not responsible for installation errors or improper handling.