Loading... (Warehouse Local Time)
MonтАУFri: 9:00 AM тАУ 6:00 PM |

Silver Diamond Polished Marble Tile 24├Ч24

$10.13

Est. Coverage: 4 sq. ft. per piece | 16 sq. ft. per box | 320 sq. ft. per crate | Request Info
Item Code T400-13338 Category Tag

Silver Diamond Polished Marble Tile 24тА│x24тА│ тАУ Redefine Luxury in Your Space

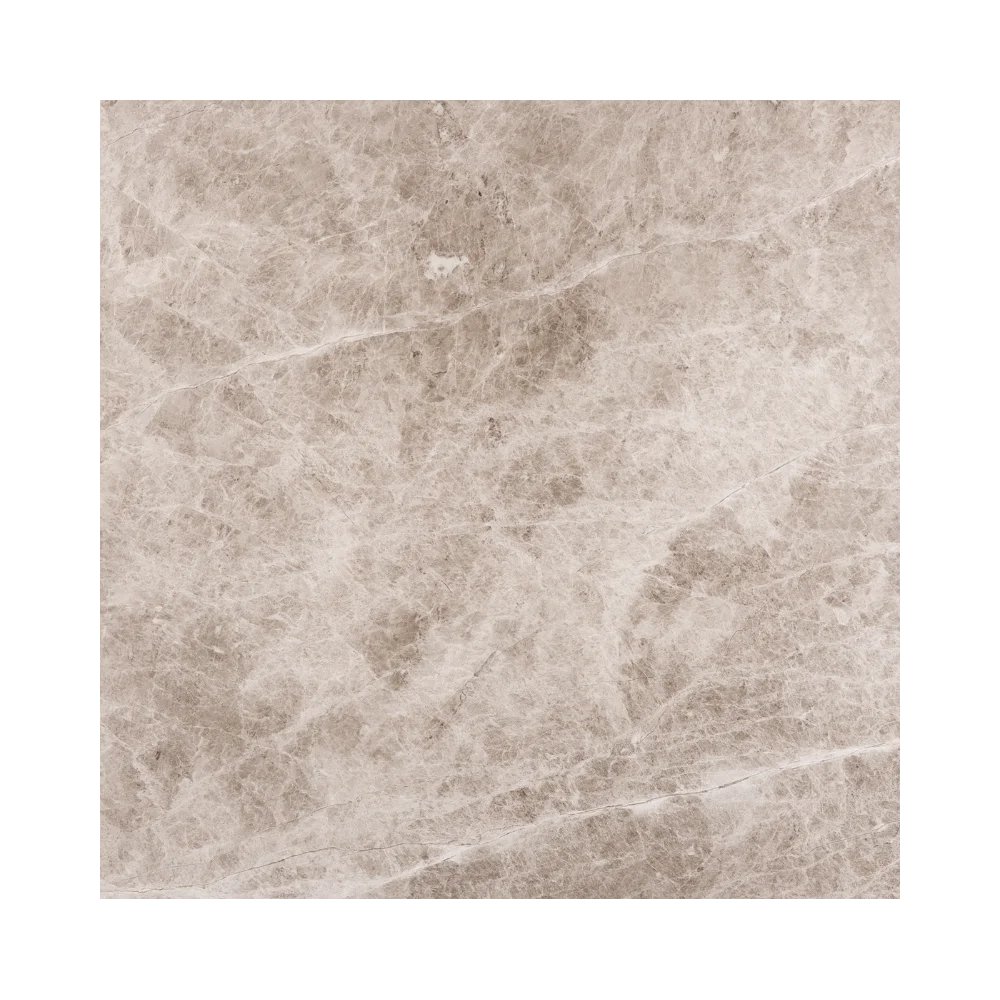
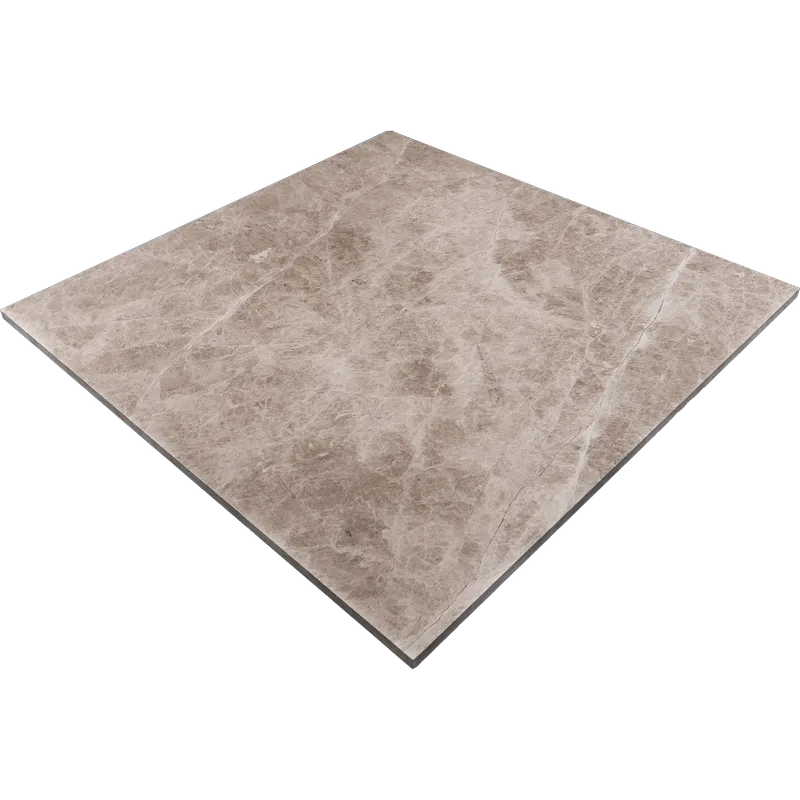
Elevate your interiors with the Silver Diamond Polished Marble Tile 24тА│x24тА│. This premium tile features warm cappuccino tones complemented by delicate gray veining. Additionally, its polished finish enhances the natural beauty of the stone, adding a luxurious shine that brightens any room. Its large format is perfect for both residential and commercial projects, offering timeless sophistication that complements any design style.

Key Features

  • Natural Marble: Premium Silver Diamond marble with warm cappuccino tones.
  • Size: 24тА│ x 24тА│ (61 cm x 61 cm) for a seamless, spacious look.
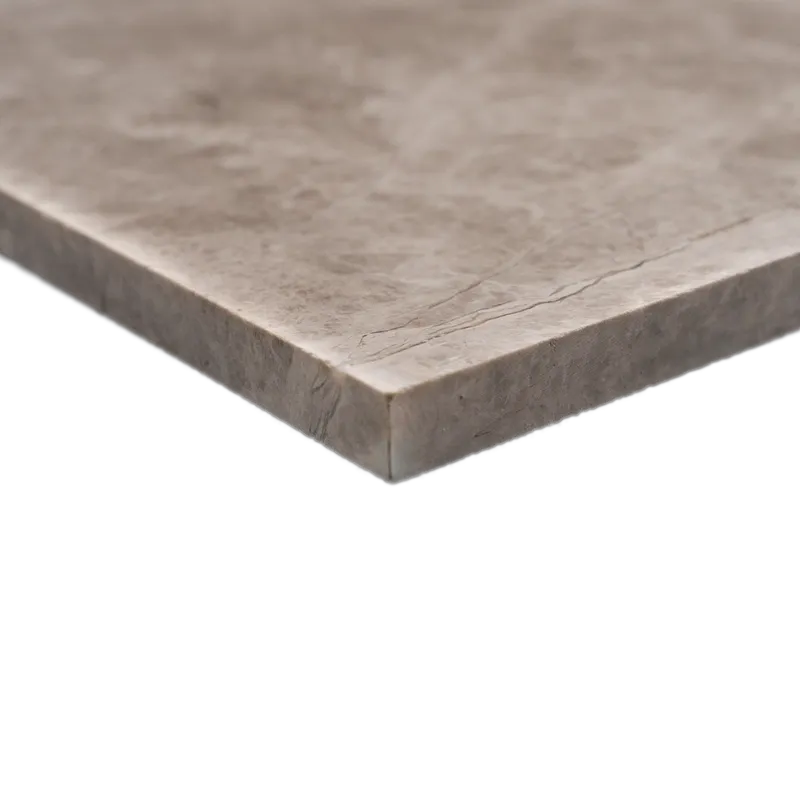
  • Thickness: 1.2 cm ensures durability and strength.
  • Finish: Polished, reflecting light for an elegant, refined look.
  • Edge: Straight edge design for clean, modern lines.
  • Packaging: 72 boxes per order, covering 29.76 SQM in total.

Benefits of Choosing Silver Diamond Marble Tile

  • Luxurious Appearance: Adds a sophisticated touch to any room.
  • Versatile Use: Ideal for living rooms, bathrooms, and entryways.
  • Durable: Stands up to daily wear while maintaining its beauty.
  • Easy Maintenance: Simply clean with a pH-neutral cleaner.
  • Timeless Style: Complements both modern and classic interiors.

Recommended Applications

  • Living rooms тАУ Create an open, luxurious feel.
  • Bathroom walls and floors тАУ Achieve a spa-like atmosphere.
  • Entryways and hallways тАУ Make a grand first impression.
  • Feature walls тАУ Add depth and elegance to contemporary spaces.
  • Commercial areas тАУ Perfect for hotels, lobbies, and showrooms.

Installation & Care Tips

  • Adhesive: Use high-quality white thin-set mortar for secure installation.
  • Sealing: Apply a premium stone sealer to prevent stains and moisture damage.
  • Grouting: Opt for non-sanded grout to protect the polished finish.
  • Cleaning: Use a pH-neutral stone-safe cleaner to maintain shine.

Ordering & Shipping Information

  • Sold By: Square meter (1 SQM per unit).
  • Box Quantity: 72 boxes per order (29.76 SQM total).
  • Shipping: Fast, secure delivery with protective packaging.
  • Bulk Discounts: Available for large orders тАФ contact us for details.

Order Now! Experience the timeless luxury of the Silver Diamond Polished Marble Tile 24тА│x24тА│. Moreover, our experts are here to assist you with design ideas and competitive pricing. Transform your space today!

Weight27 lbs
Dimensions24 ├Ч 24 ├Ч 0.50 in
Finish

Thickness

Size (inches)

Color

Material

Usage Area

Backsplash, Commercial Interior Floors, Commercial Interior Walls, Outdoor Floors, Residential Interior Floors, Residential Interior Walls, Shower Floors, Shower Walls

Collection

Silver Diamond Collection

Installation Guide for Silver Diamond Polished Marble Tile 24тА│x24тА│

Ensure a smooth and long-lasting installation of your Silver Diamond Polished Marble Tile 24тА│x24тА│ by following this step-by-step guide. Moreover, using proper techniques and materials will preserve the beauty and integrity of your tile for years to come.

Step 1: Surface Preparation

  • Clean the installation area thoroughly to remove dust, dirt, and debris.
  • Ensure the subfloor or wall surface is level, smooth, and dry before proceeding.
  • Repair any cracks or uneven areas to provide a stable base for the tiles.

Step 2: Layout Planning

  • Dry-lay the tiles to determine the optimal layout and minimize cuts.
  • Mark reference lines to ensure proper alignment and symmetry.
  • Start tiling from the center of the space and work outward for a balanced look.

Step 3: Adhesive Application

  • Use a high-quality white thin-set mortar for best adhesion.
  • Apply the adhesive evenly with a notched trowel, holding the trowel at a 45-degree angle.
  • Cover small areas at a time to prevent the adhesive from drying before tile placement.

Step 4: Tile Installation

  • Press each tile firmly into the adhesive, using slight twisting motions to ensure full contact.
  • Use tile spacers to maintain consistent joint widths between tiles.
  • Check frequently with a level to ensure tiles are even and aligned.

Step 5: Grouting

  • Allow the adhesive to cure according to the manufacturerтАЩs instructions (typically 24 hours).
  • Remove tile spacers and clean any excess adhesive from the joints.
  • Use a non-sanded grout to avoid scratching the polished surface.
  • Apply the grout with a rubber float, working diagonally across the joints to fill them completely.
  • Wipe away excess grout with a damp sponge before it dries.

Step 6: Sealing

  • After the grout has fully cured (usually 48-72 hours), apply a premium penetrating stone sealer to protect against moisture and stains.
  • Follow the sealer manufacturerтАЩs instructions carefully for best results.

Step 7: Cleaning & Maintenance

  • Use a pH-neutral, stone-safe cleaner for regular cleaning.
  • Avoid acidic or abrasive cleaners that may damage the polished finish.
  • Wipe up spills promptly to prevent staining.

Need Assistance? Contact our team for expert advice and additional tips on maintaining your Silver Diamond Polished Marble Tile 24тА│x24тА│.

Category
Category
Material
Material
Color
Color
Size
Size
Finish
Finish
Design
Design
Thickness
Thickness
Application
Usage Area

Need a Quote or Have a Question?

Let us know what youтАЩre planning! Feel free to include project name, area, timeline, or any other notes.